Welcome to our step-by-step video guide on integrating the AI Bot into your website. We'll be focusing on how to deploy the AI bot onto a WordPress site, but remember, we have instructions for other platforms including Wix, Squarespace, HubSpot, and others in our FAQ. Let's get started!
If the Bot Installation code isn't on your clipboard yet, go to the 'Config' navigation menu and select the 'Bot' menu item to find it. If you've already copied the installation code, you can bypass both this step and the following one.
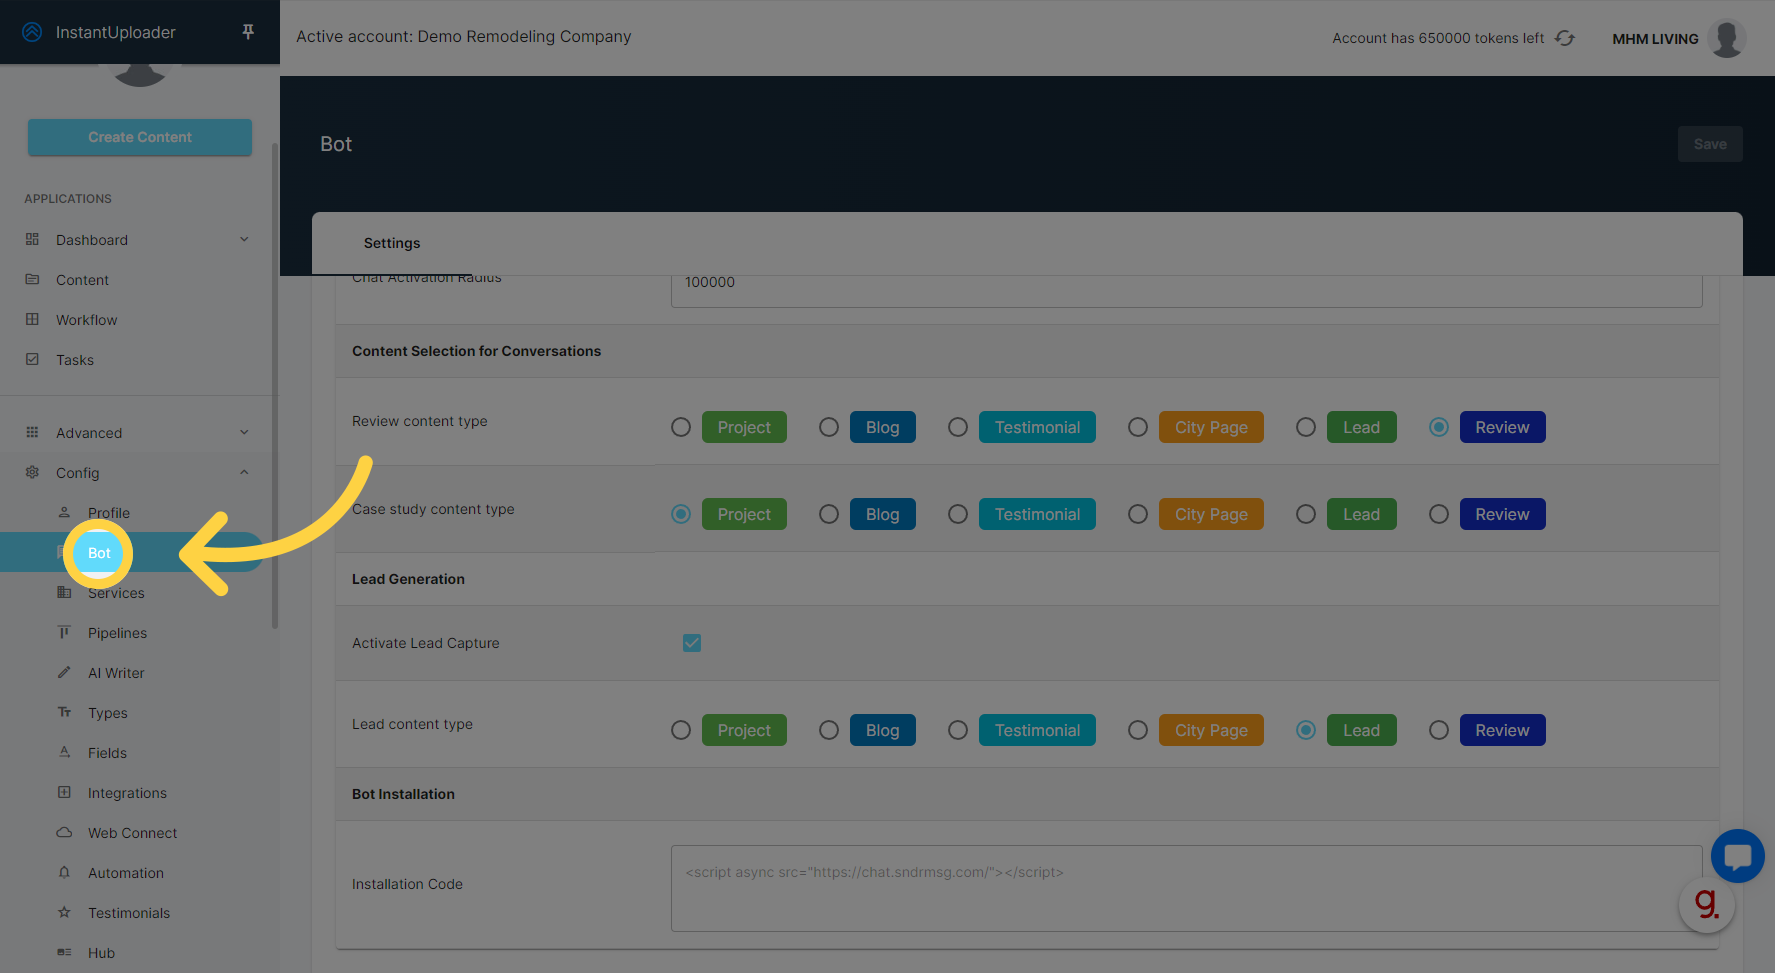
Scroll down to the Installation Code field and copy the script to your clipboard.

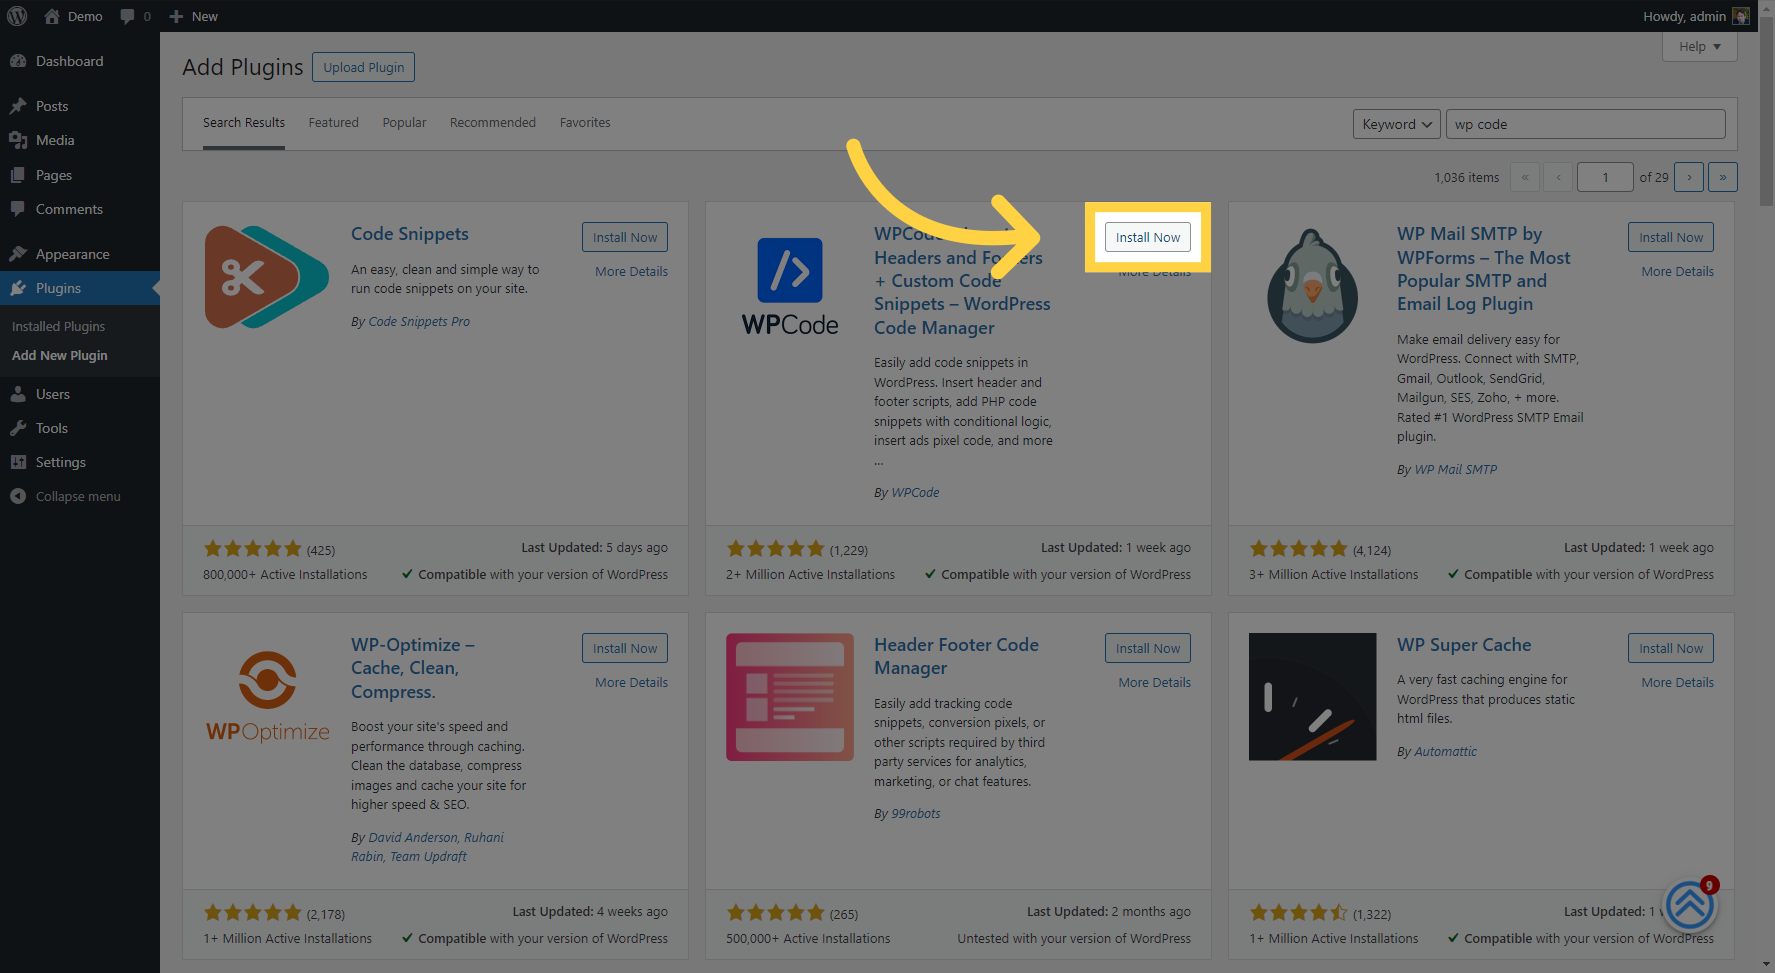
Open the plugins section in the WordPress dashboard.

In the plugin search bar, type in "WP Code" to find the plugin we'll use to insert our AI bot code. Once you've located it, click the 'Install Now' button.
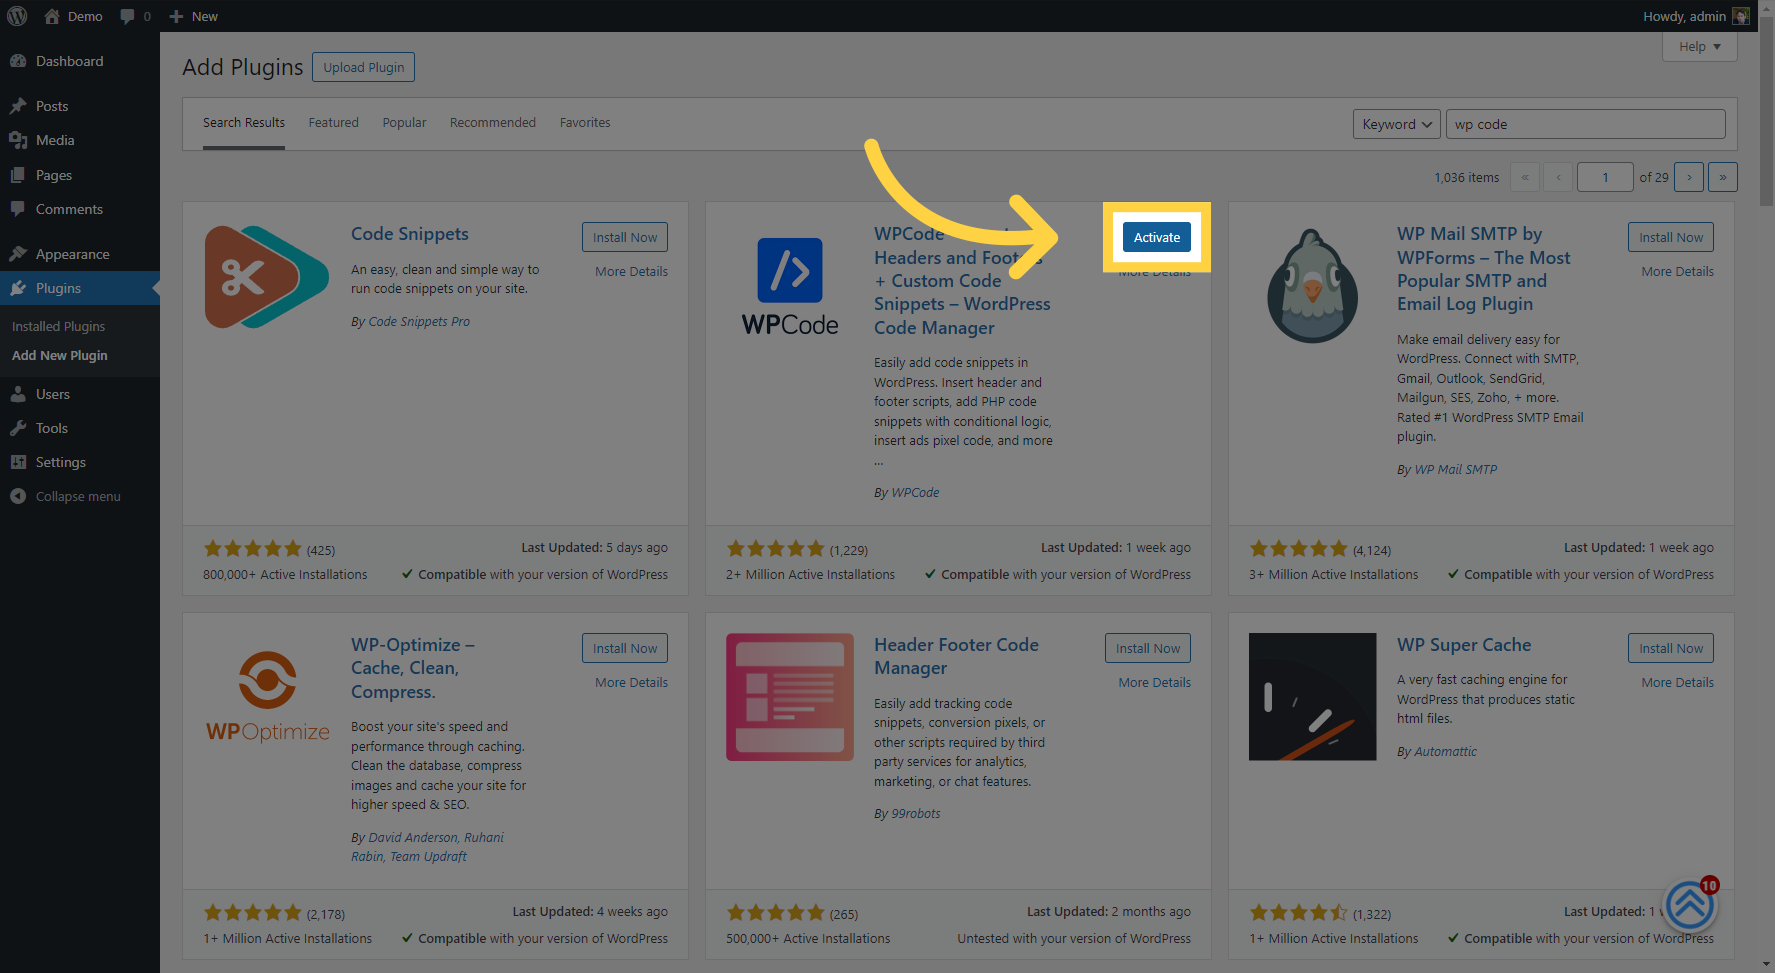
After the plugin has been installed, you'll need to activate it. You can do this immediately after installation or by finding the plugin in your list of installed plugins and clicking 'Activate'.
With the WP Code plugin active, look for the 'Code Snippets' option in your sidebar navigation. Click on it, and then select 'Header and Footer'.
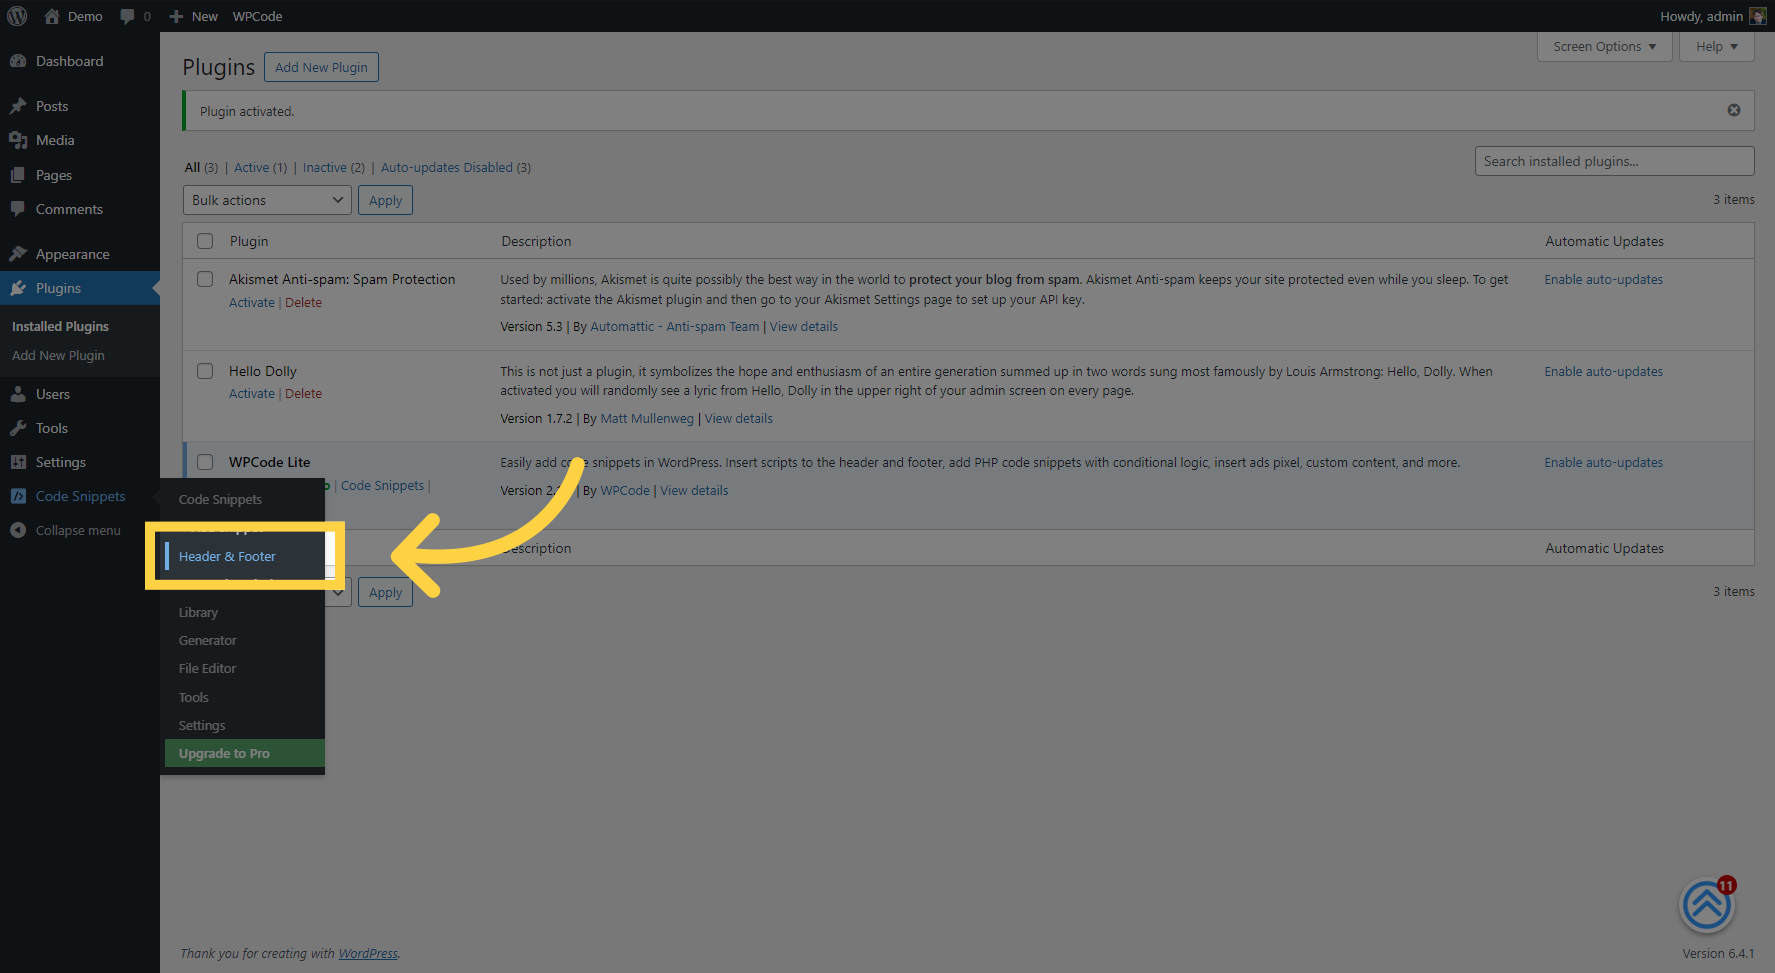
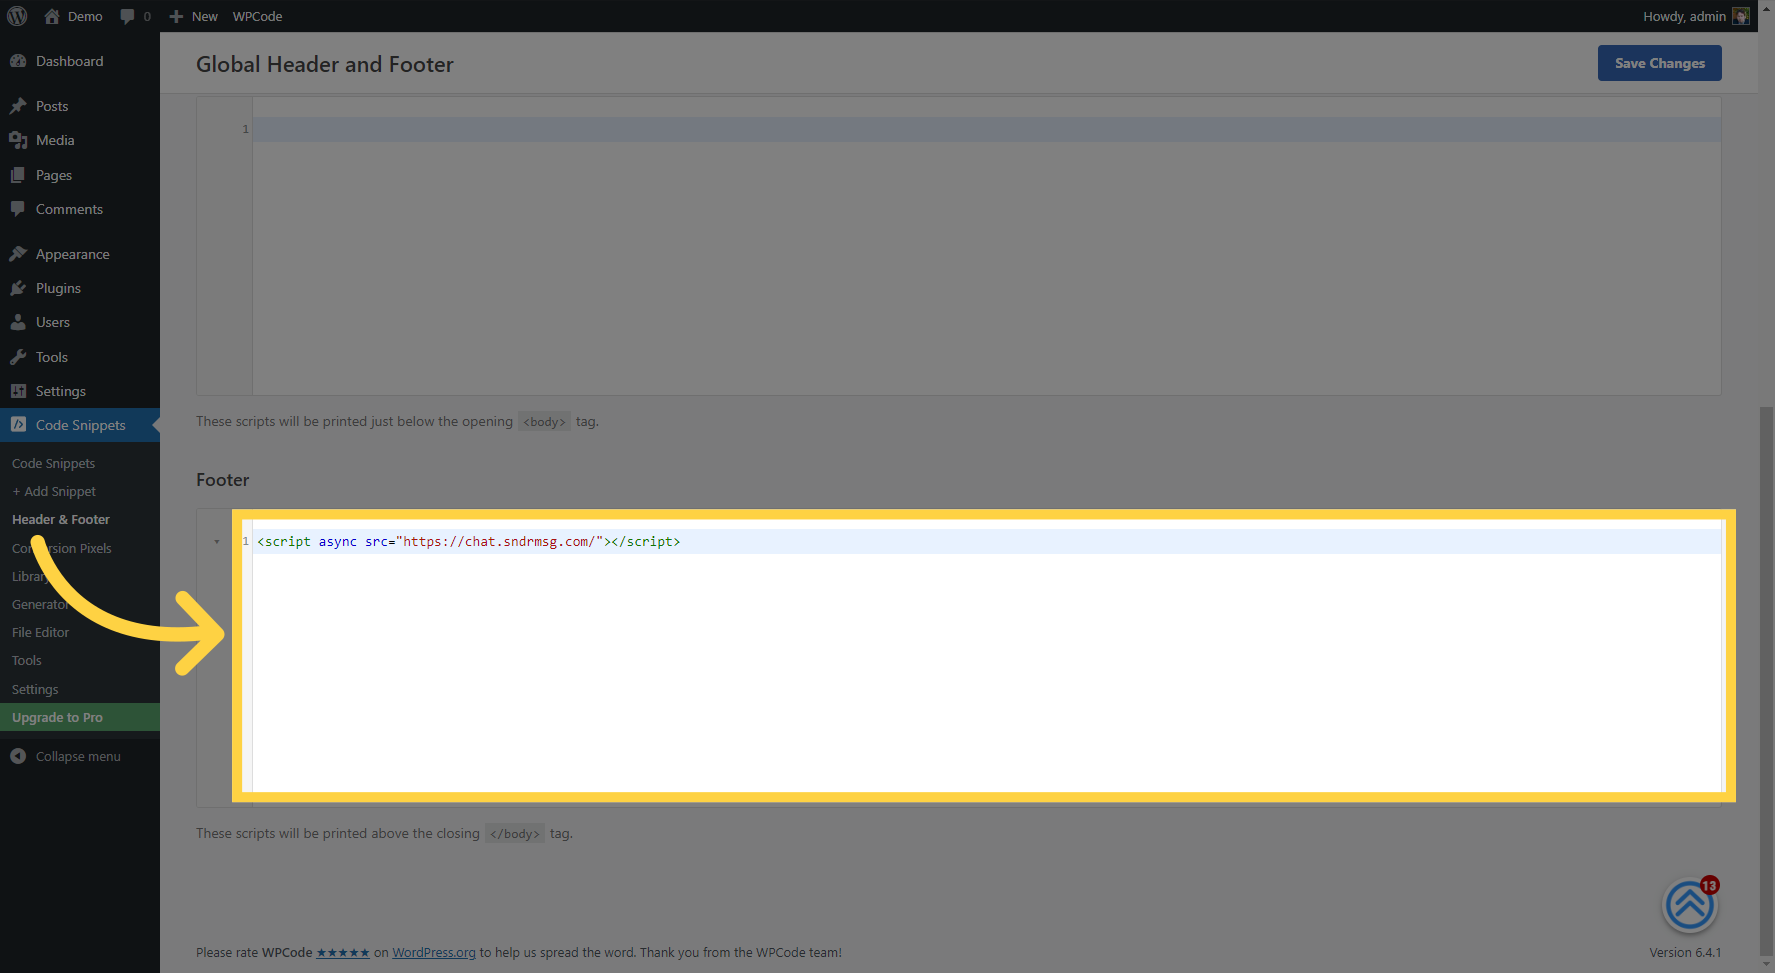
Scroll down to the 'Footer' section, as this is where we'll be pasting our AI bot code. Paste the code that you copied earlier into the footer box.
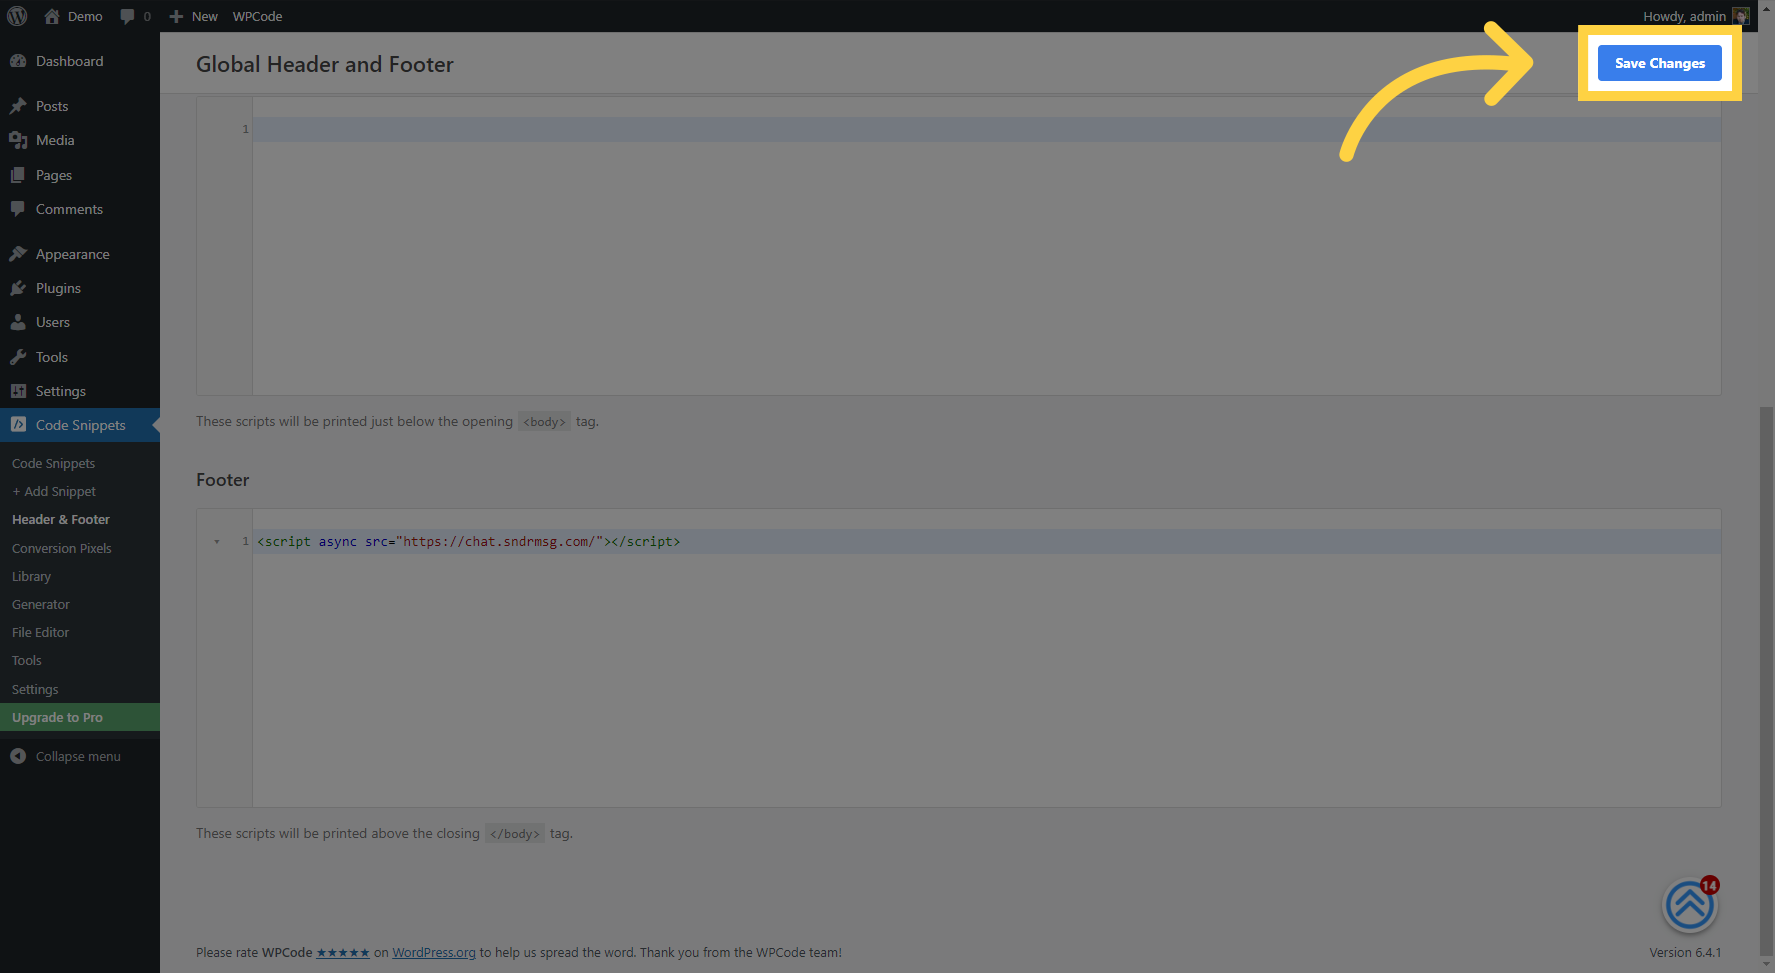
After pasting the code, make sure to click 'Save Changes' to apply the new addition to your website.
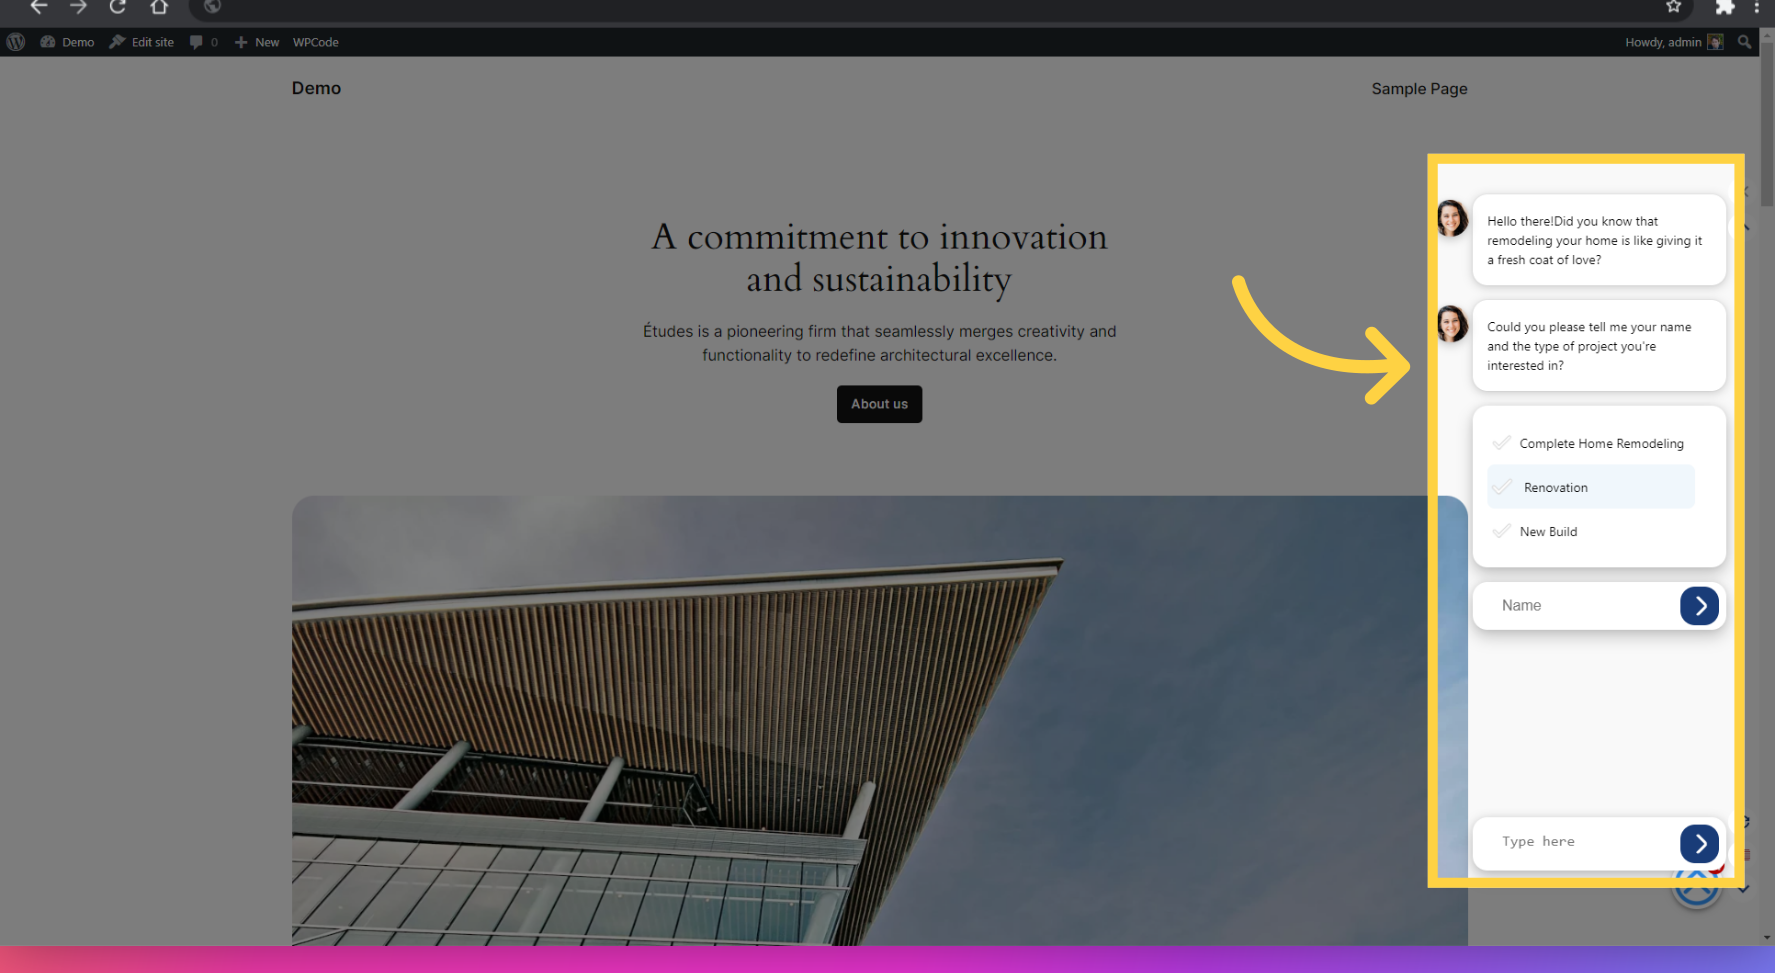
Finally, let's check to see that everything's working. Go to your website's home screen to see the AI bot in action.
And that's all there is to it! You've successfully integrated the AI bot into your website. If you have any questions or need further assistance, our detailed guide is always available to help you through the process. Thanks for following along, and we hope you enjoy the enhanced capabilities the AI bot brings to your site!
