Last updated July 25th 2024
As of April 2024, all new accounts come pre-loaded with rich automations set up for social media content writing and publication. The following is a detailed guide to using the automations and the meanings and use cases for the different content types:
For a guide to using these automations for creating and publishing WordPress Blog Posts and Location Specific Posts, please see This Guide. Please note that these are for WordPress only.
Social media integration: prerequisite to automated posting
Content Type: Social Media Post: Announcement/Information
Content Type: Project: Showcase Your Work
Content Type: Happy Customer Testimonial
It is important to note that in most cases, no AI Write-ups will occur if social media accounts are not integrated.
It's also important to note that if nothing is posted to social media through our platform in 14 days, the social media accounts automatically disconnect and need to be re-integrated.
Step 1: In the Instant Uploader web app, click on Config and then Integrations. Then click Configure for whichever social media platform you want to integrate:
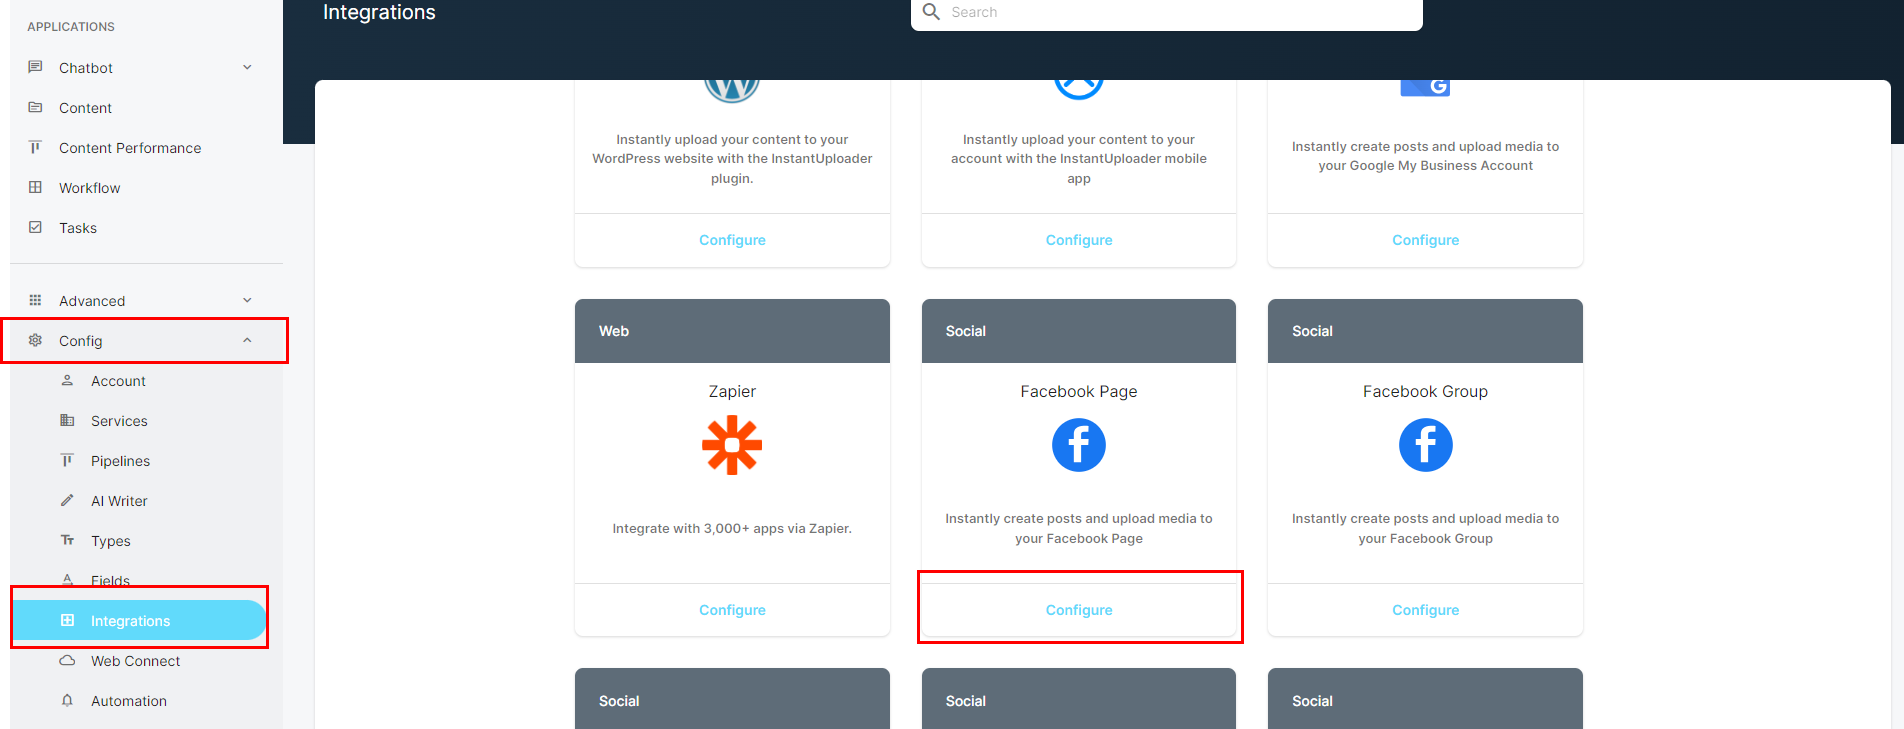
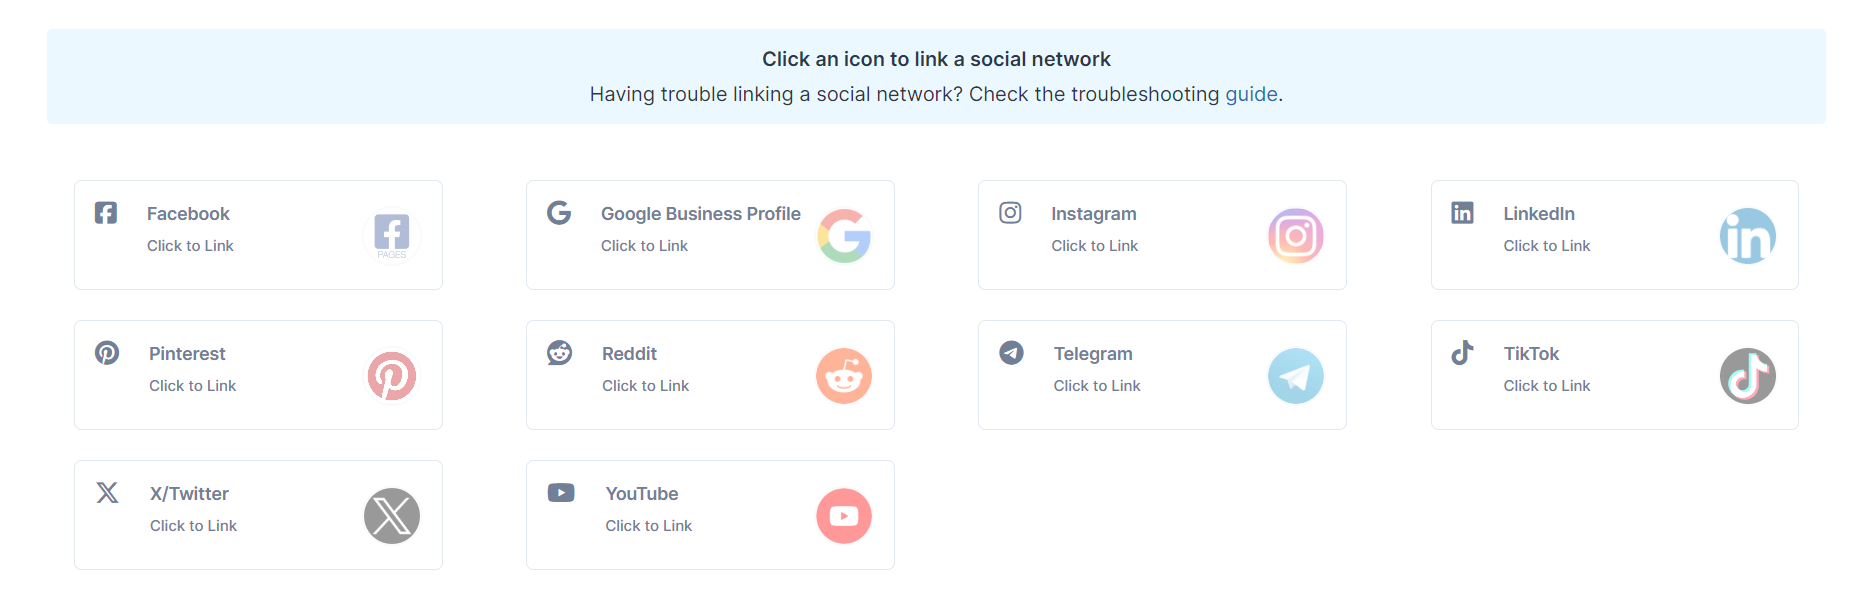
Step 2: On the following screen (this is a very well established, third party app called Ayrshare), select any of the options and follow the login prompts to connect each channel you are interested in connecting.
Please note that our default template is not set up for posting to Reddit, Telegram, TikTok or YouTube. These are additional offerings from Ayrshare but we do not support posting to them at this time.
Step 3: Once linked, you will see that the linked platform displays "Linked"
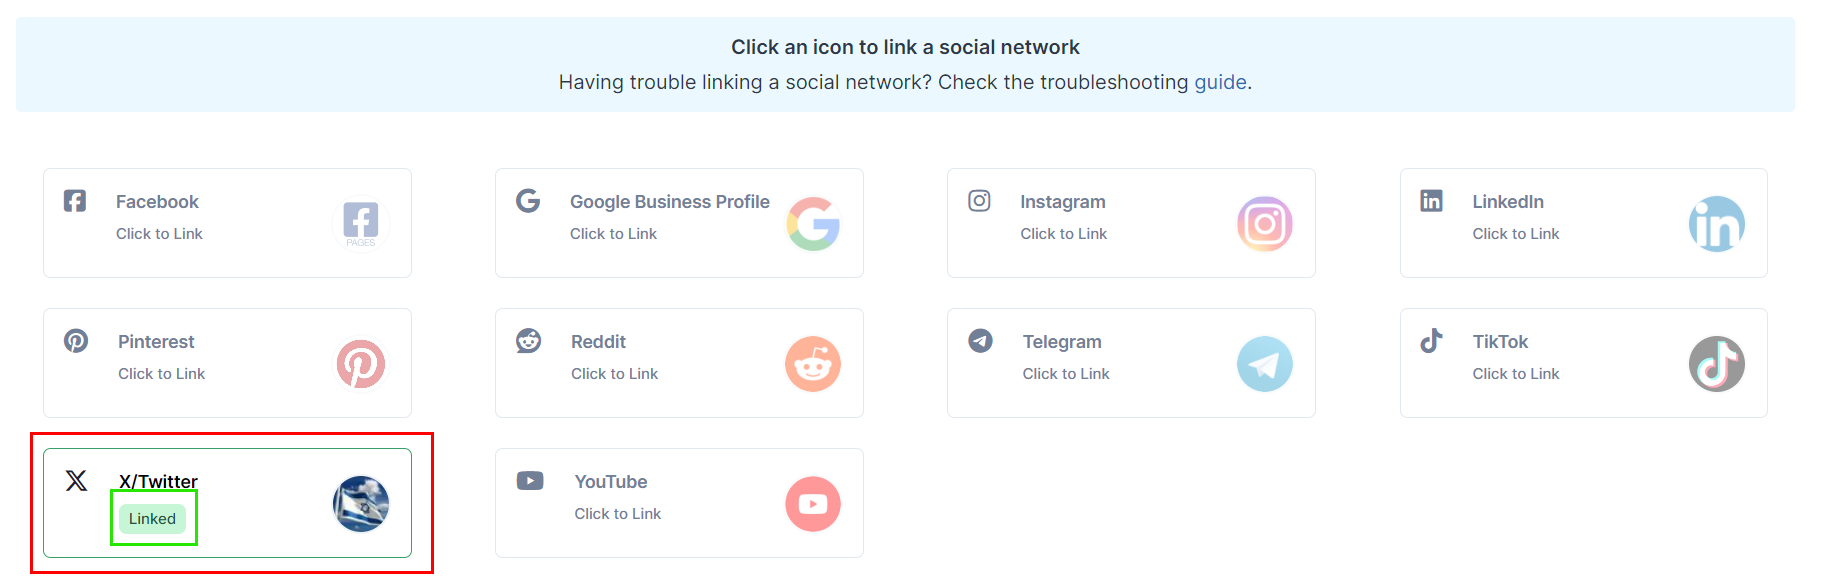
As well, inside of InstantUploader the configure button color will change to green and will remain that way as long as the platforms are connected.
Introduction: This content type is for creating general posts for your social media accounts. This is best for announcements (New items, sales, news, etc), industry specific information (recommendations, tips to improve experience, etc), as well as general posts.
To create content one at a time, follow this guide. To upload content in bulk, please view this article.
Please note that all of the following steps can be easily done via the Instant Uploader Mobile App as well. See this article to learn more about .
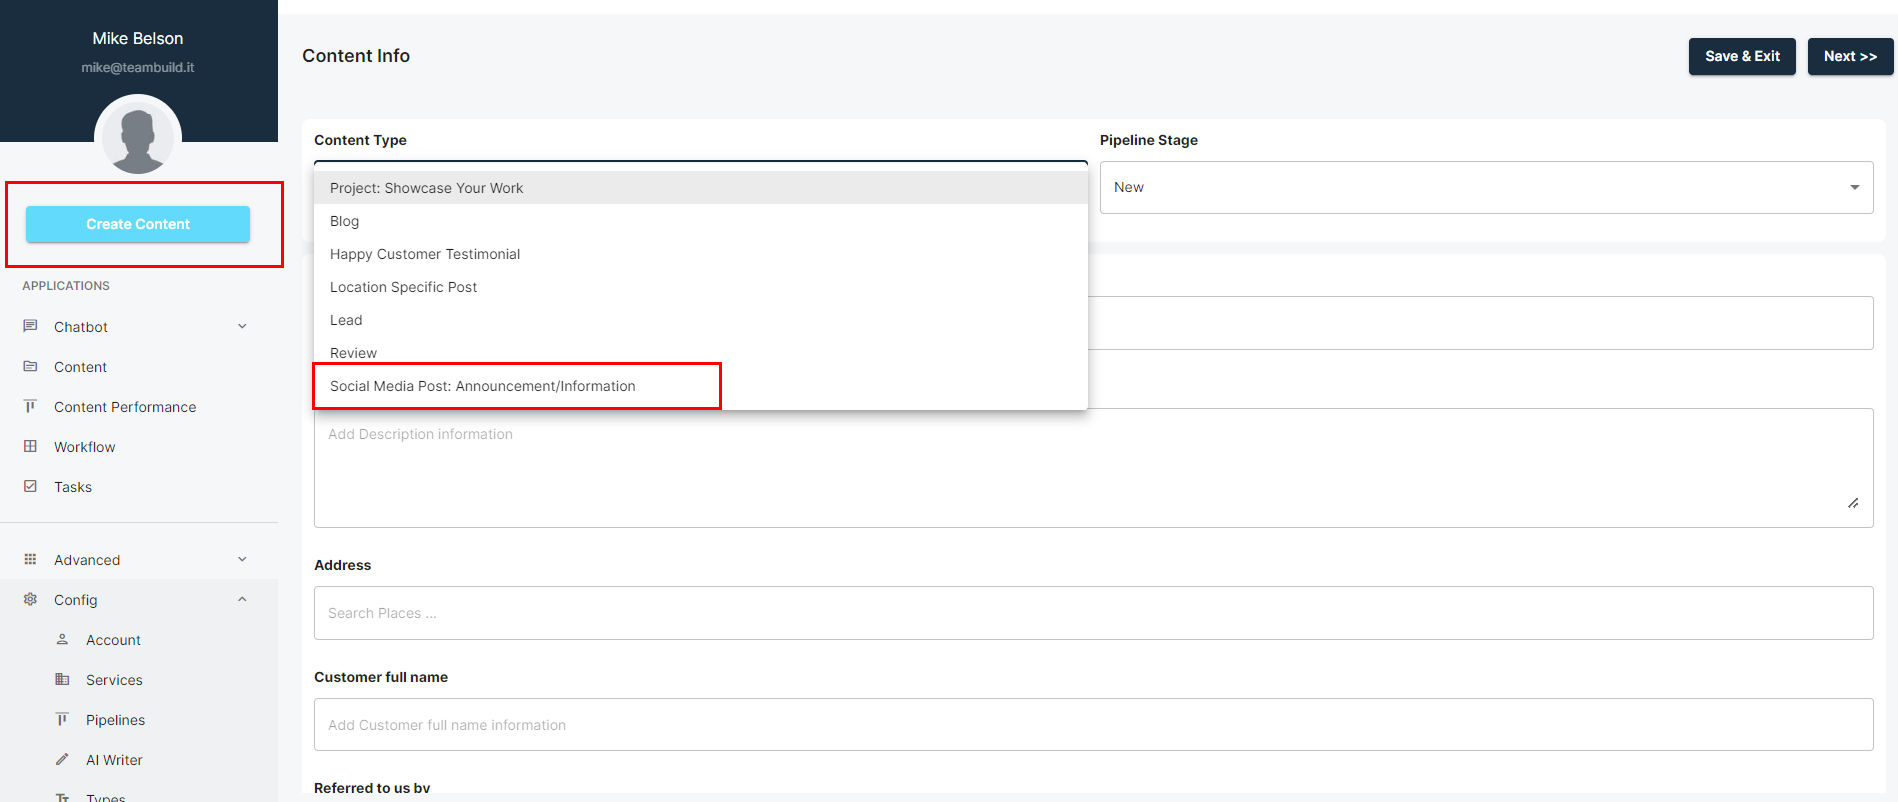
Step 1: In the Instant Uploader web app, click on Create Content, then from the dropdown, select "Social Media Post: Announcement/Information and press Save:
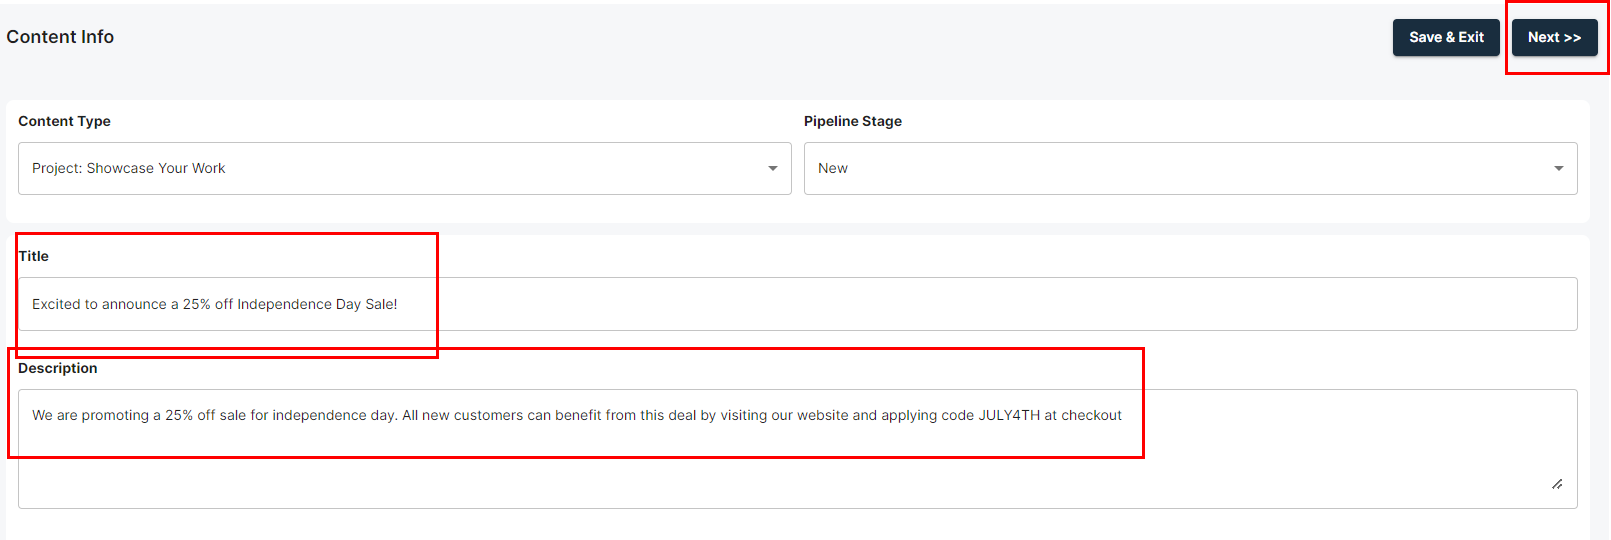
Step 2: Add a title and description and click Next.
***Important! These are the primary inputs that dictate to the AI what should be included in the post. The better and more descriptive these inputs are, the better the outcome of the post. For example, the input pictured in the below image will give fairly good results, but Title: "Sale" and Description: "Big sale" will force the AI to make up lots of unwanted information to complete the post, leading to poor and inaccurate results.
Step 3: Add an image. You can click and search or drag and drop. Then press next.
Optional: After uploading an image and before clicking Next, if the image is relevant to the post (not a general stock image), you can click the image and then click "Analyze with AI" to add context to your post.
Note: Adding an image is not necessary but adds a lot of value to posts. Some platforms such as Instagram will not accept posts from our platform without images.

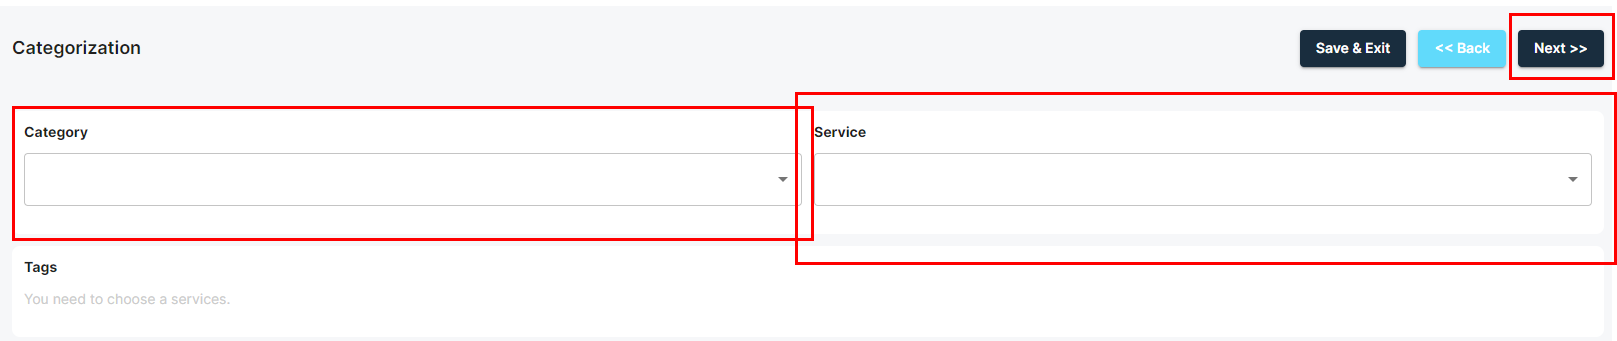
Step 4: Optional: Add internal context and relevance to the posts by categorizing the posts in the dropdowns. Then click Next:
Step 5: Review the information and, when satisfied, click "Save and Return to Feed"

Step 6: Ensure the relevant content is selected (it automatically selects the most recent one, so this shouldn't be a problem) and change the Progress Status to "Done". This automatically triggers the writeups for all integrated social media platforms.

Step 7: After a few minutes, once the AI Writer completes the writeups for each platform, an automated email will be sent out to approve the content.
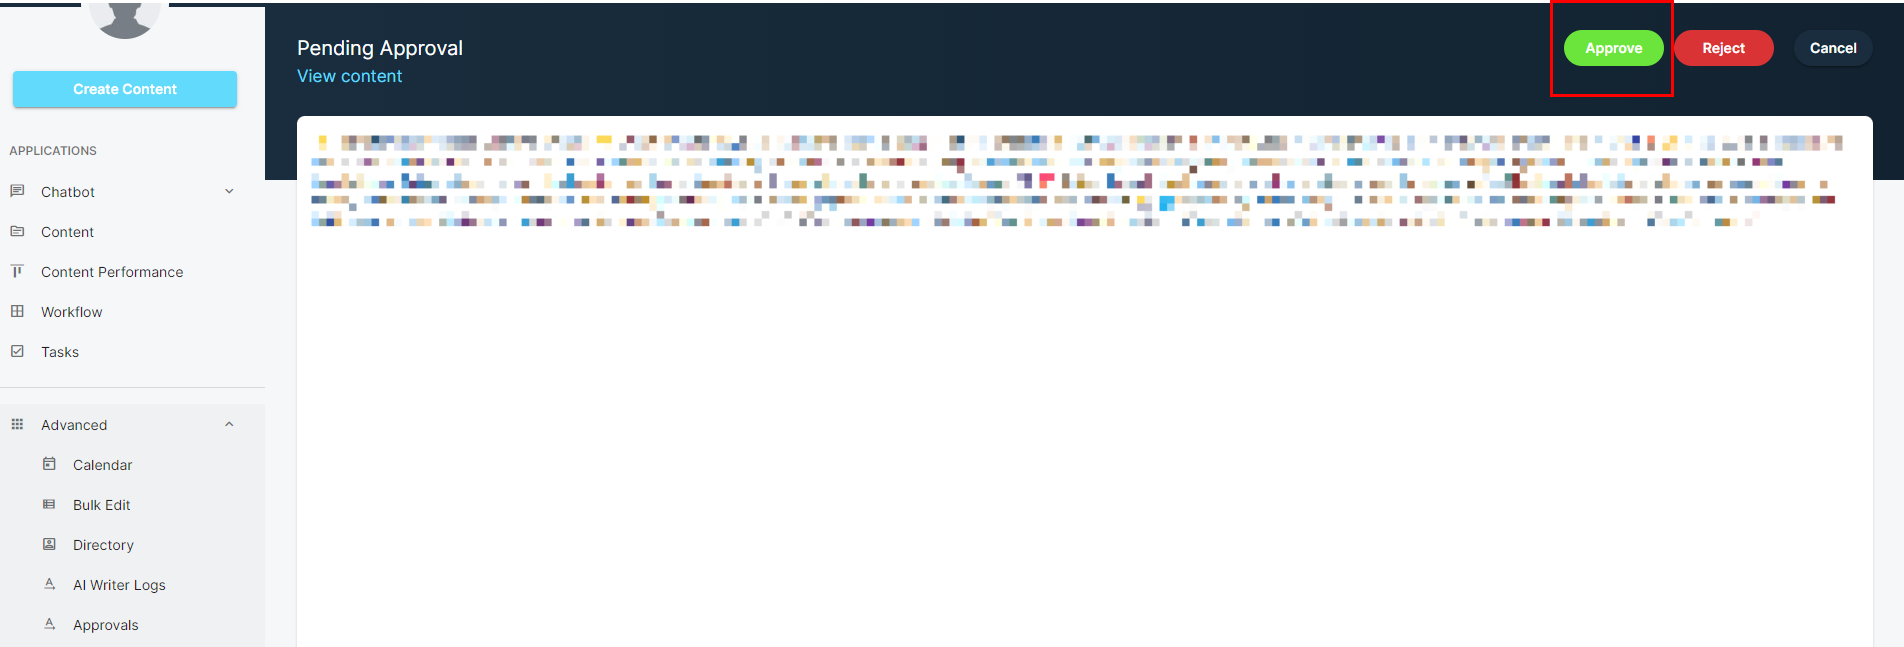
Step 8: In Advanced -> Approvals, click View for the content you want to approve.
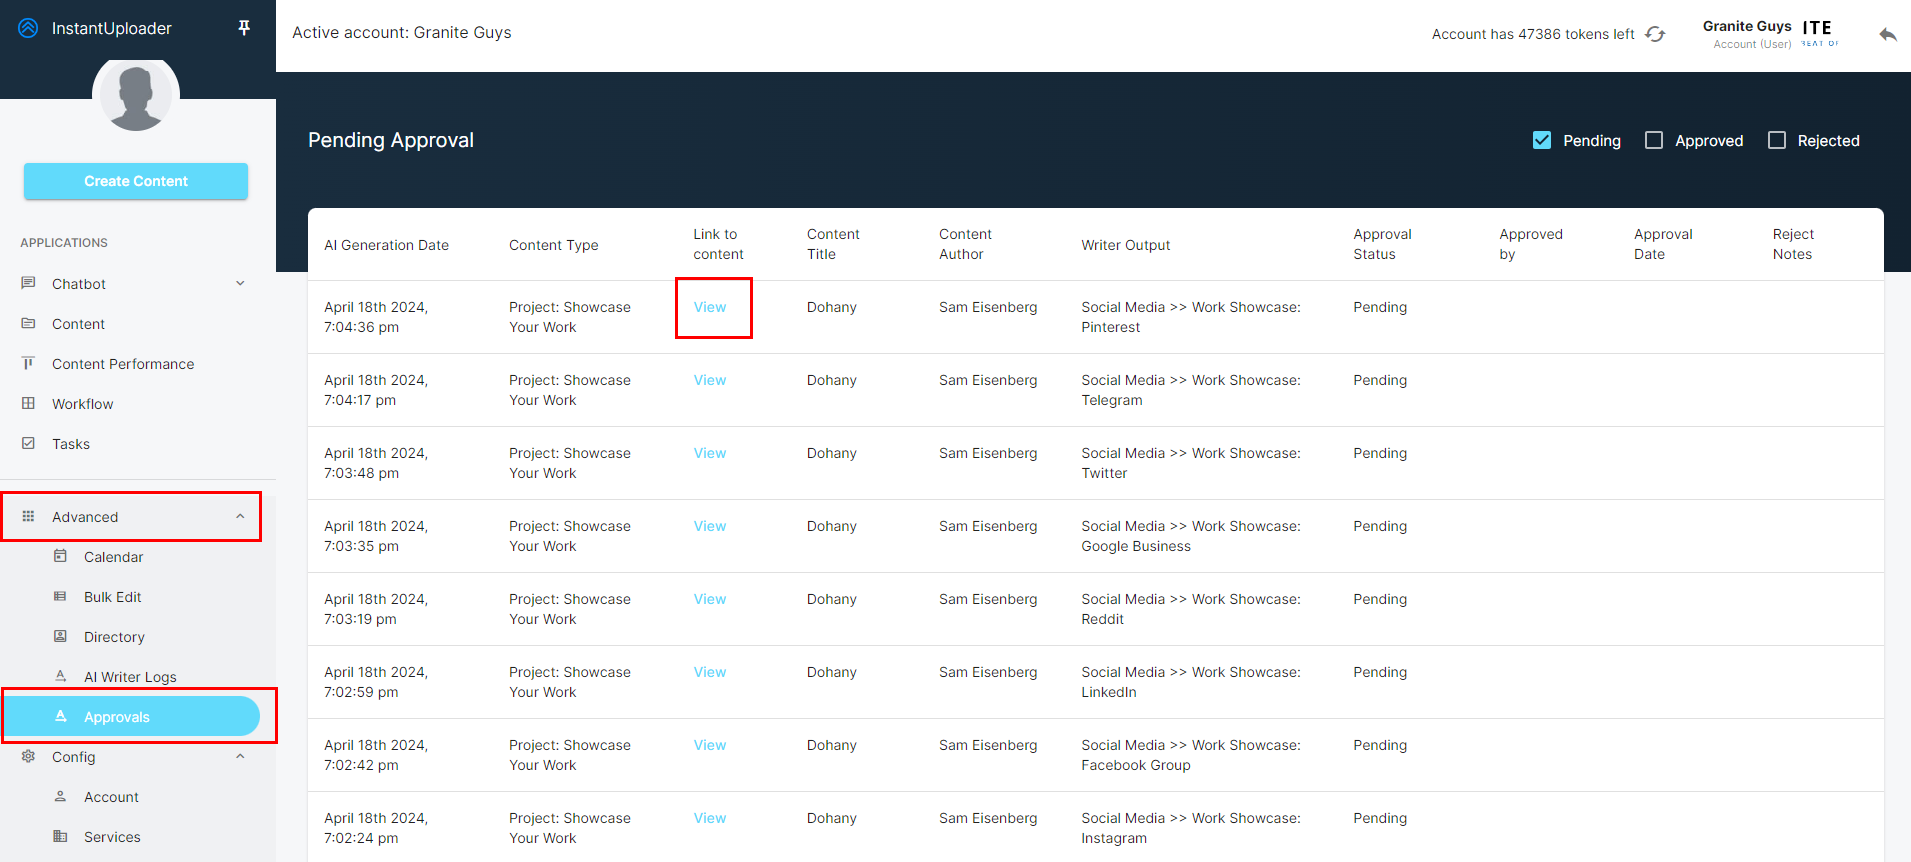
Step 9: If you are satisfied with the content, select Approve and the content will immediately be published on the relevant social media account associated with that content (Facebook post to Facebook, LinkedIn post to LinkedIn, etc)

Introduction: This content type is for creating posts for your social media accounts that highlight success stories and work that you've done for your clients.
The classic use case here is to use the mobile app to snap a picture or two after completing a job and adding a quick title and description. Select project progress: Done and let the AI create an amazing social media post for you.
It's best to add good project information in the title and description including names (can be anonymized of course) and location details. If you don't include these details, the AI will probably invent a fictitious name to paint the picture of a happy customer that received your wonderful product or service.
An example of a good Title and Description for a plumber would be:
Title: Beautiful vanity sink installed in Malibu, California.
Description: Mrs. Smith's bathroom sink needed replacement. We came in and got the job done in 2 hours. The results were stunning and Mrs. Smith was super happy with the work. She said she would totally recommend us next time.
The steps for creating Showcase Your Work content are identical to those outlined in Section 2 except for two things:
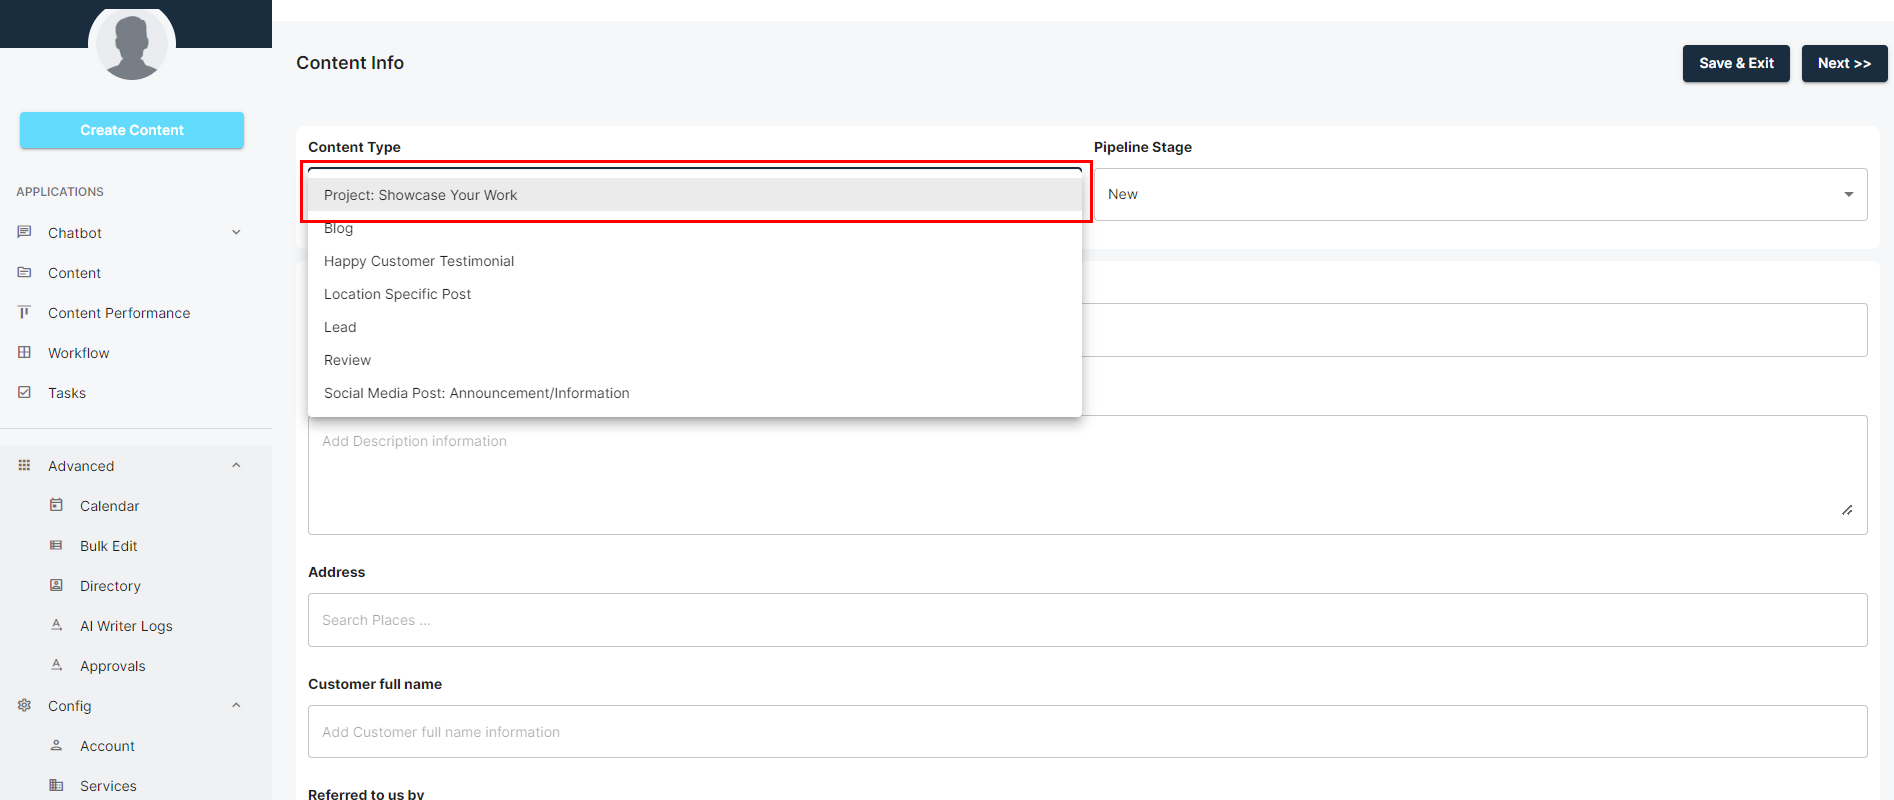
First difference: In Step 1, you must select "Project: Showcase Your Work" from the dropdown menu:
Second difference: For this content type, we have a feature that schedules new content to be automatically written up every Monday and Wednesday morning at 9am PST. The time and frequency of this can be changed here:
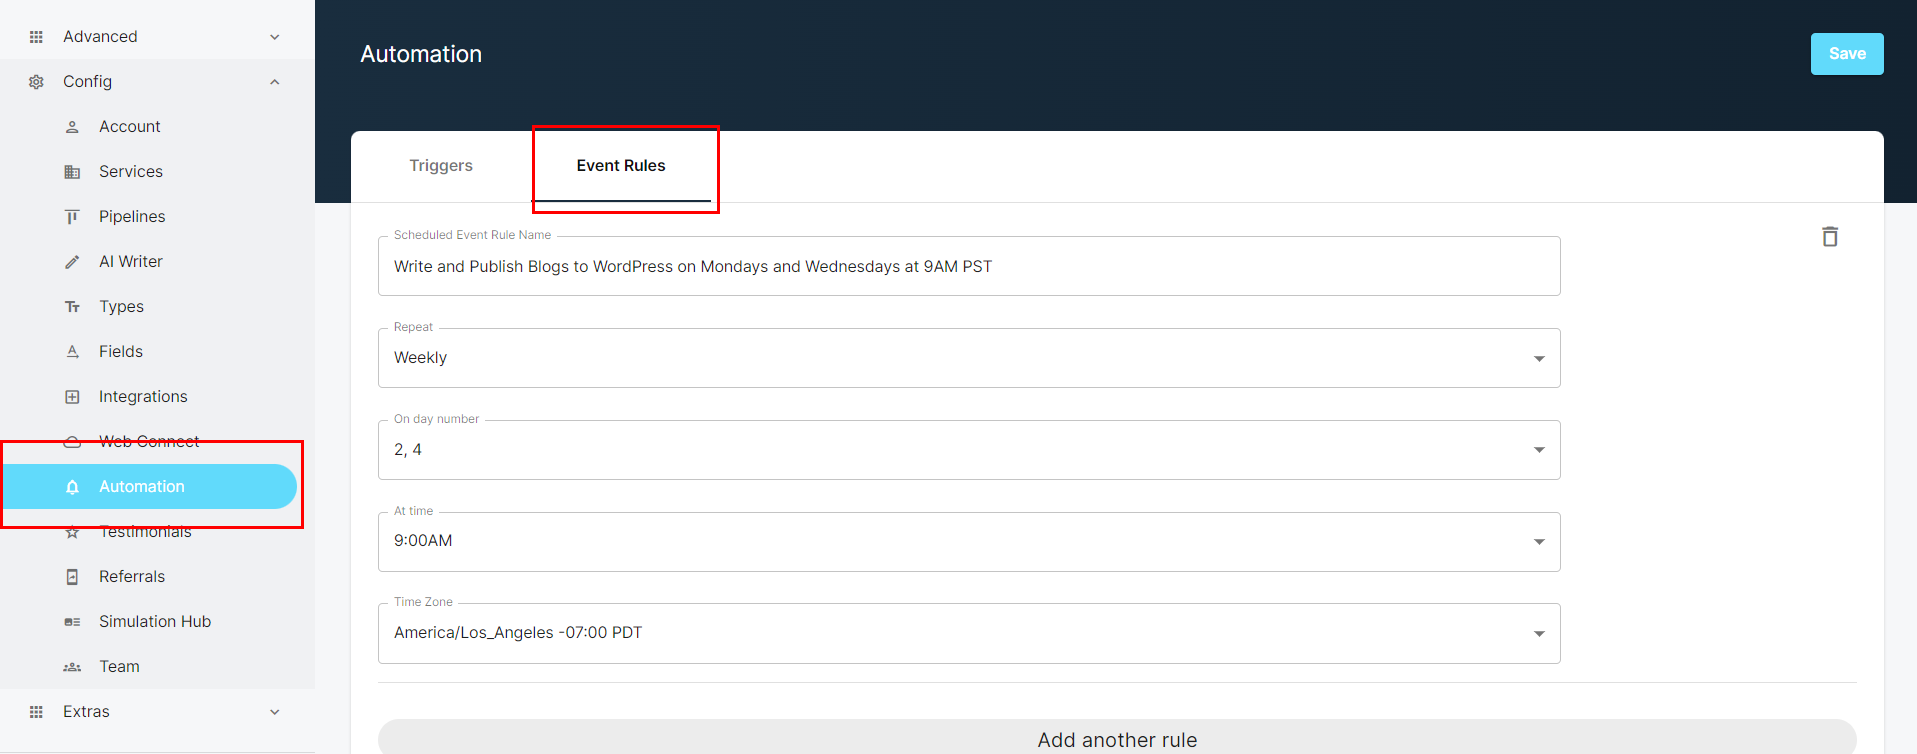
This allows users to upload a large number of new case studies and successes at once and then have the scheduler automatically create writeups on a regular basis.
Once the AI writer completes the writeup, an automated email will go out for content approval. Once approved, it will post to social media.
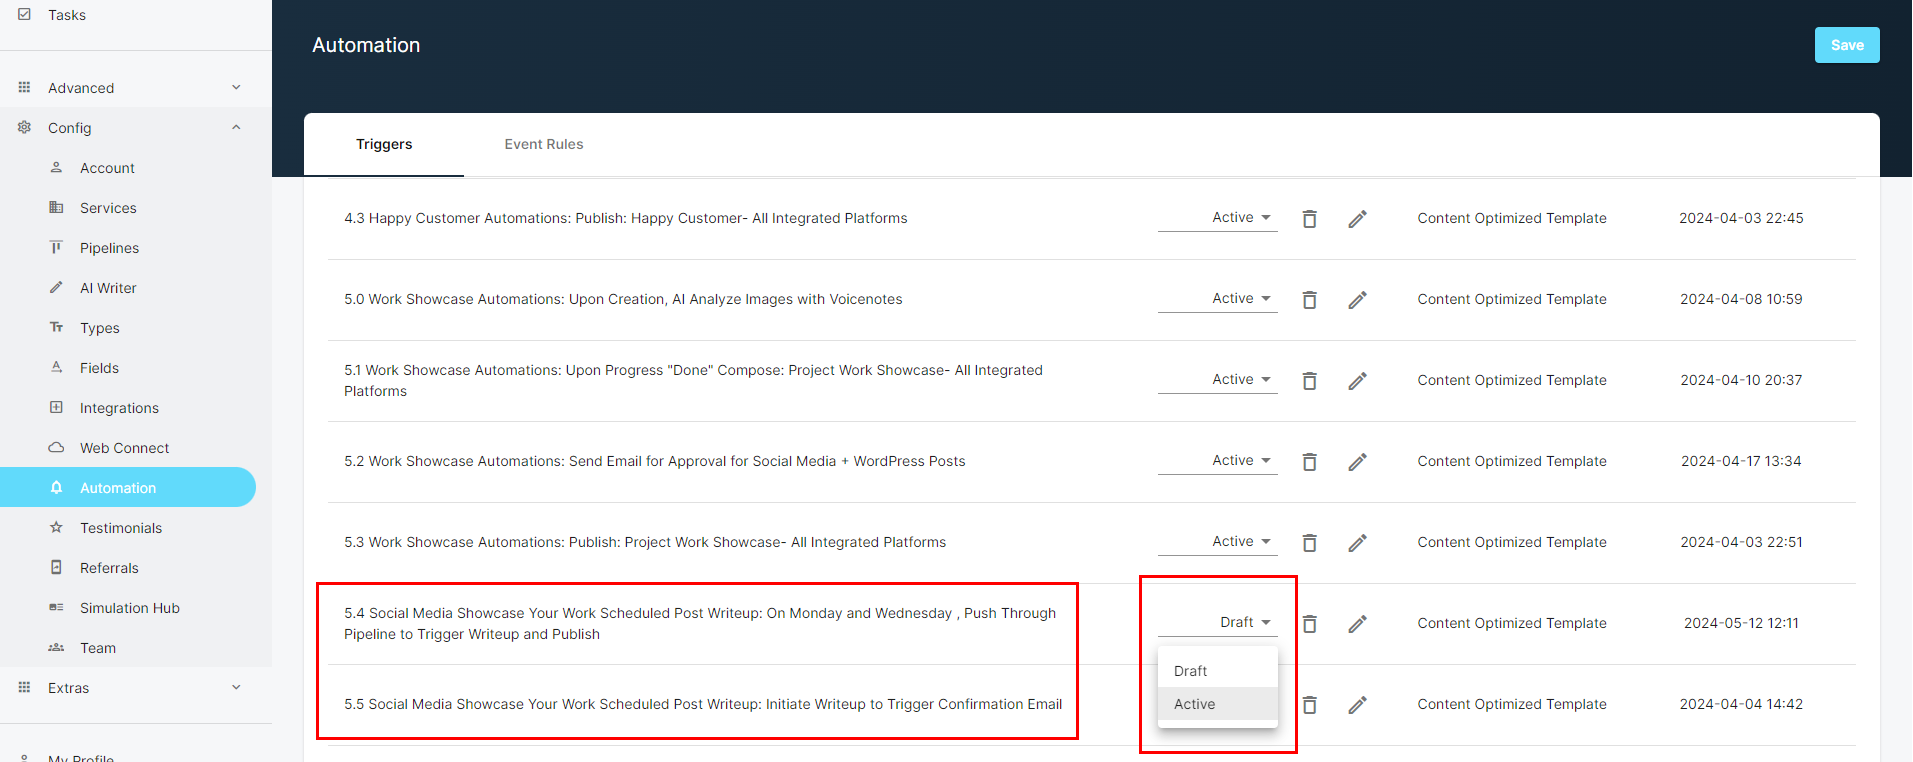
To turn this feature off, go to Automation, and turn 5.4 and 5.5 from "Active" to "Draft".
Information on setting up automations can be found here:
Happy Customer Testimonials are generated by your customers by sharing a testimonial link with them.
The content automations are a great way to automatically convert these testimonials into quality posts for your social media channels.
For a detailed article outlining how to set up and use testimonials, as well as embed the testimonials on your website, please visit this article.
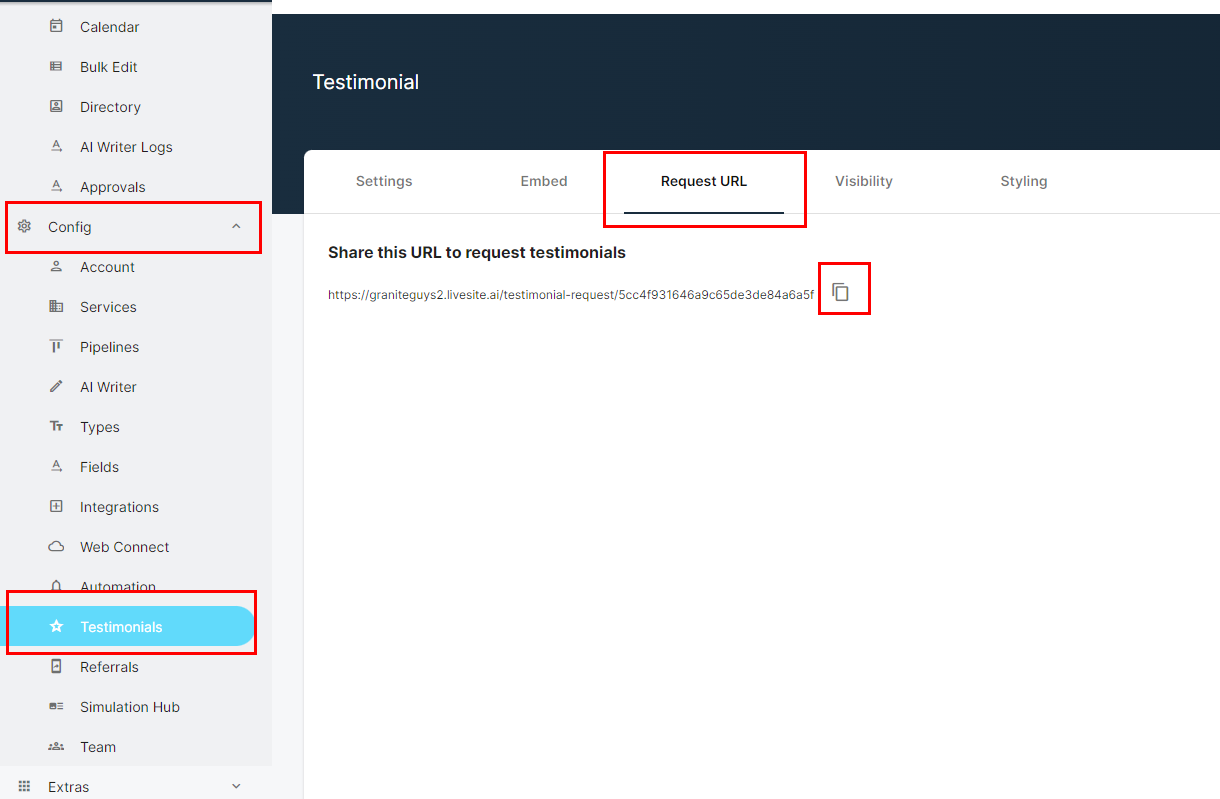
Step 1: Share the custom testimonial link with your customers.
In the Instant Uploader app, click Config->Testimonials. Click the third tab, "Request URL" and copy the URL. Send that URL to all of your customers you want to request a testimonial from.
Step 2: Grab a coffee and wait for them to leave you a great testimonial. Our powerful AI will help them write it, so this shouldn't take too long.

Step 3: Once submitted, the AI Writer will automatically create posts for all your social media accounts and send you an automated email when the content is ready for your approval.
Step 4: In Advanced -> Approvals, click View for the content you want to approve.
Step 9: If you are satisfied with the content, select Approve and the content will immediately be published on the relevant social media account associated with that content (Facebook post to Facebook, LinkedIn post to LinkedIn, etc)
I hope you enjoyed this article and that you get great value out of the power of the content automations.
Happy posting!
