Welcome to our guide on setting up your first automation trigger. This essential feature streamlines your content management by automatically updating statuses upon distribution. As you follow this example, you'll not only master this specific automation but also gain insights into optimizing various tasks. This includes refreshing content on your WordPress site, efficiently managing social media, or integrating seamlessly with tools like Zapier. Let's begin your journey to a smoother, more efficient workflow.
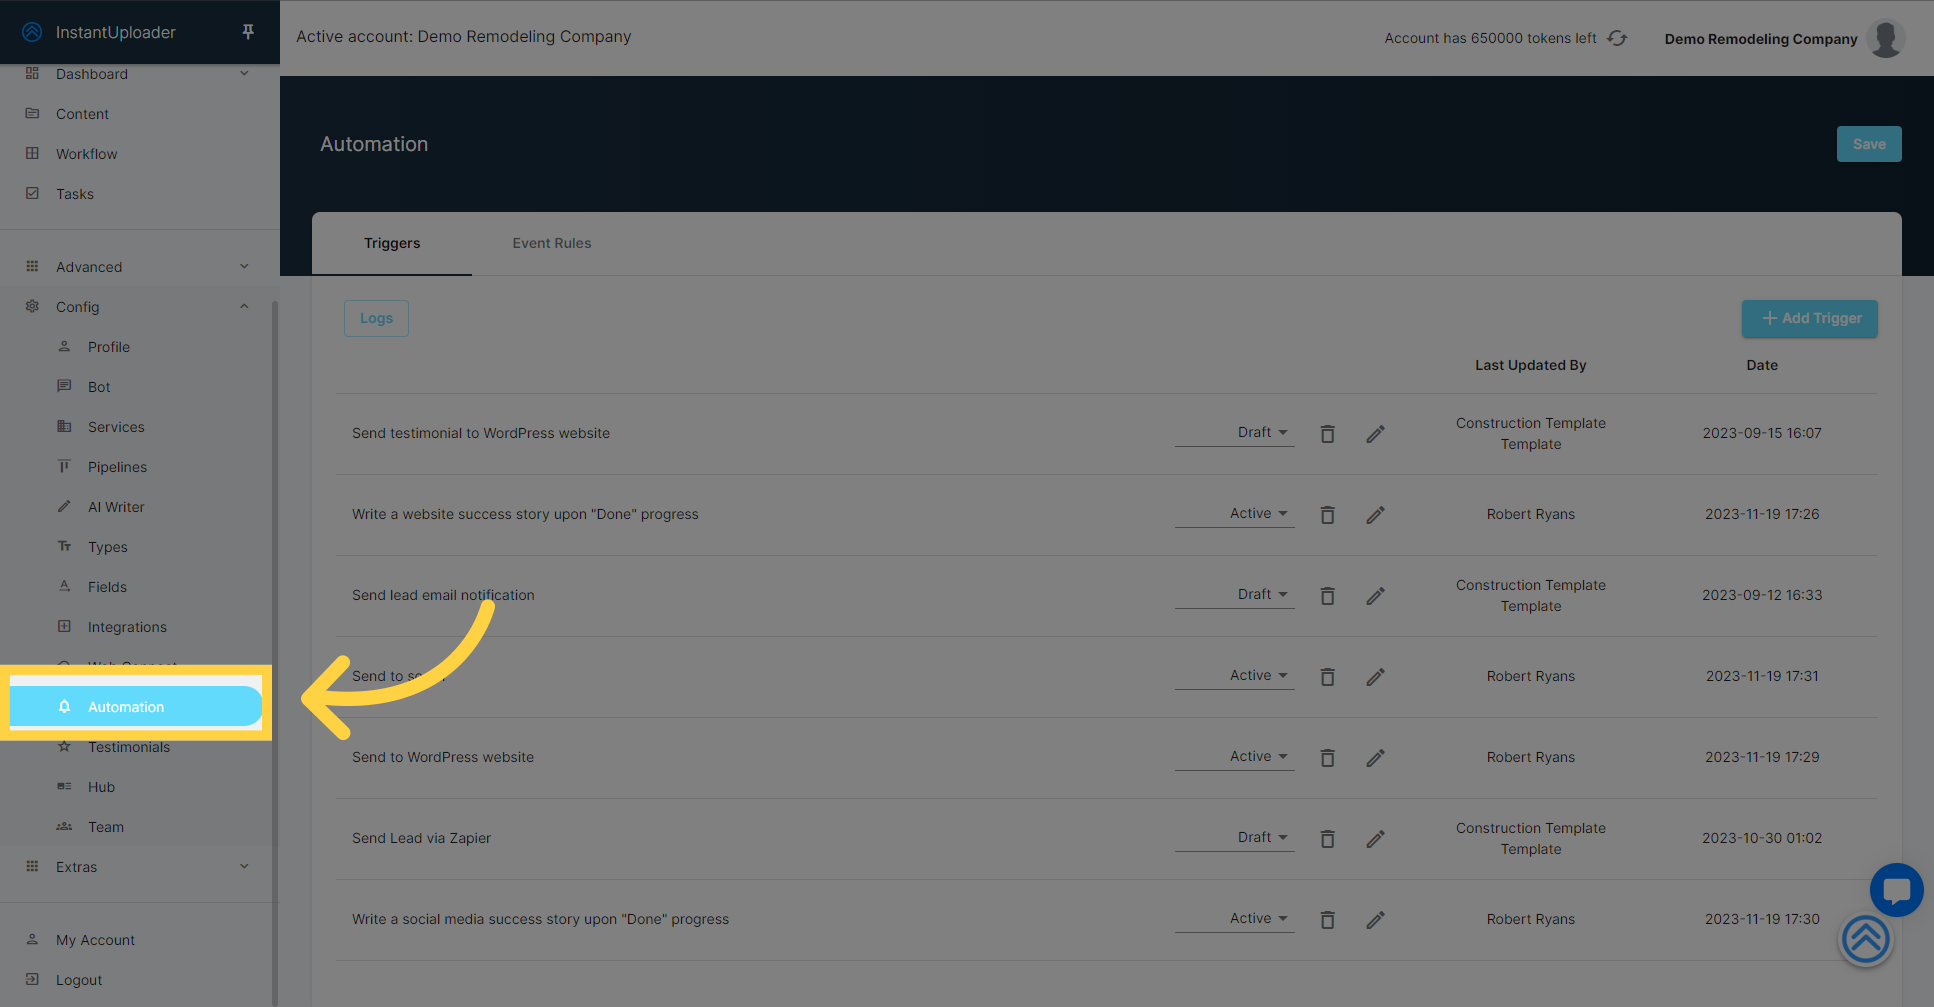
To get started, navigate to the 'Automations' screen by clicking on 'Automation' within the configuration menu. This is where the magic of workflow automation begins.
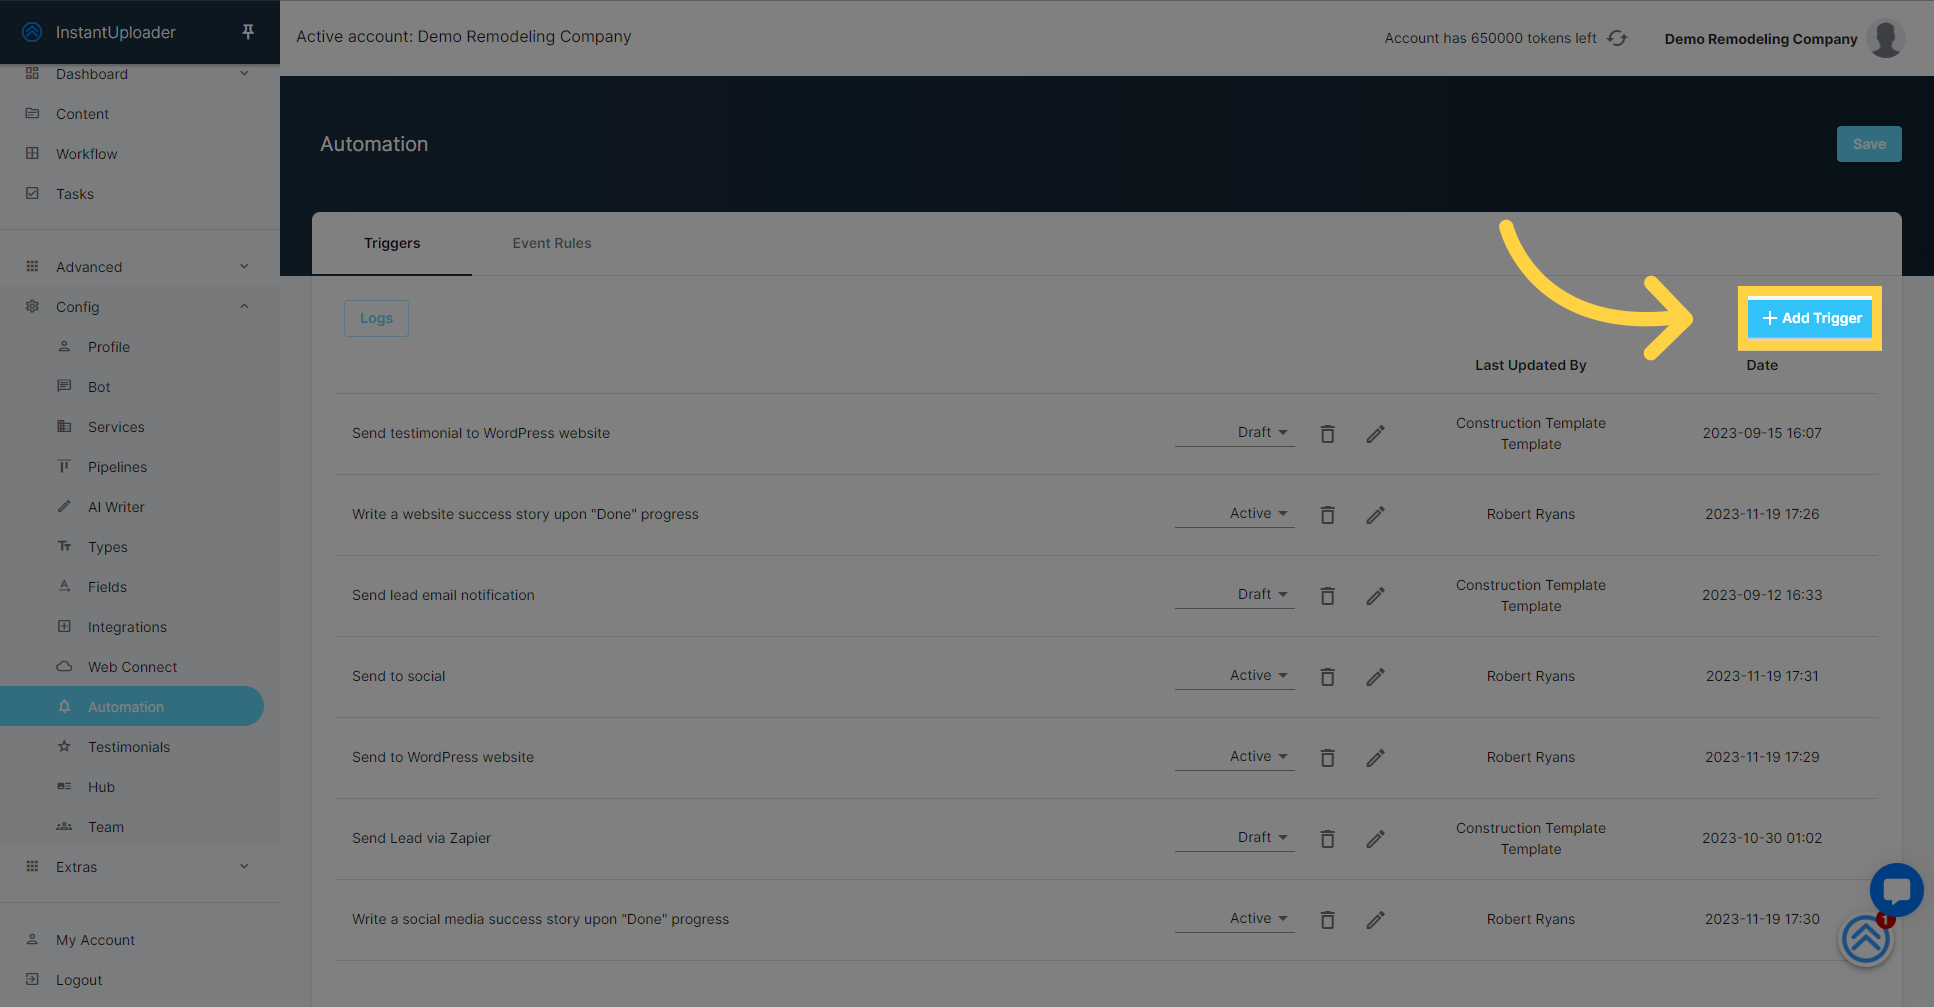
Go ahead and click on 'Add Trigger'.
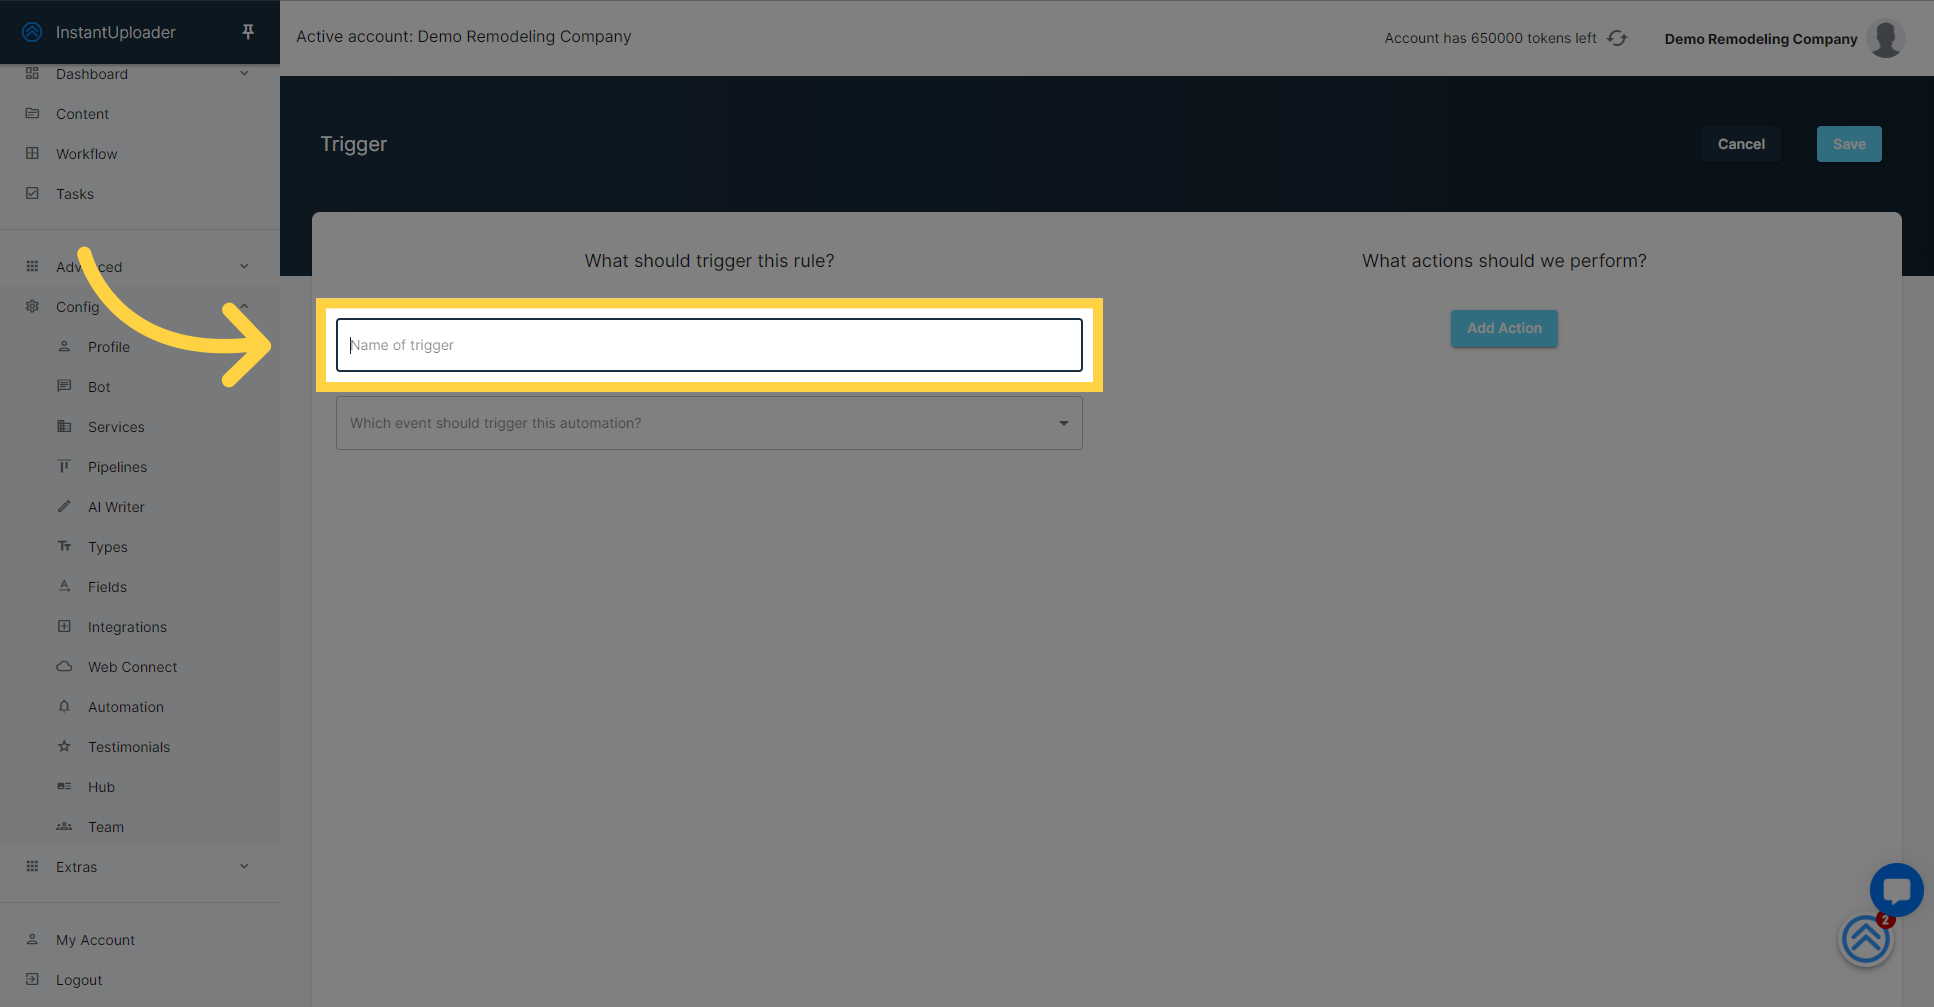
Now, let's name your trigger to reflect its function. Choose a descriptive title like "Content Distribution Status Update." This helps you easily identify the trigger's role in your workflow. Go ahead and type in your chosen name.
It's time to decide what event will prompt your automation to spring into action. Click the dropdown menu titled "Which event should trigger this automation?" This will reveal a list of events that can initiate your automation.

With the dropdown menu now open, you'll see various events that can trigger your automation. For this example, we'll select "Content added, updated, deleted." Note that there are several other events you can choose from, including:
Pipeline stage change
Description update
Content status change
Content type deleted
Media added, updated, deleted
Main video added
Testimonial video added
Distributed to WordPress
Scheduled Event Rule
Select "Content added, updated, deleted" to proceed, keeping in mind that these additional events are also available for future automations you may wish to create.

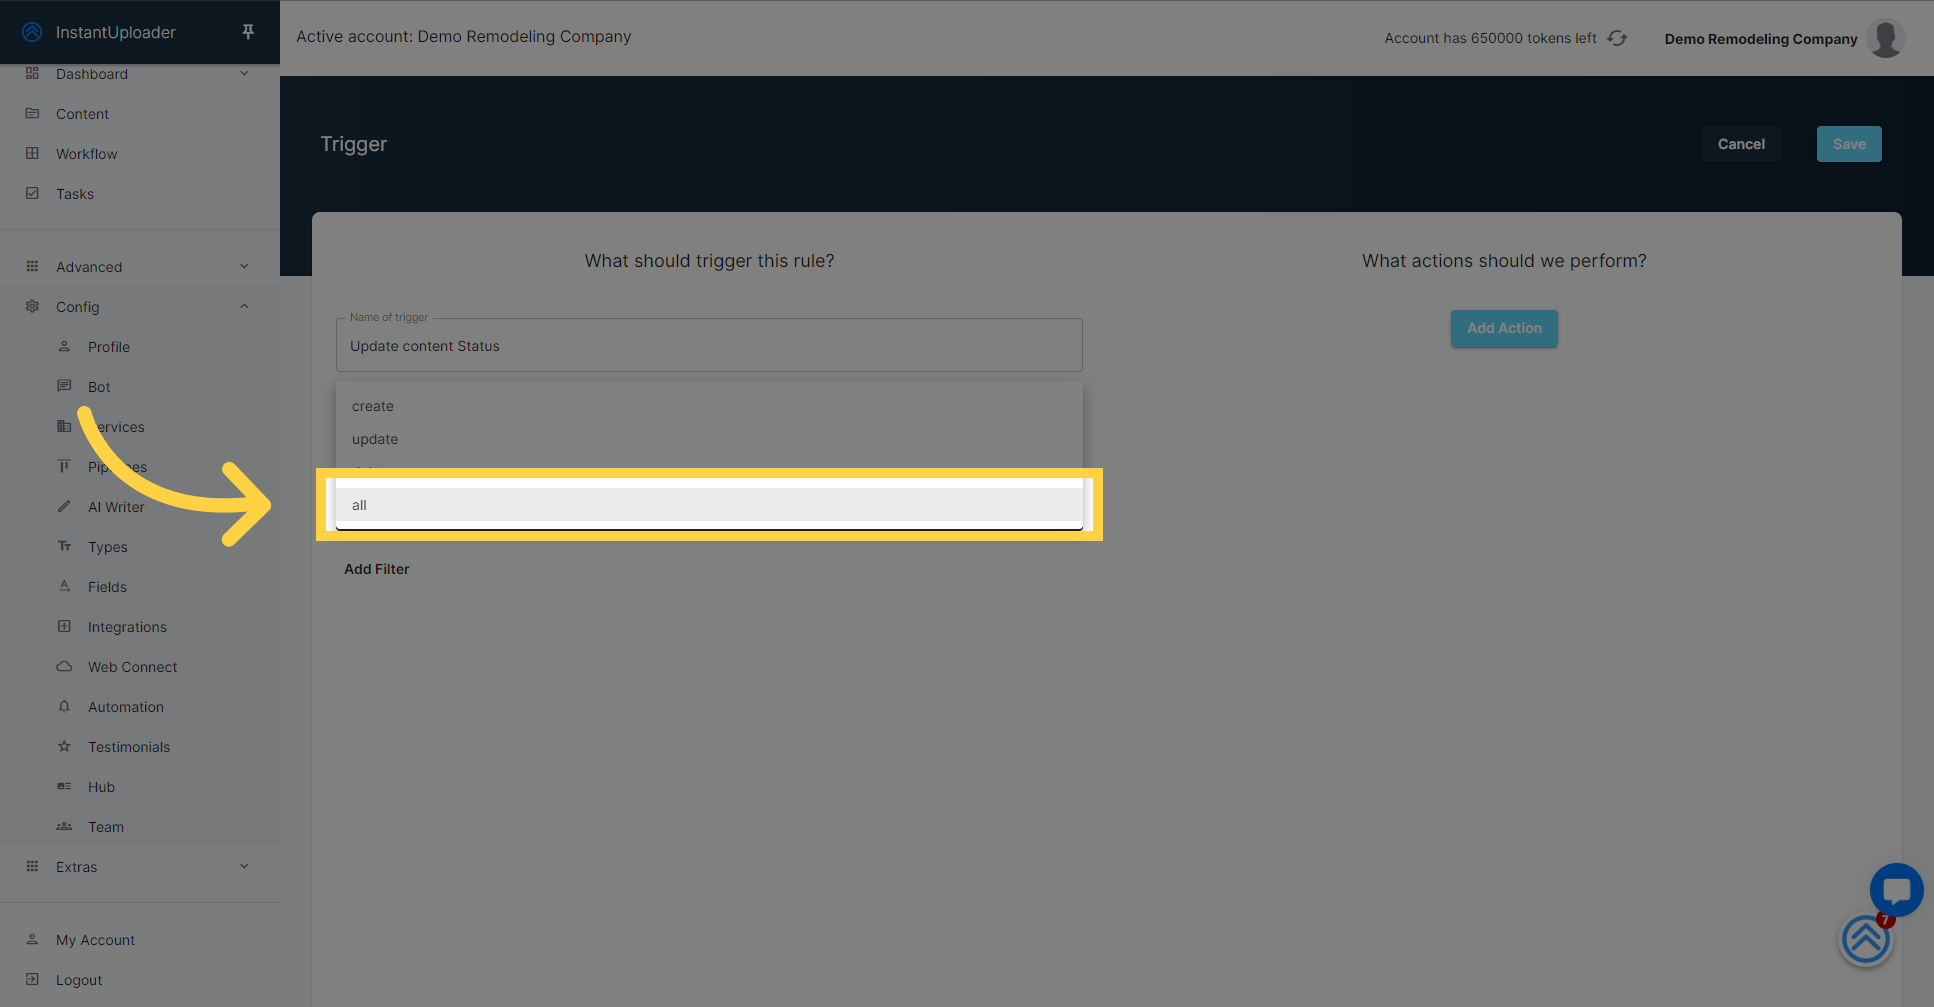
Now that you've chosen the event that will trigger the automation, it's time to refine when it activates. Click on the "Select Automation's filter" to expand your filtering options.
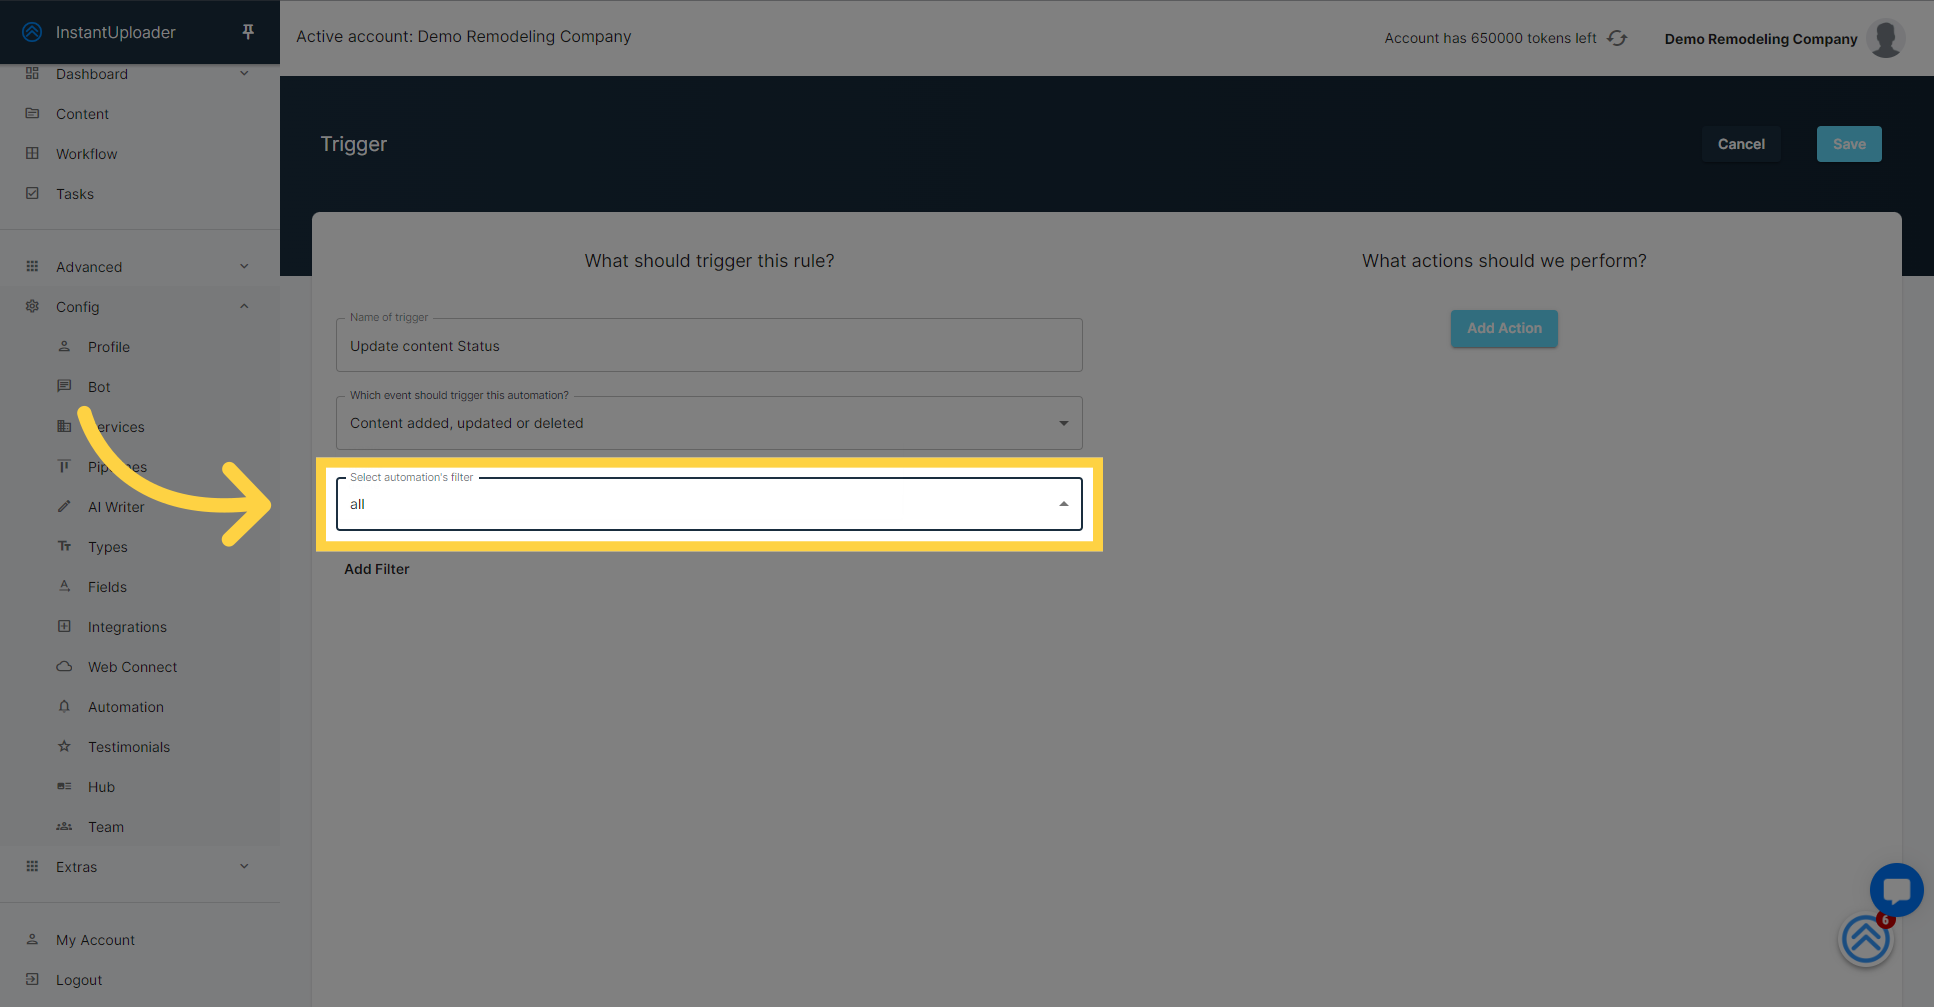
From the filter options presented, select "All." This setting ensures that your trigger will fire regardless of whether content is being added, updated, or deleted, without any restrictions. This broad criteria allows the automation to apply to all such content changes.
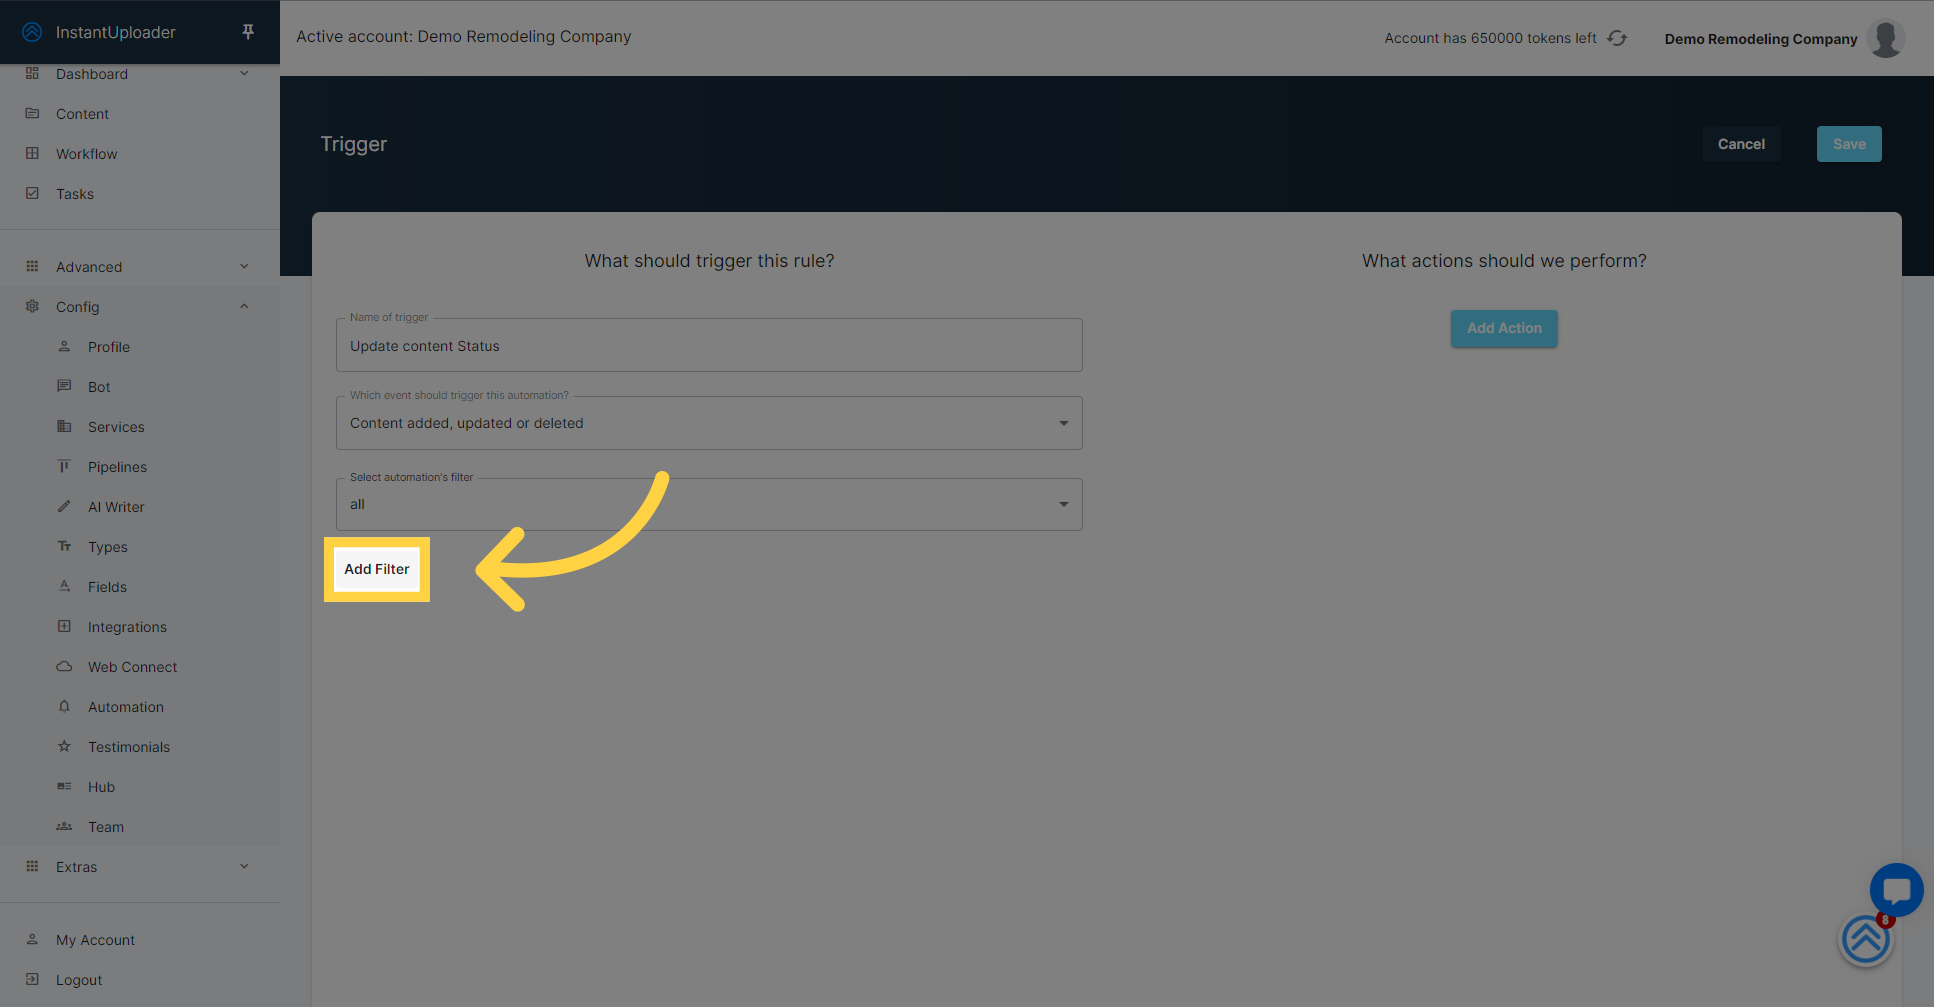
With your main event and filter set, let's narrow down the conditions further. Click on the "Add Filter" button. This will allow you to introduce more specific criteria to ensure your automation only triggers under the right circumstances.
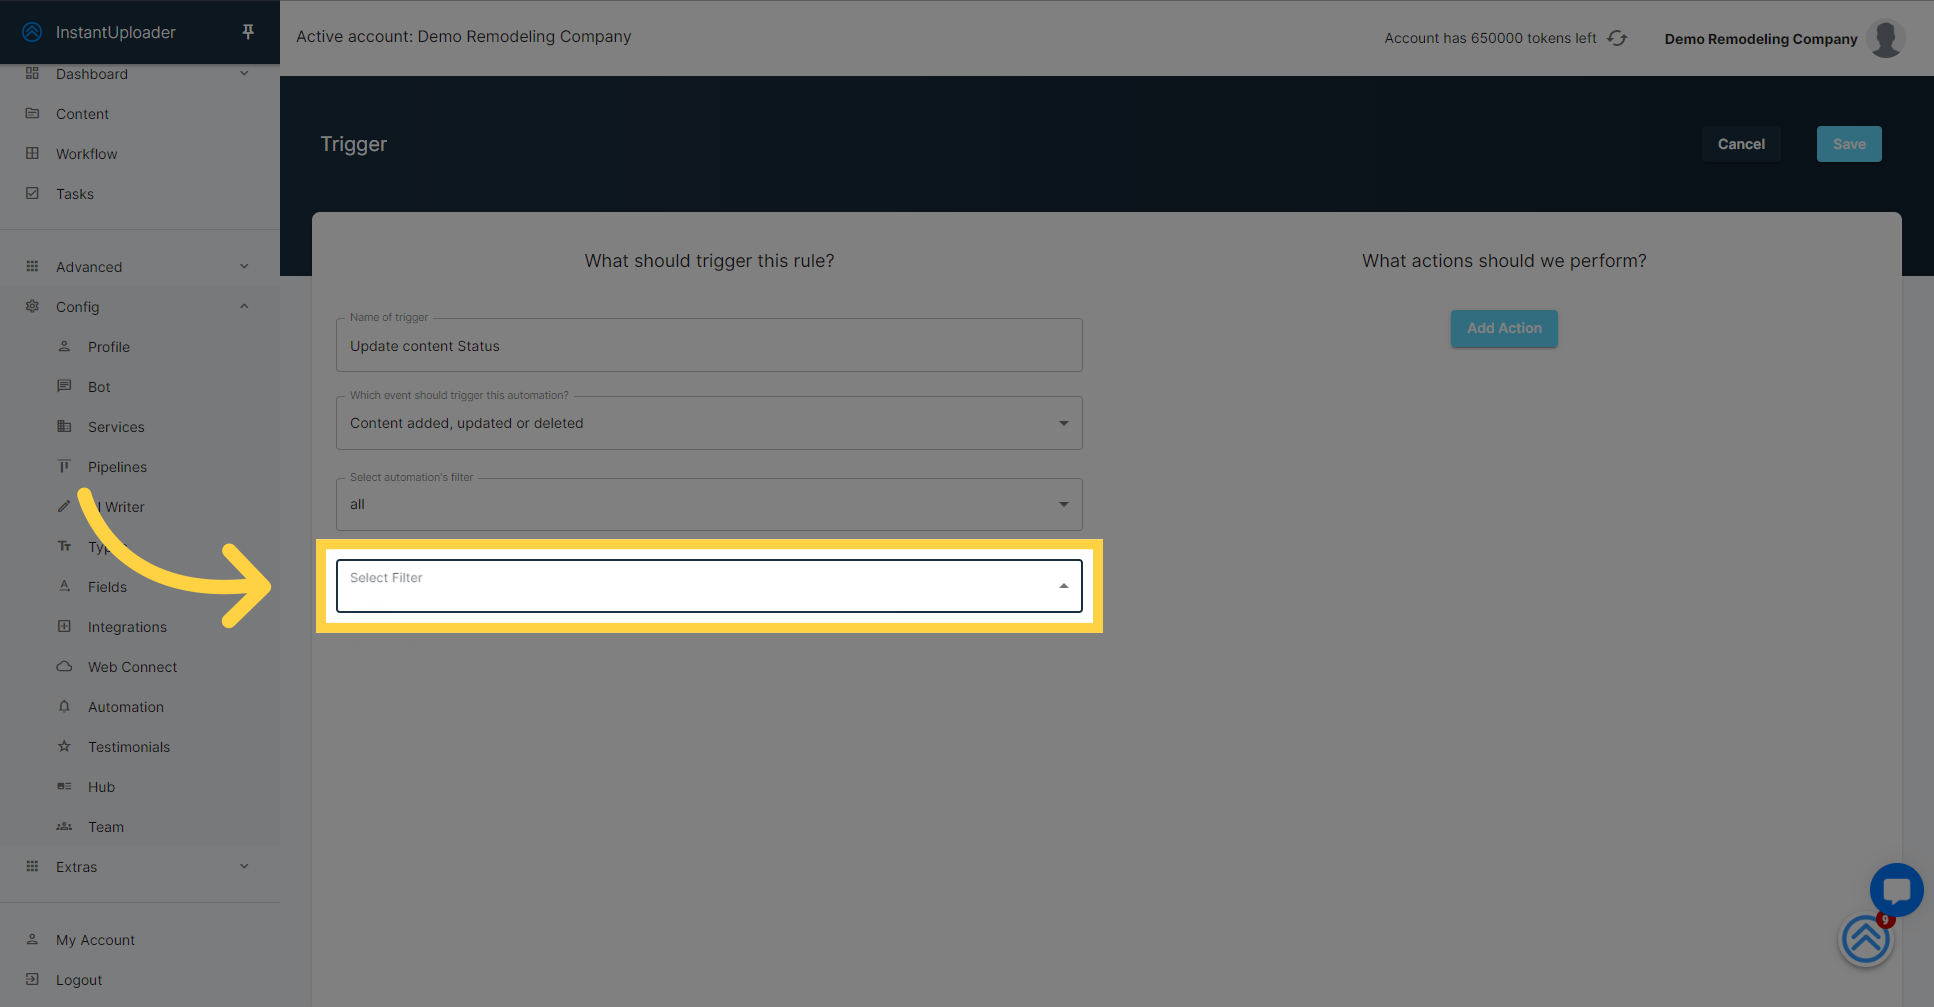
Next, we'll add more precision to your automation. Click on "Select filter" to view the available options that will help you define the conditions under which your trigger should activate.
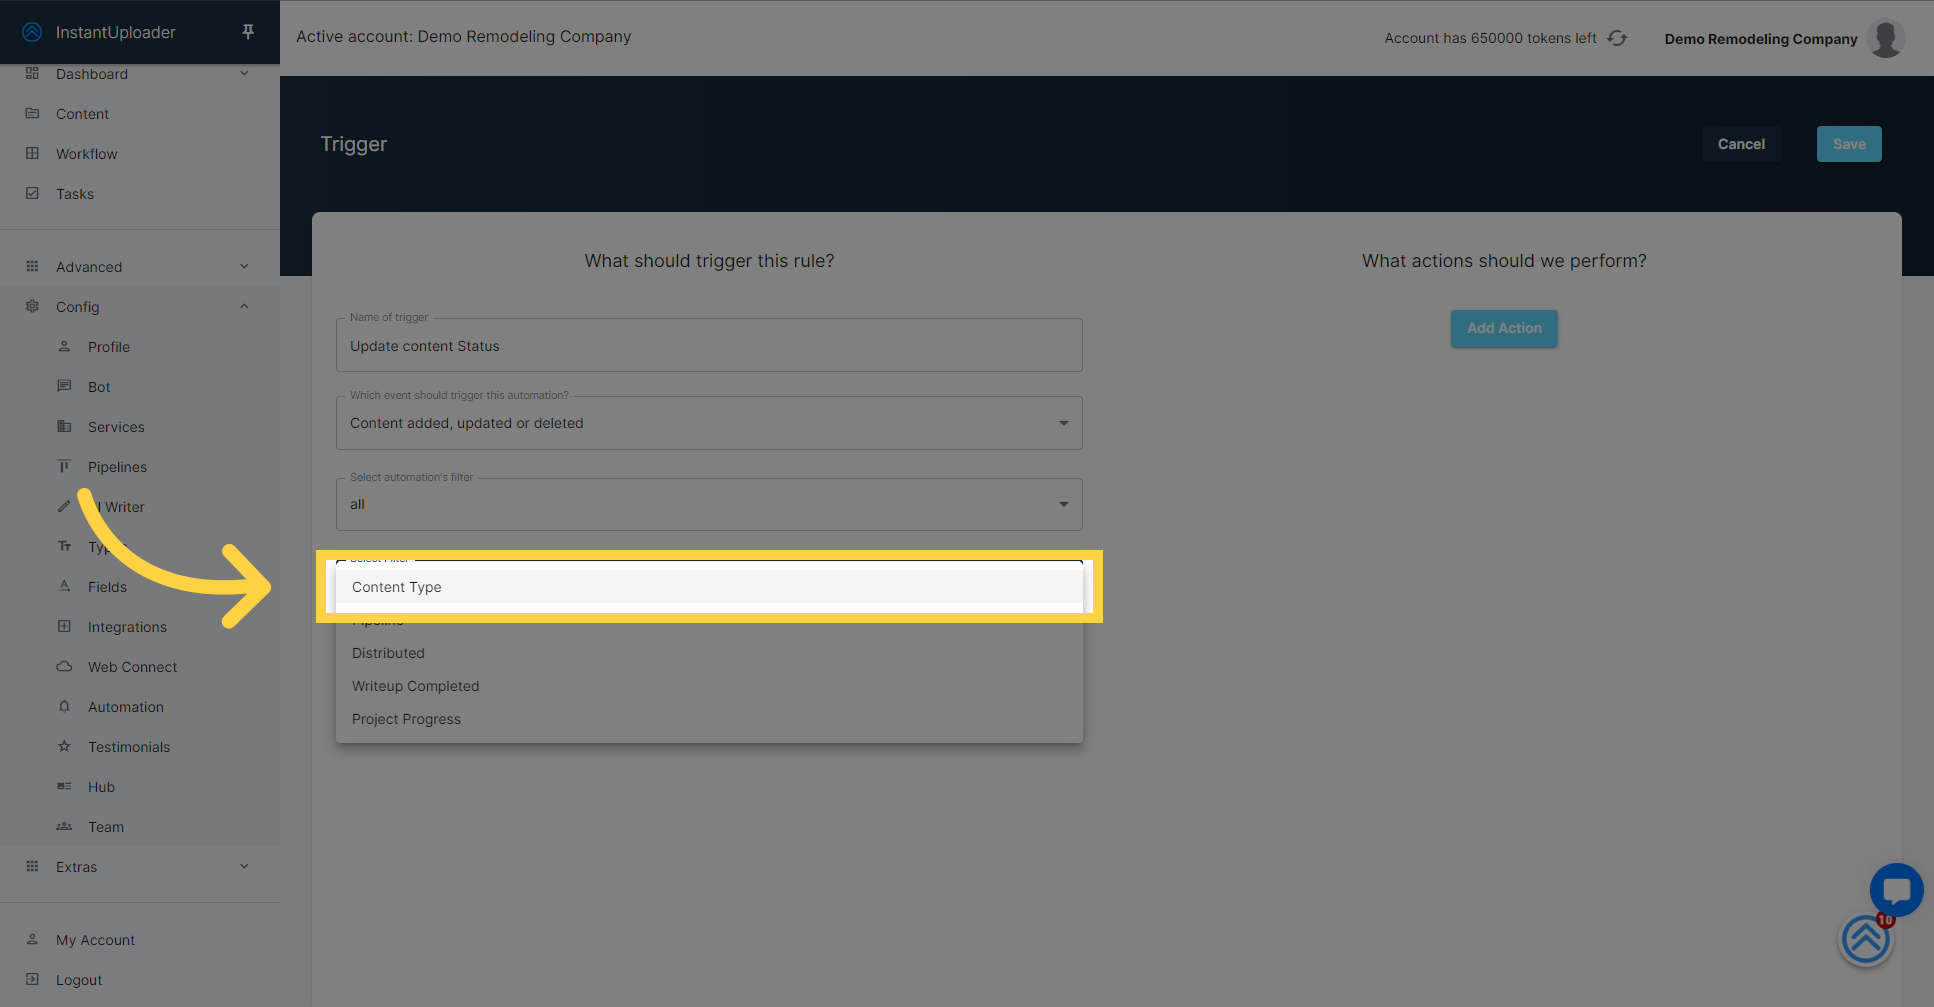
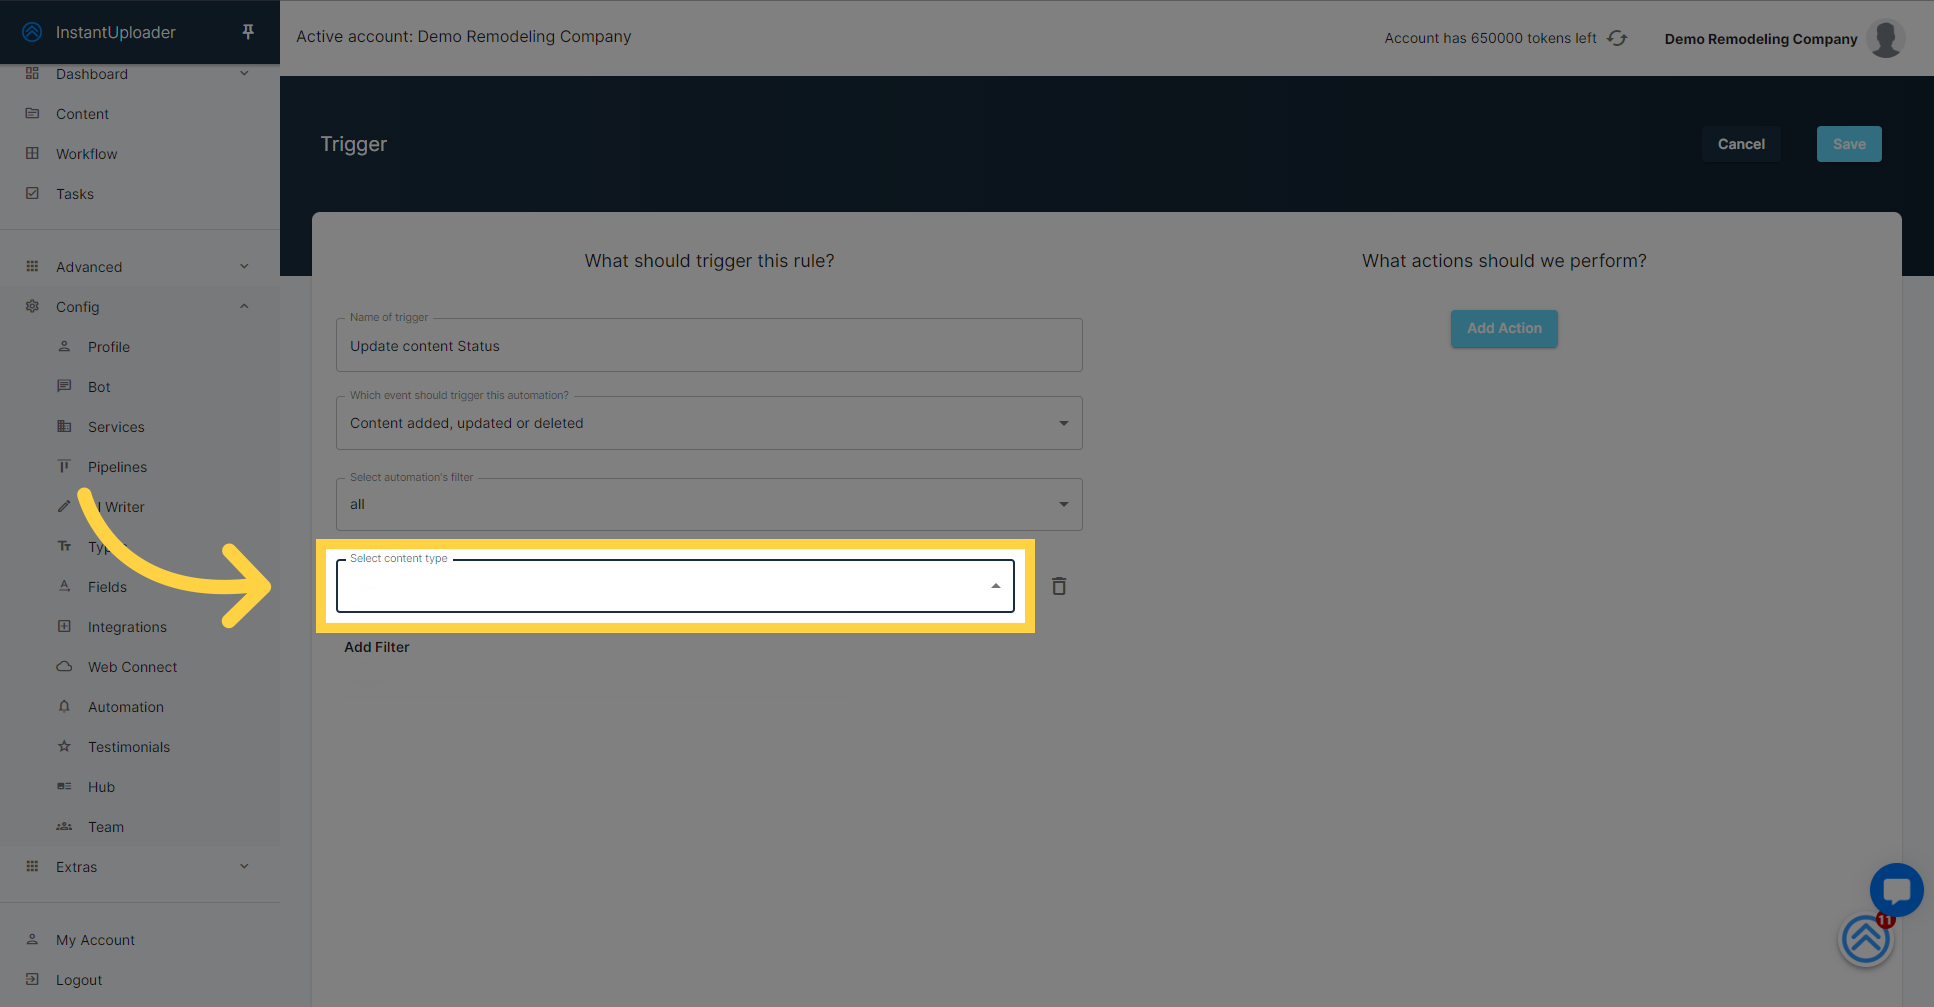
With the additional filter options now visible, it's time to select the type of filter that best suits our needs. From the dropdown list, choose "Content Type." This will allow us to specify the automation to run for certain kinds of content, adding another layer of customization to your workflow.
After selecting "Content Type" as your filter, the dropdown will update to prompt you for more detail. Click on the newly displayed "Select Content Type" to reveal the different content types you can choose from for this automation. This step will help you target the automation to the specific kind of content you're working with.
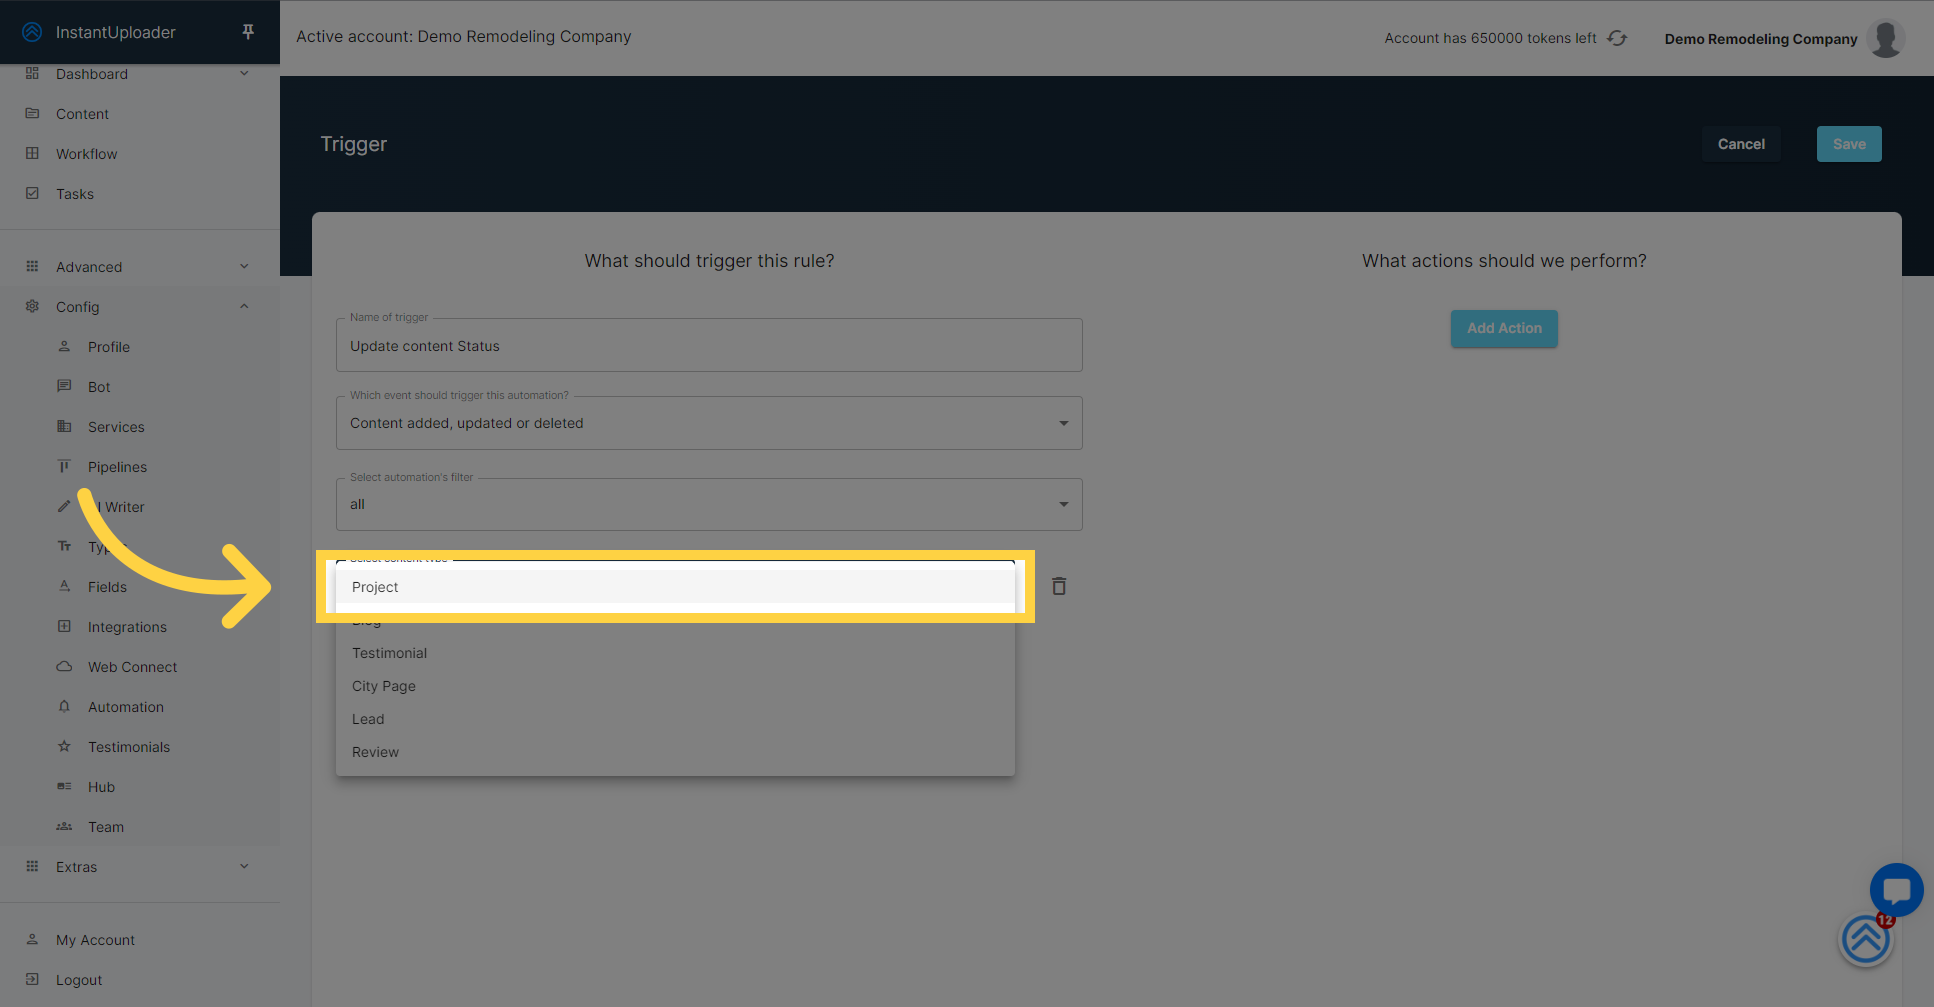
With the list of content types now in front of you, it's time to make your selection. Find and click on "Project" from the available options. This choice ensures that your automation will specifically apply to content labeled as 'Project', aligning the trigger with your intended workflow requirements.
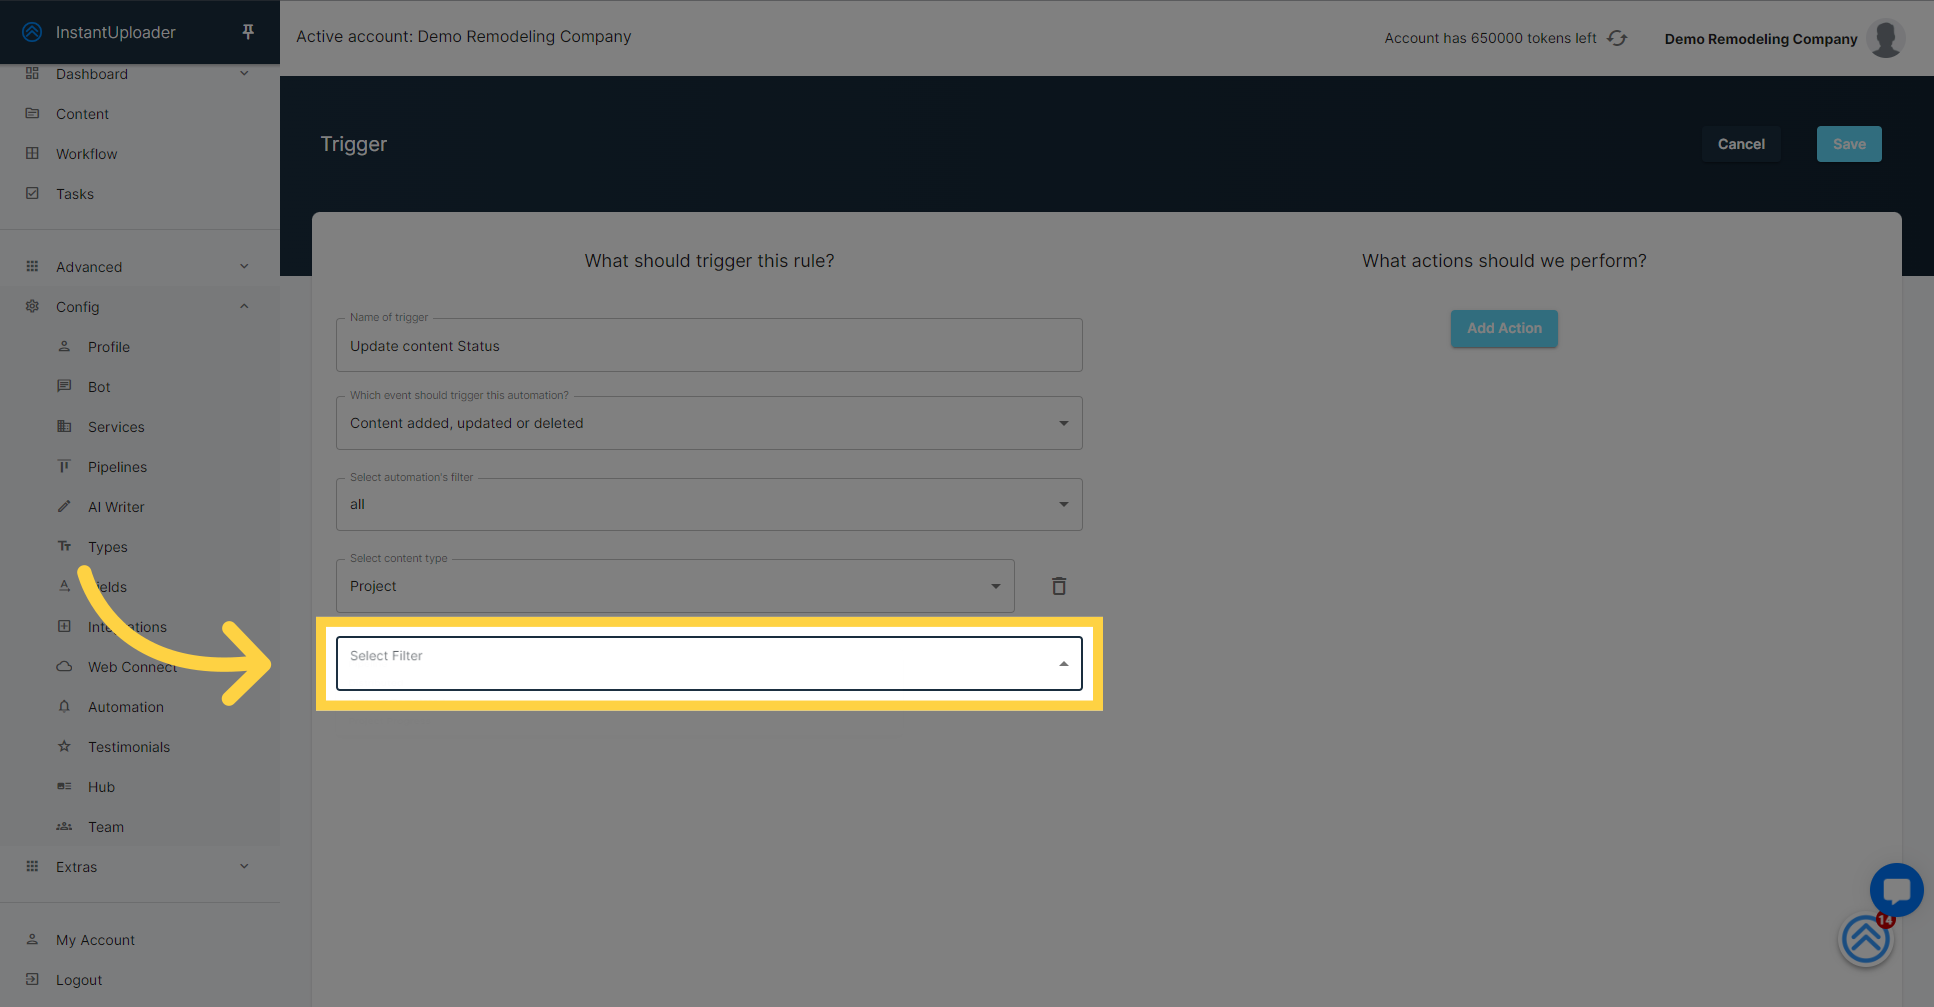
To further refine your automation's conditions, click "Add Filter" once more. This will enable you to introduce an additional layer of criteria, ensuring that your automation is as targeted and effective as possible.

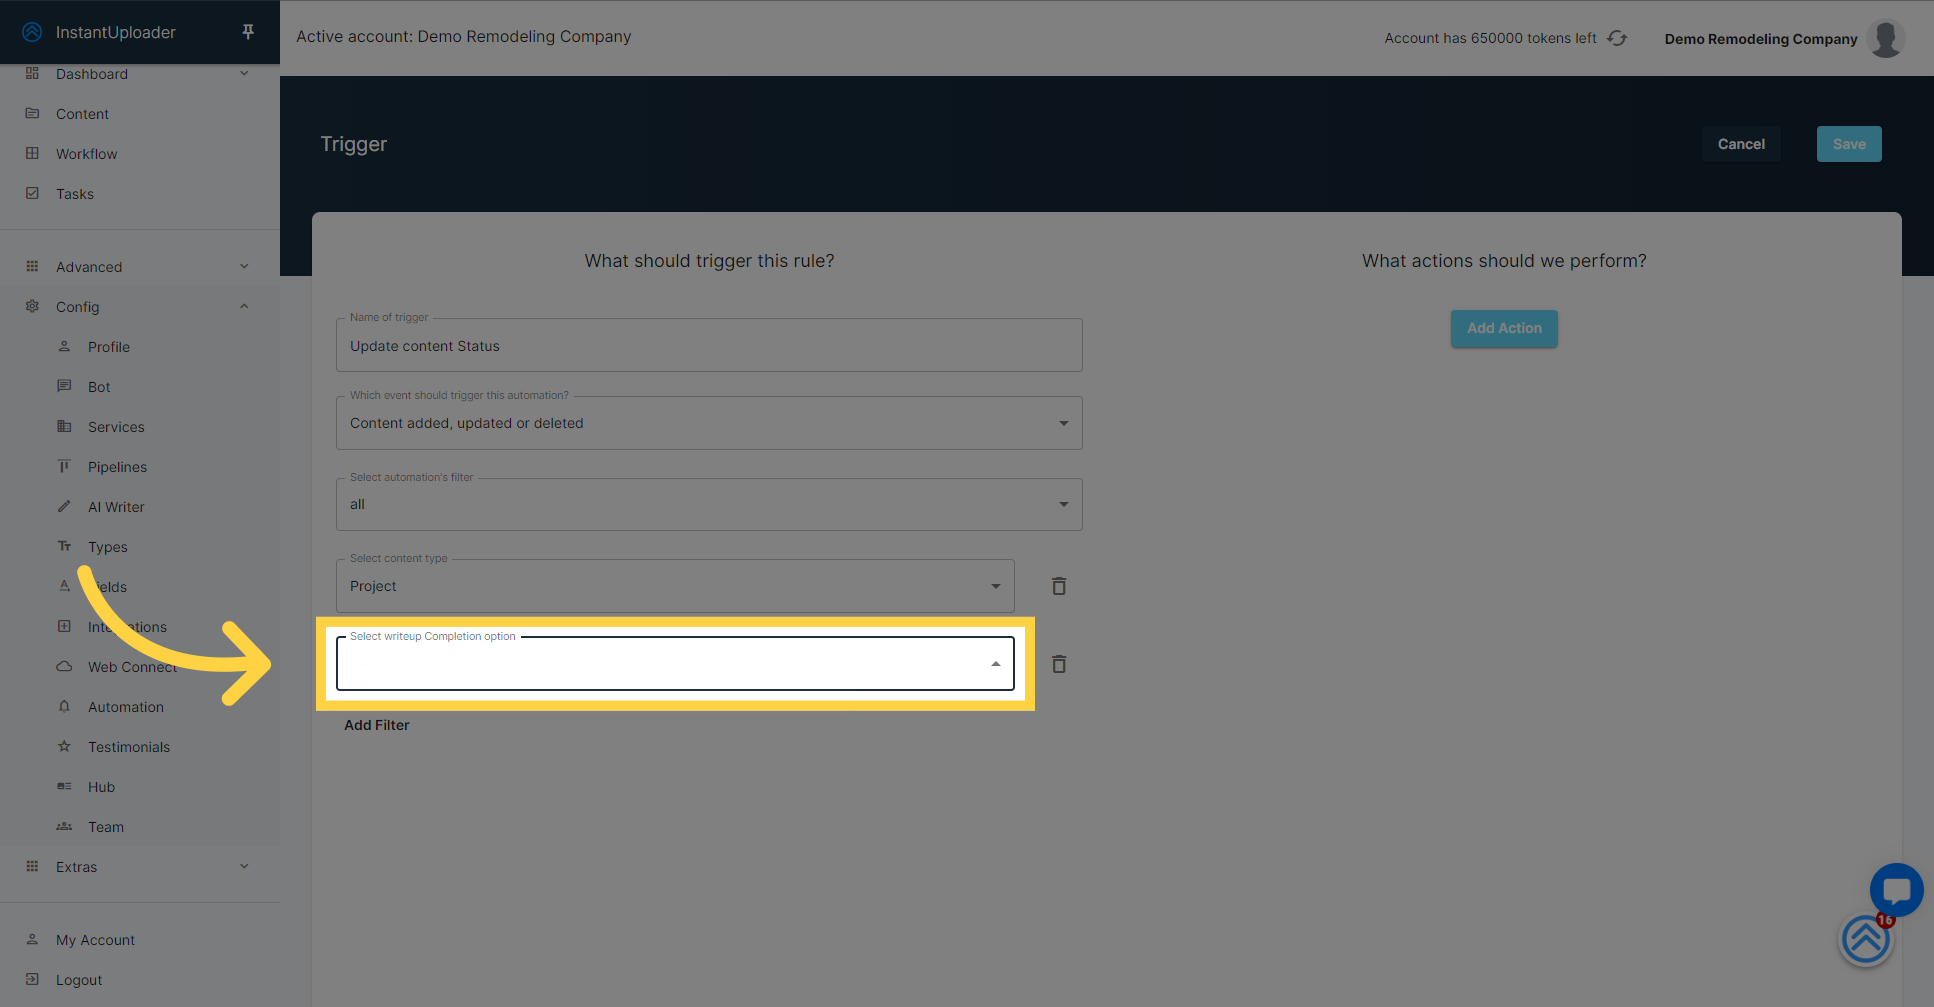
Now that you're ready to add another layer of specificity, click on "Select filter" again. This action will display a fresh set of filter options for you to choose from, allowing you to continue refining the conditions for your automation trigger.
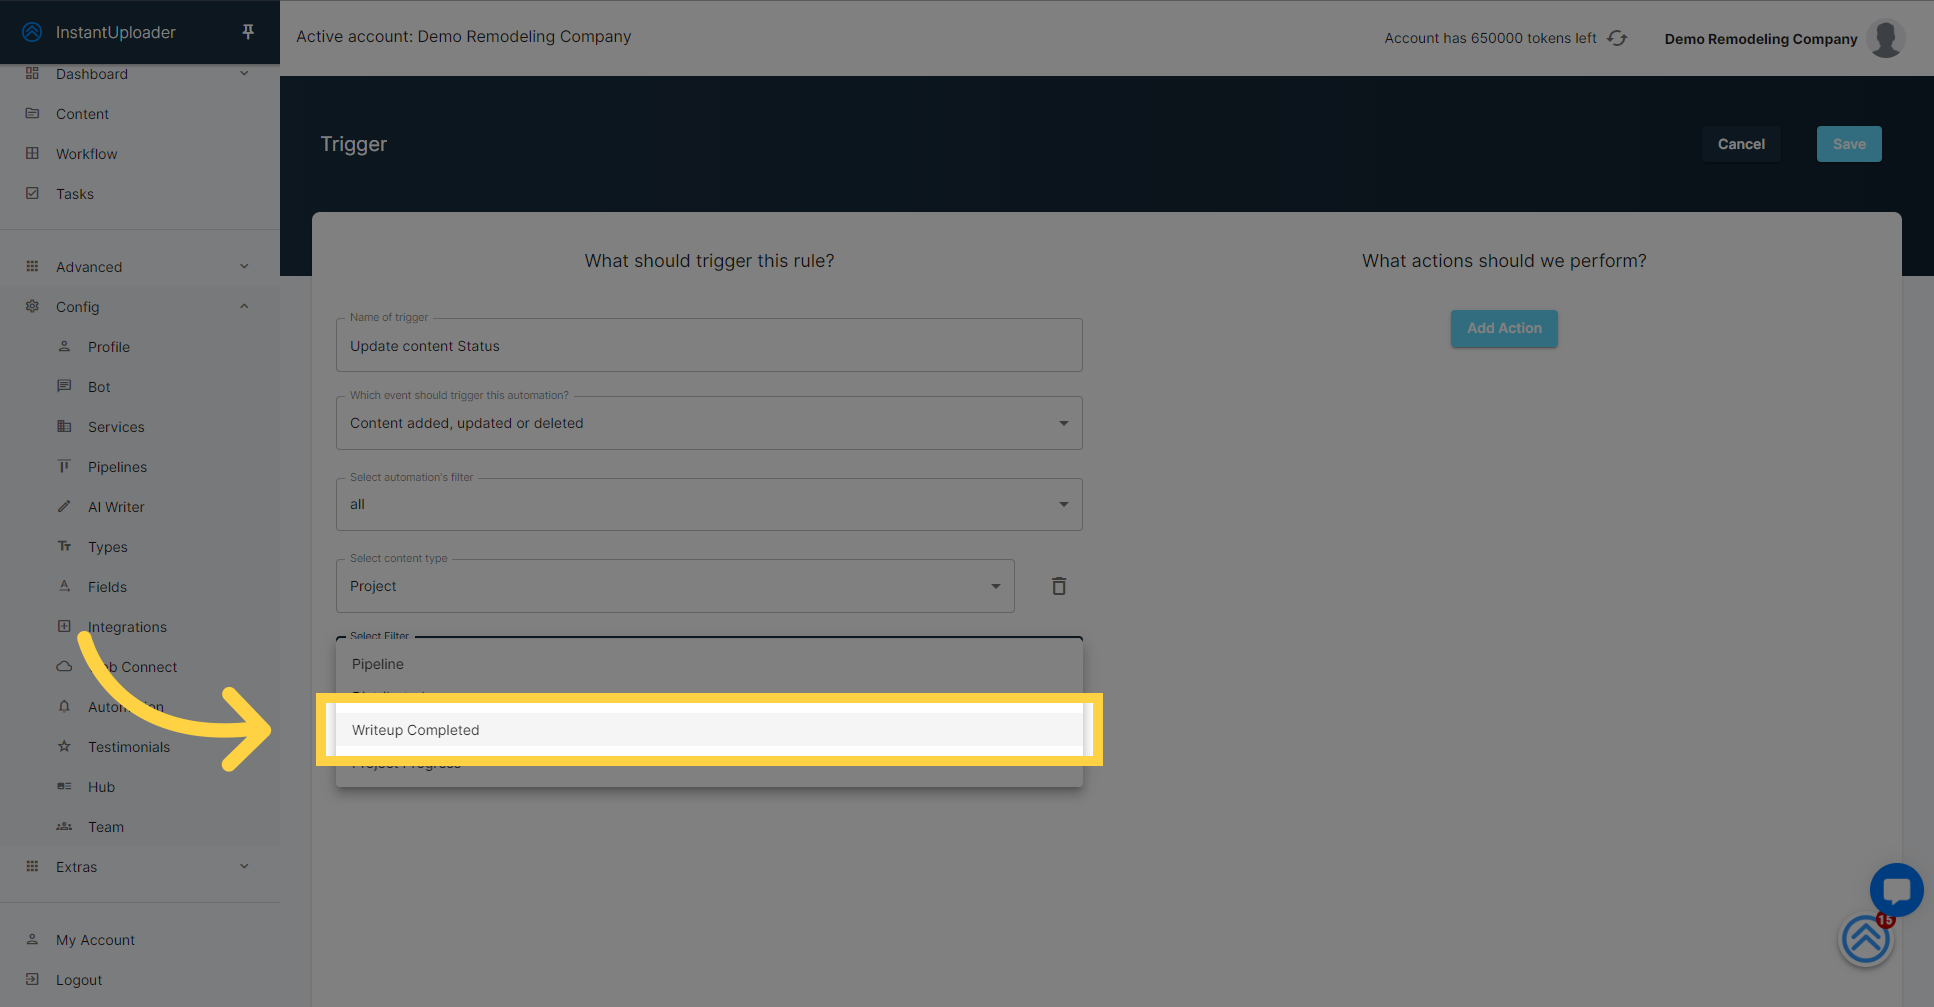
Within the list of available filter options, find and select "Writeup Completed."
Click on the "Select Writeup Completion Options" dropdown to reveal the available choices.
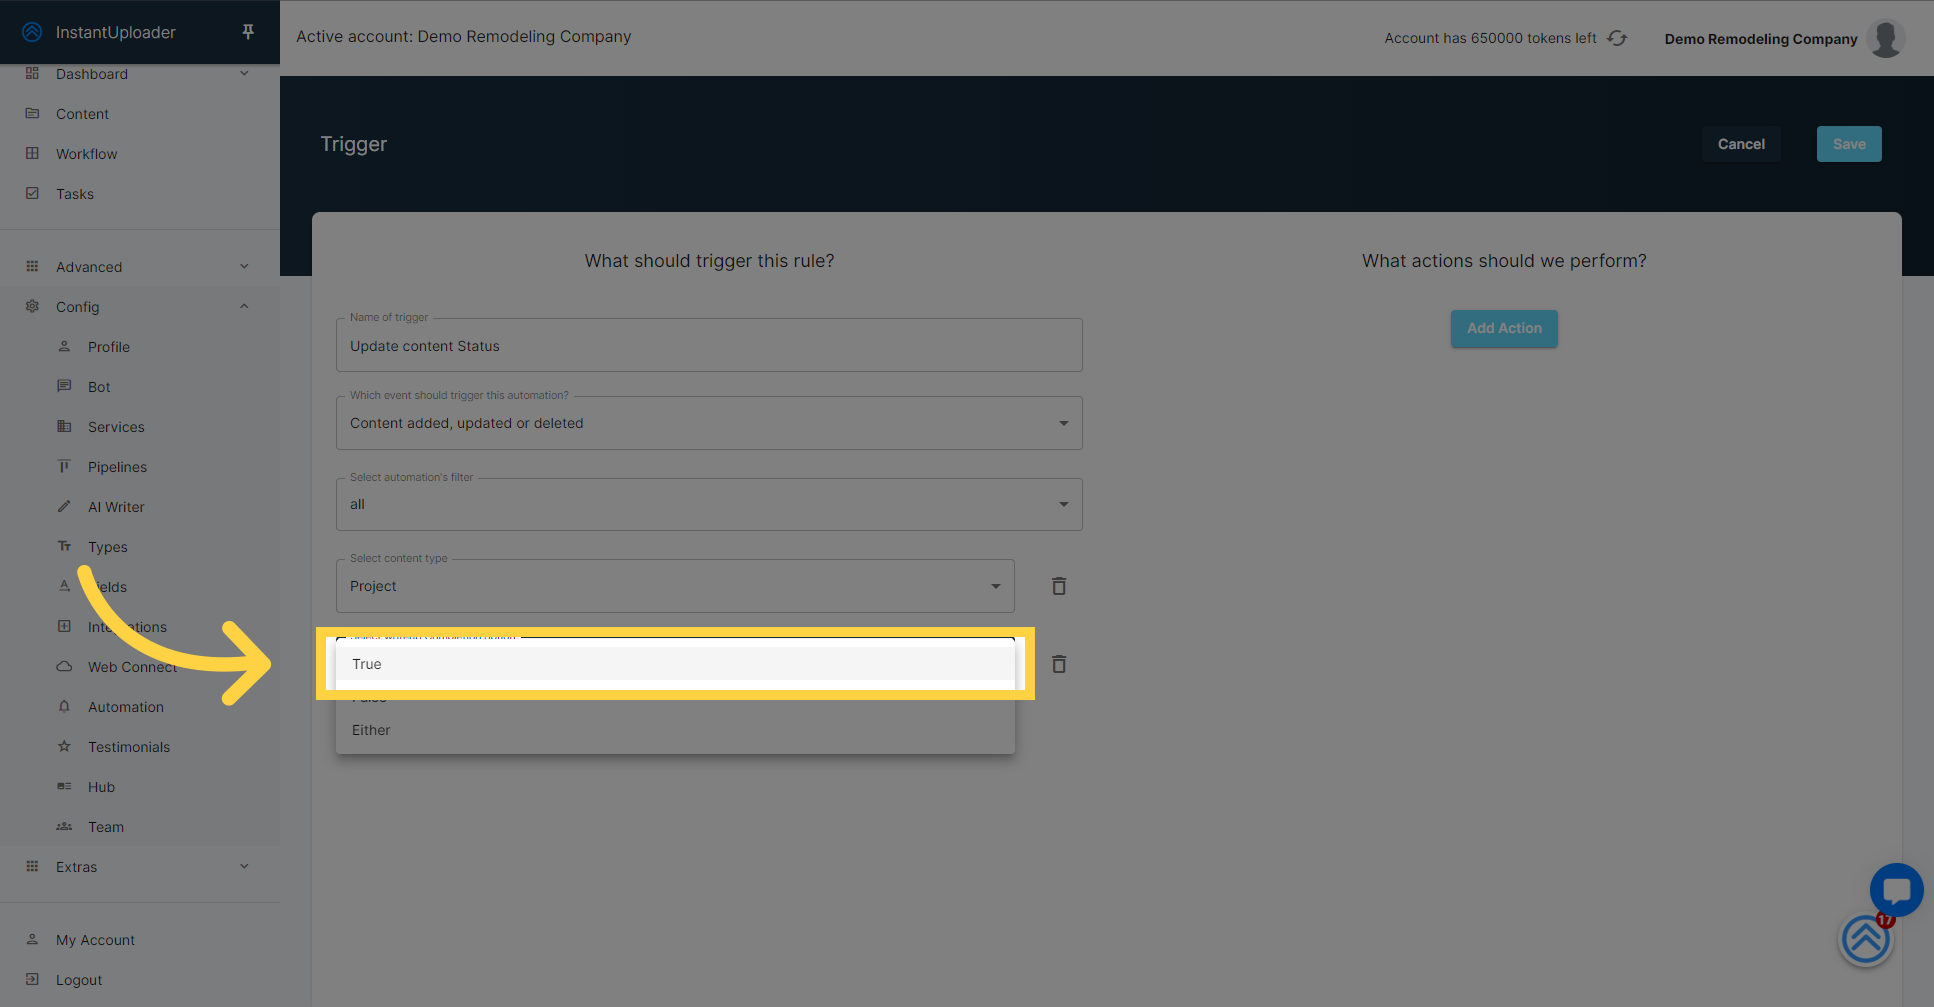
From the dropdown, you'll see "True," "False," or "Either." For our automation, which activates after the AI writer finishes, we'll select "True." Go ahead and make this selection to continue.
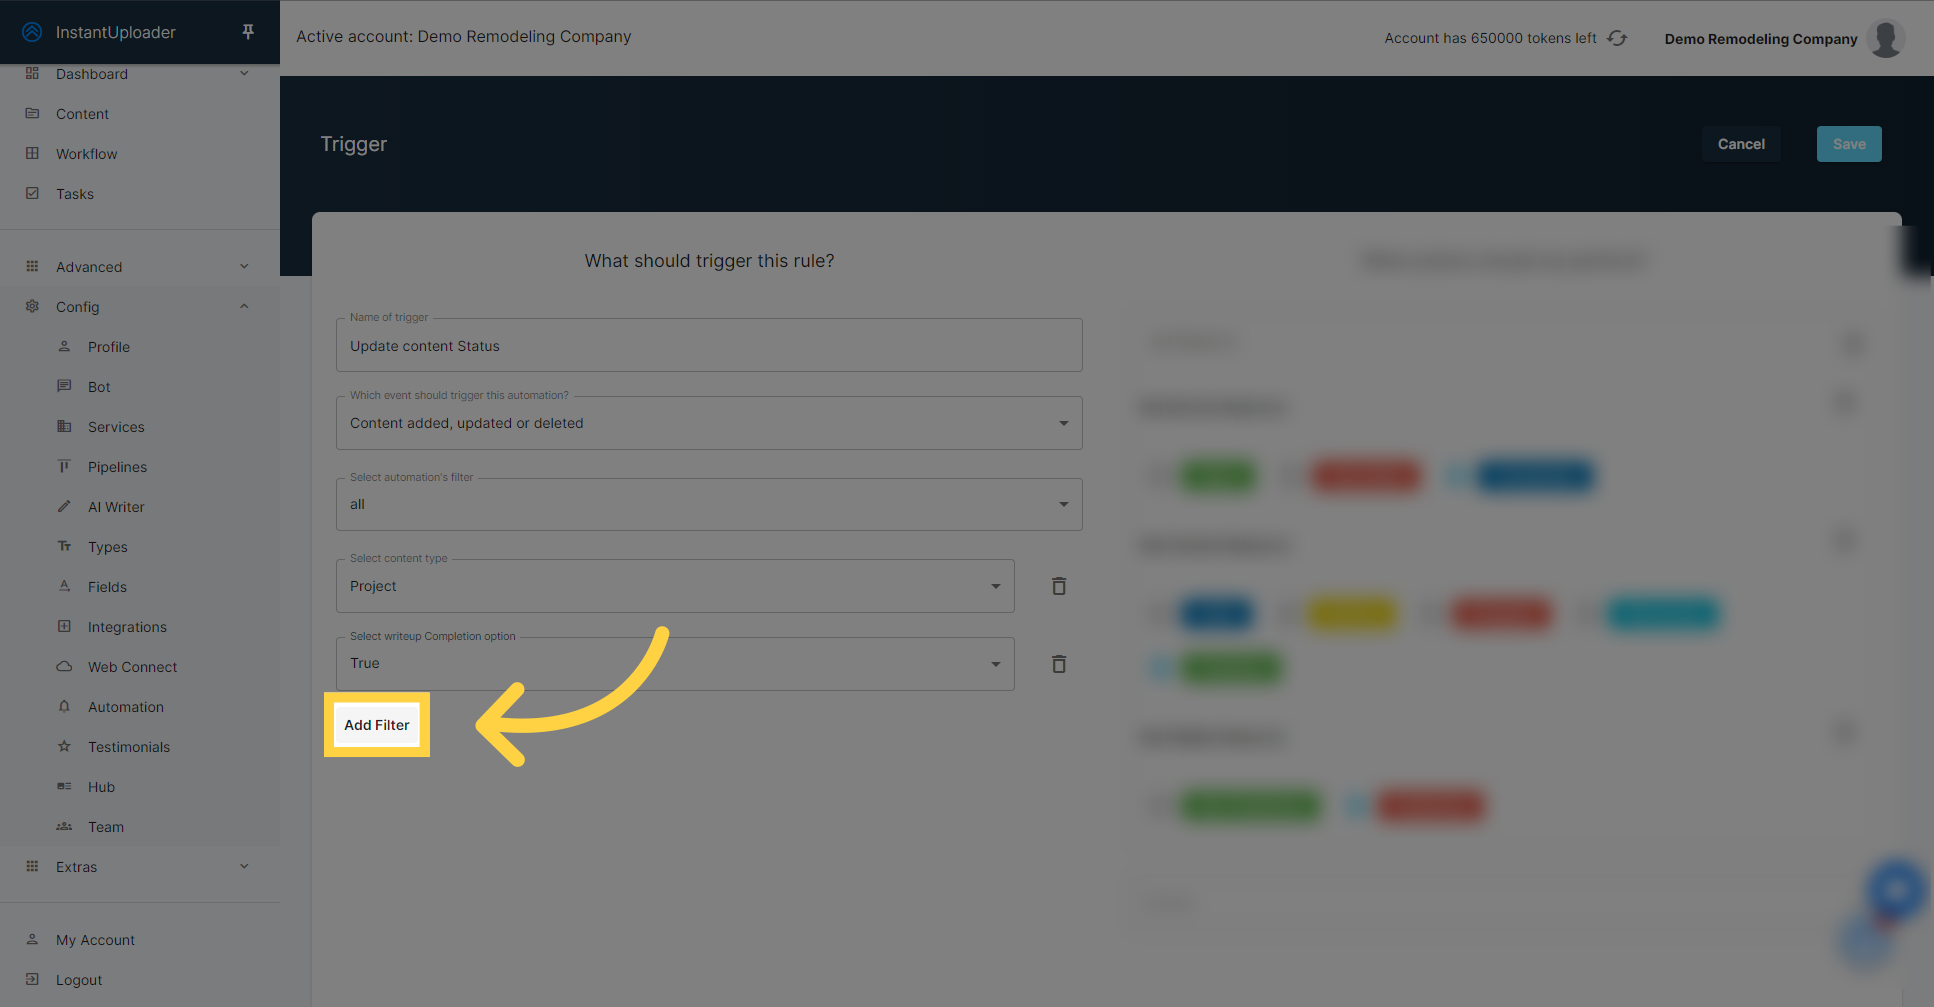
We're almost there! To add the last filter for our automation, click on the "Add Filter" button once more. This will set us up to define the final condition that our automation will check before it is triggered.
To proceed with our final filter, click on "Select Filter." This will display the remaining filter options that you can apply to your automation.
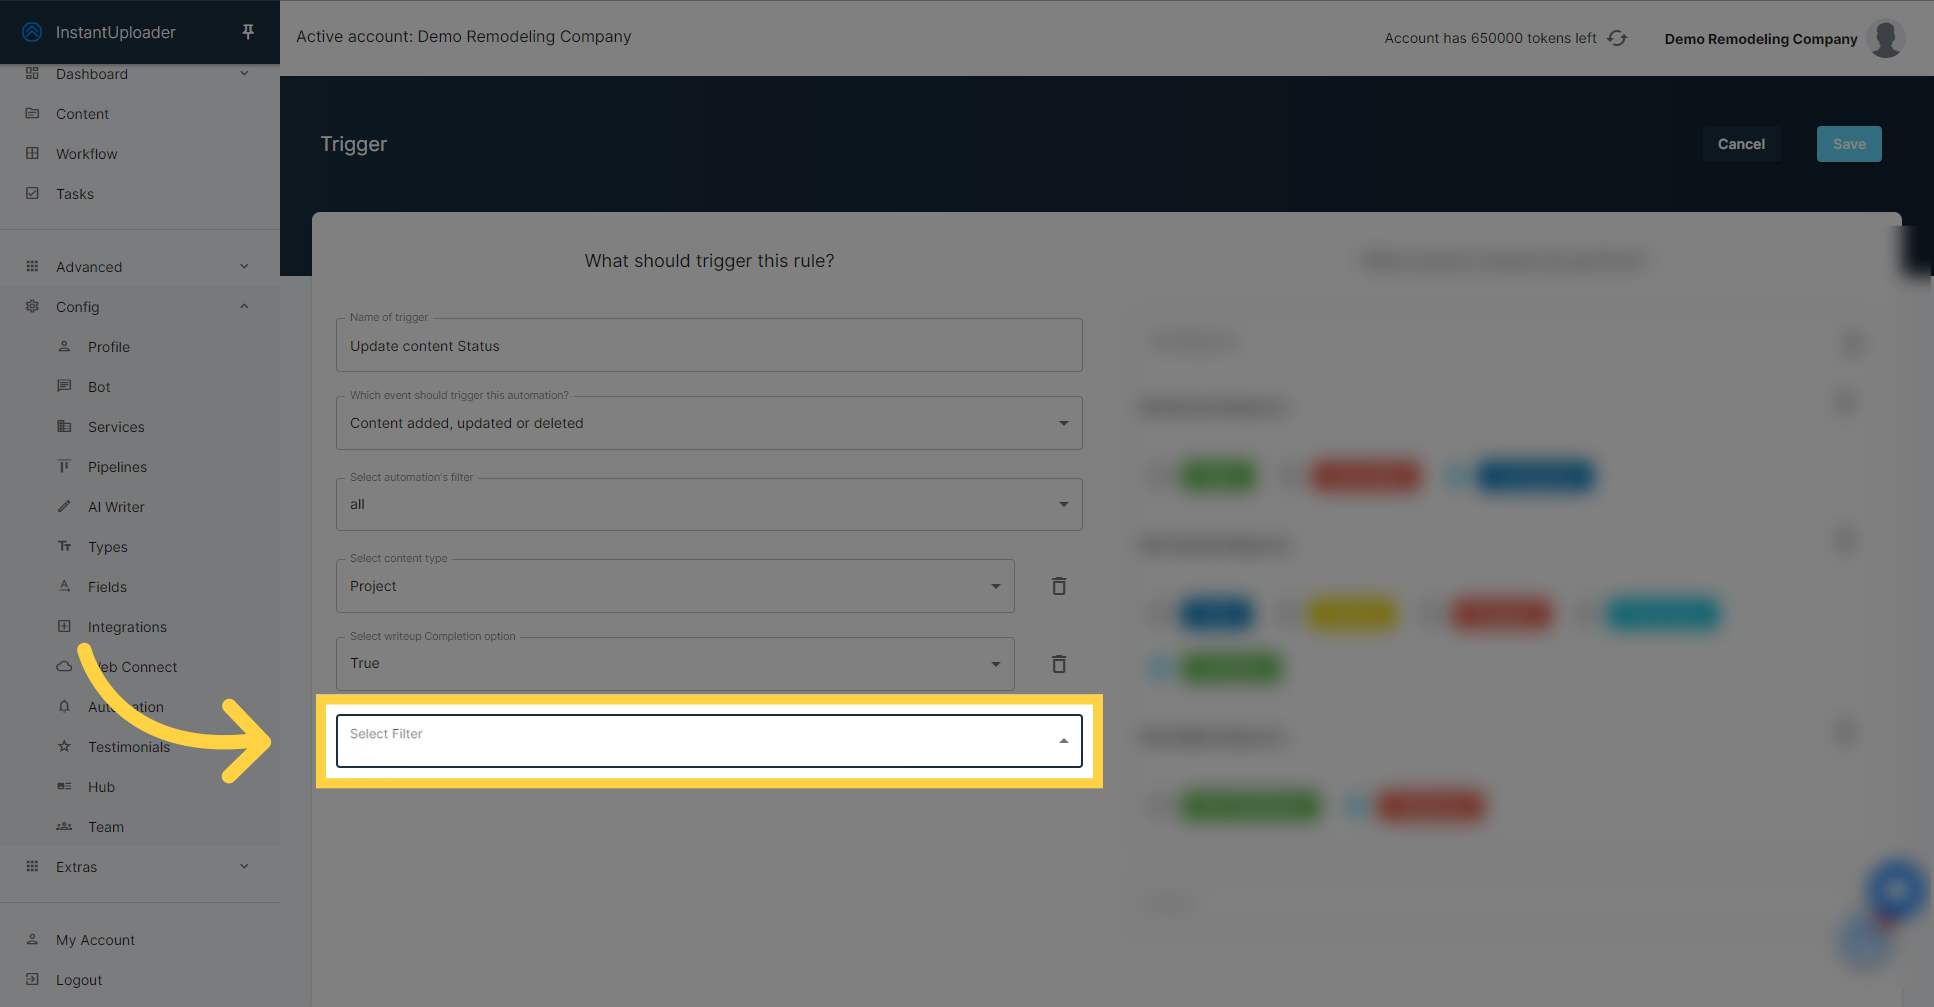
From the available filter options, select "Distributed." This filter focuses on whether the content has been distributed to the website, allowing you to trigger the automation based on the distribution status of the content.
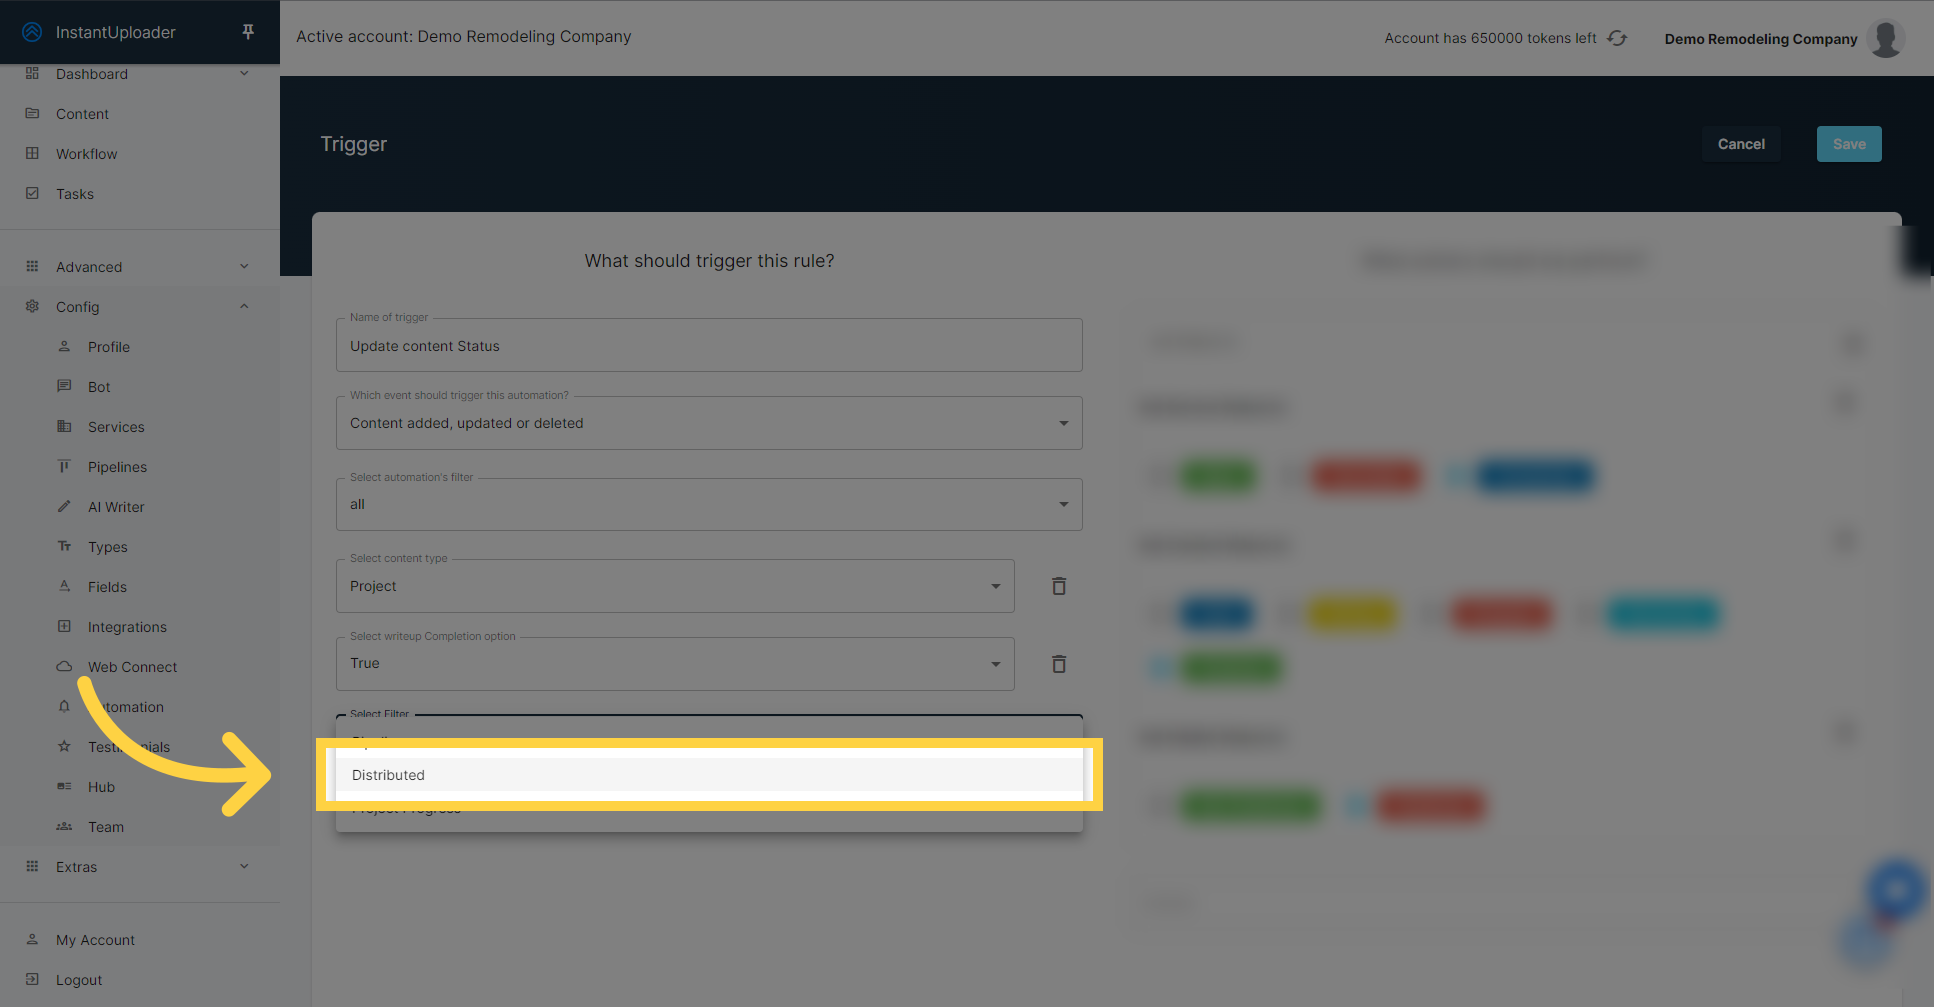
Once you've chosen the "Distributed" filter, you'll need to specify the condition that applies. Select "True" if you want the automation to trigger for content that has already been distributed to the website. This ensures the automation only activates after distribution has occurred.

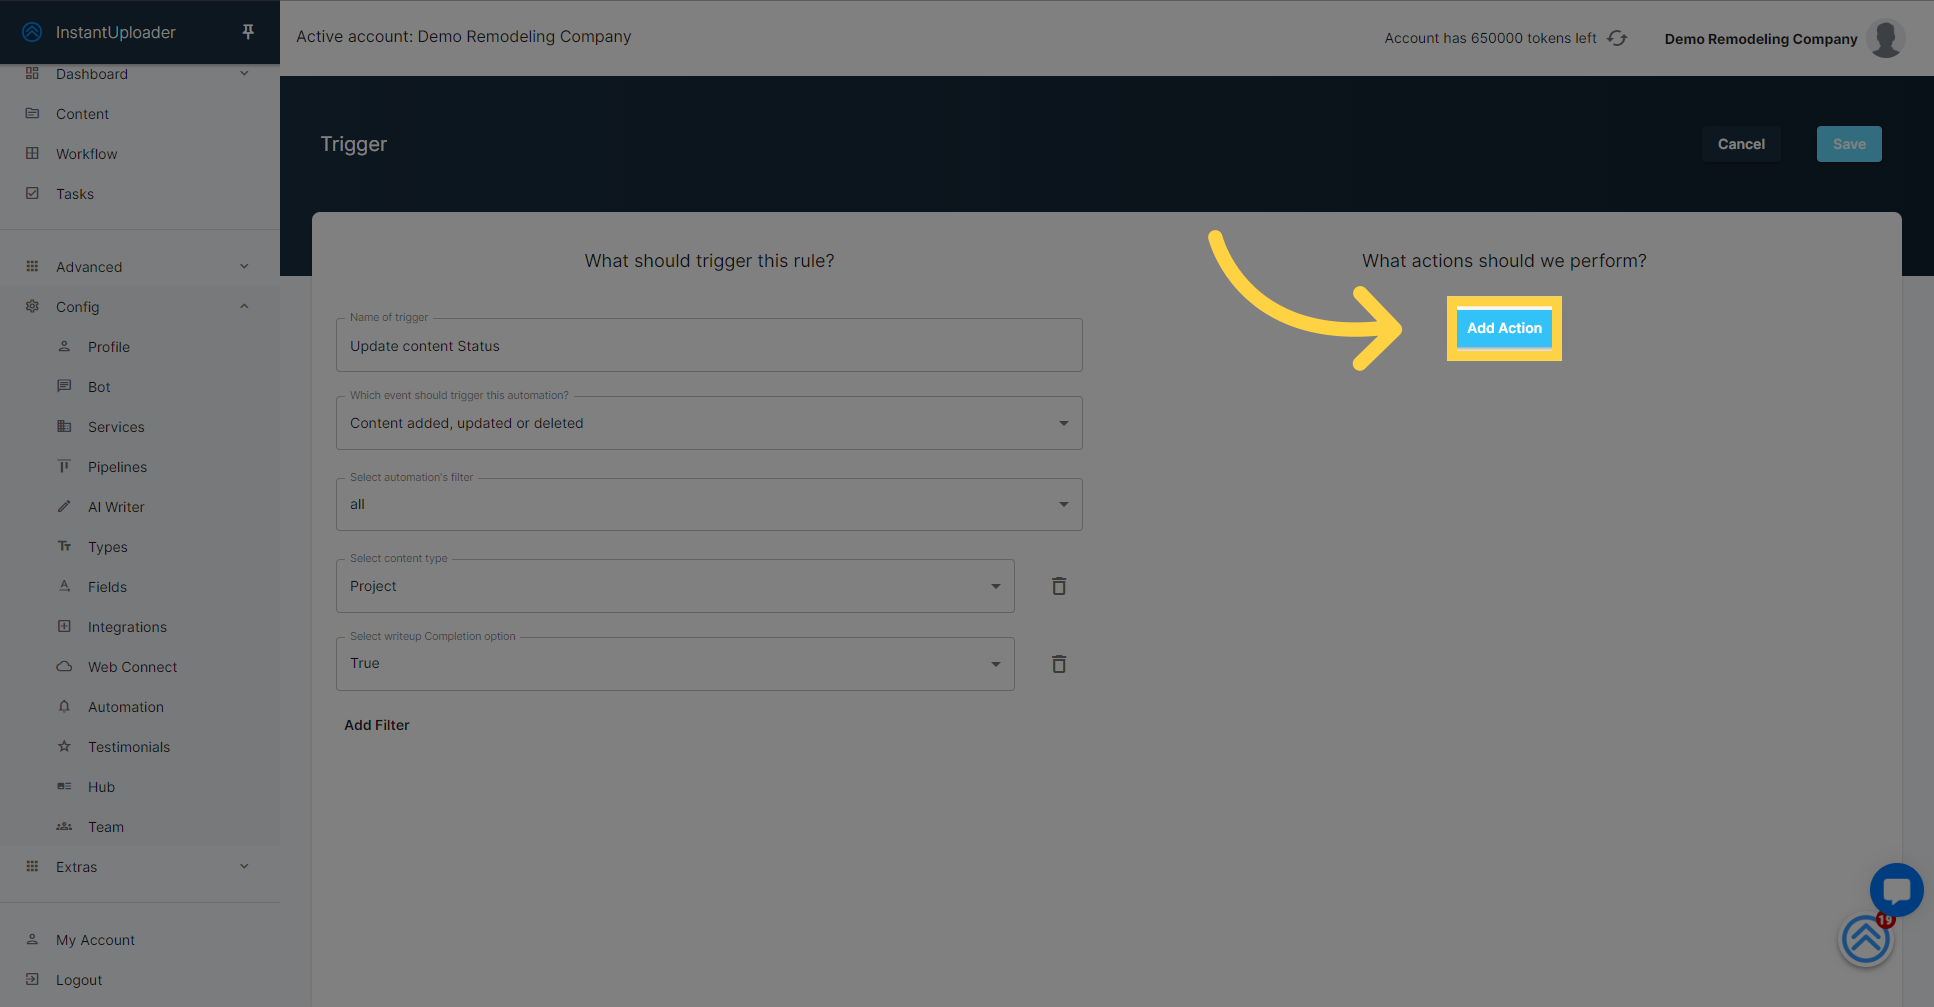
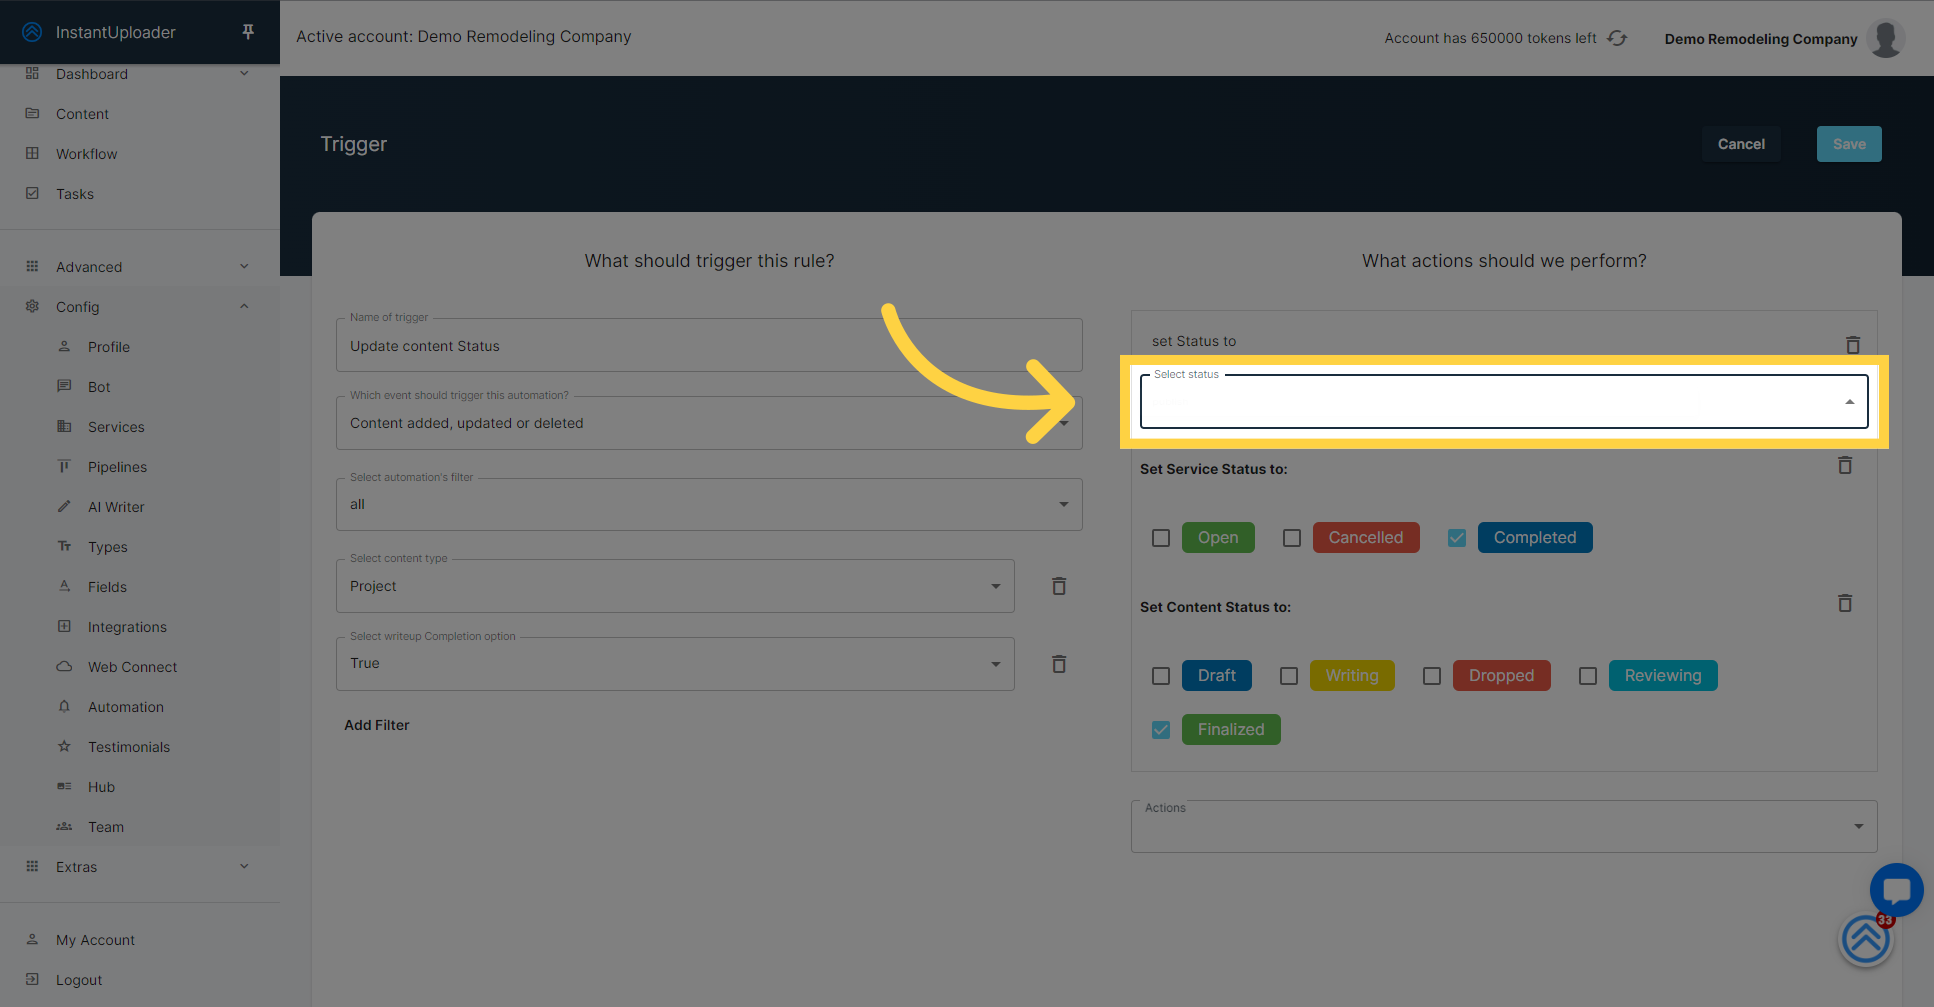
With our trigger conditions set on the left, it's time to focus on the right side of the screen, where we'll define the actions our automation will perform. Go ahead and click the "Add Action" button to start specifying what happens when your trigger fires.
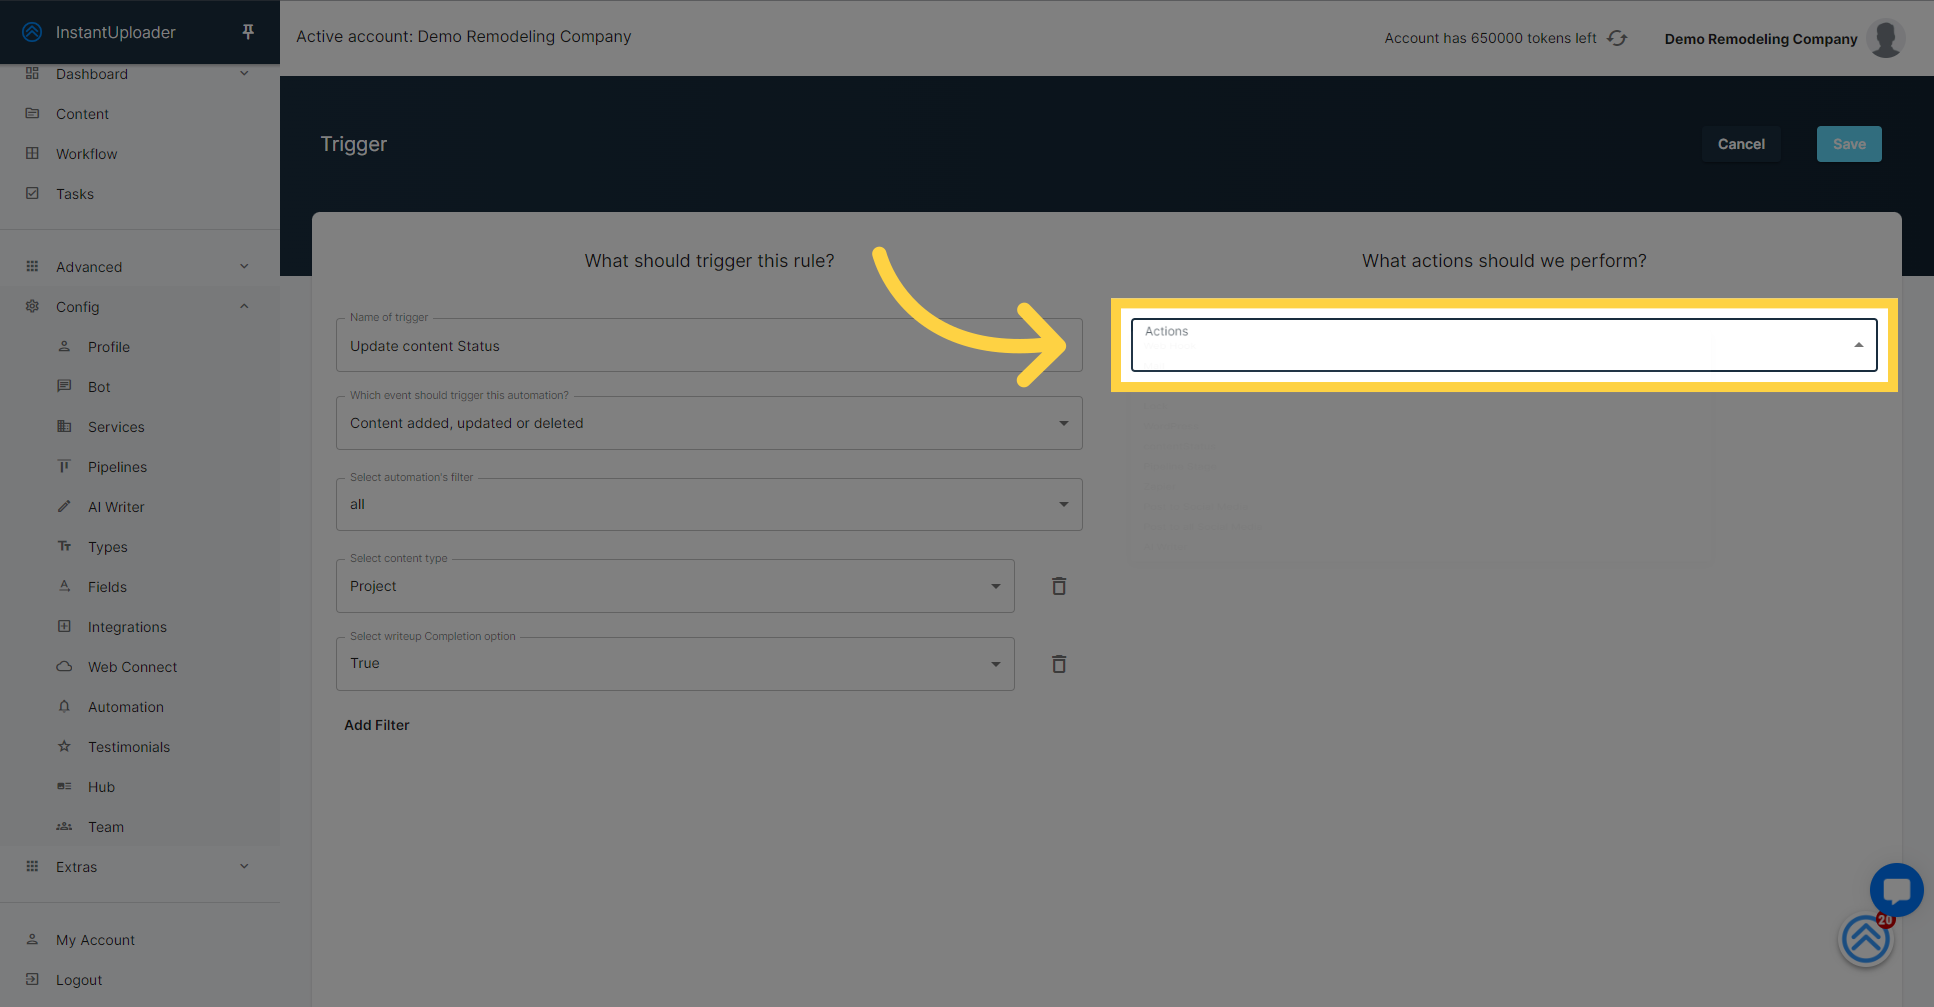
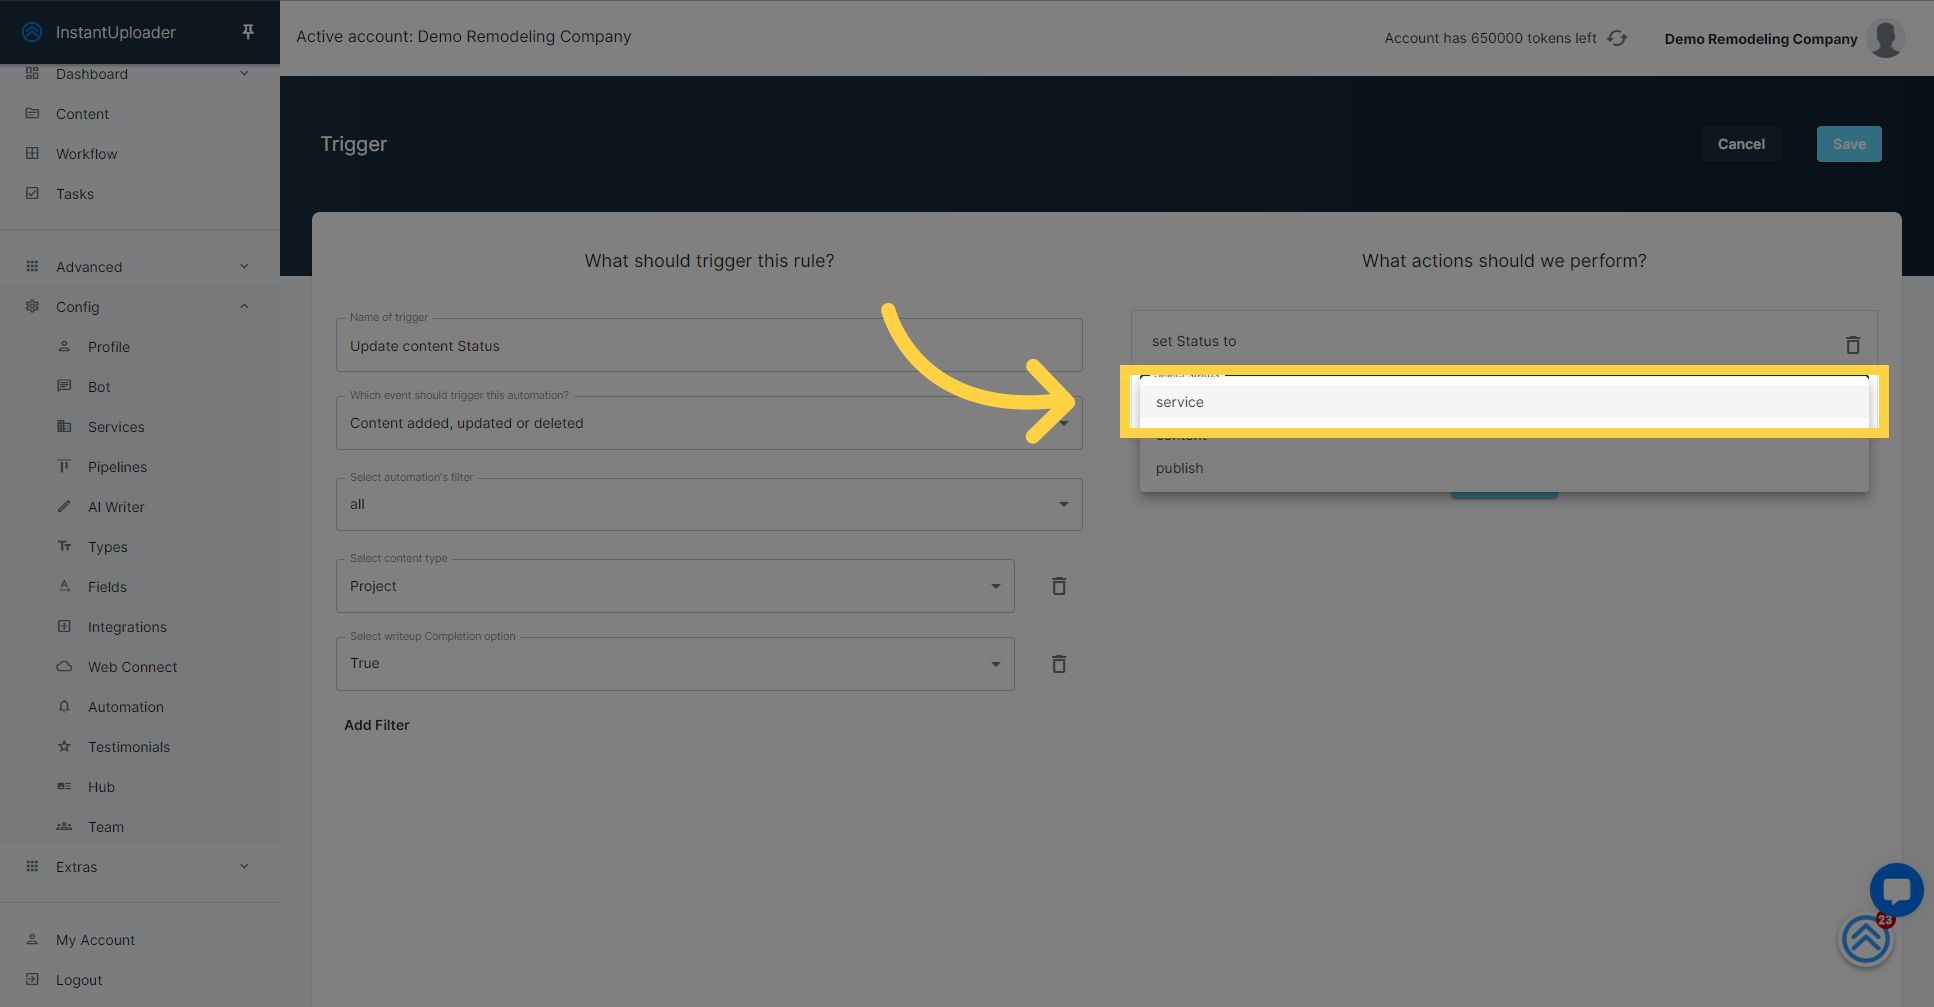
Now that you're ready to add an action, click on the "Actions" dropdown. This will reveal a list of possible actions that your automation can perform once triggered.
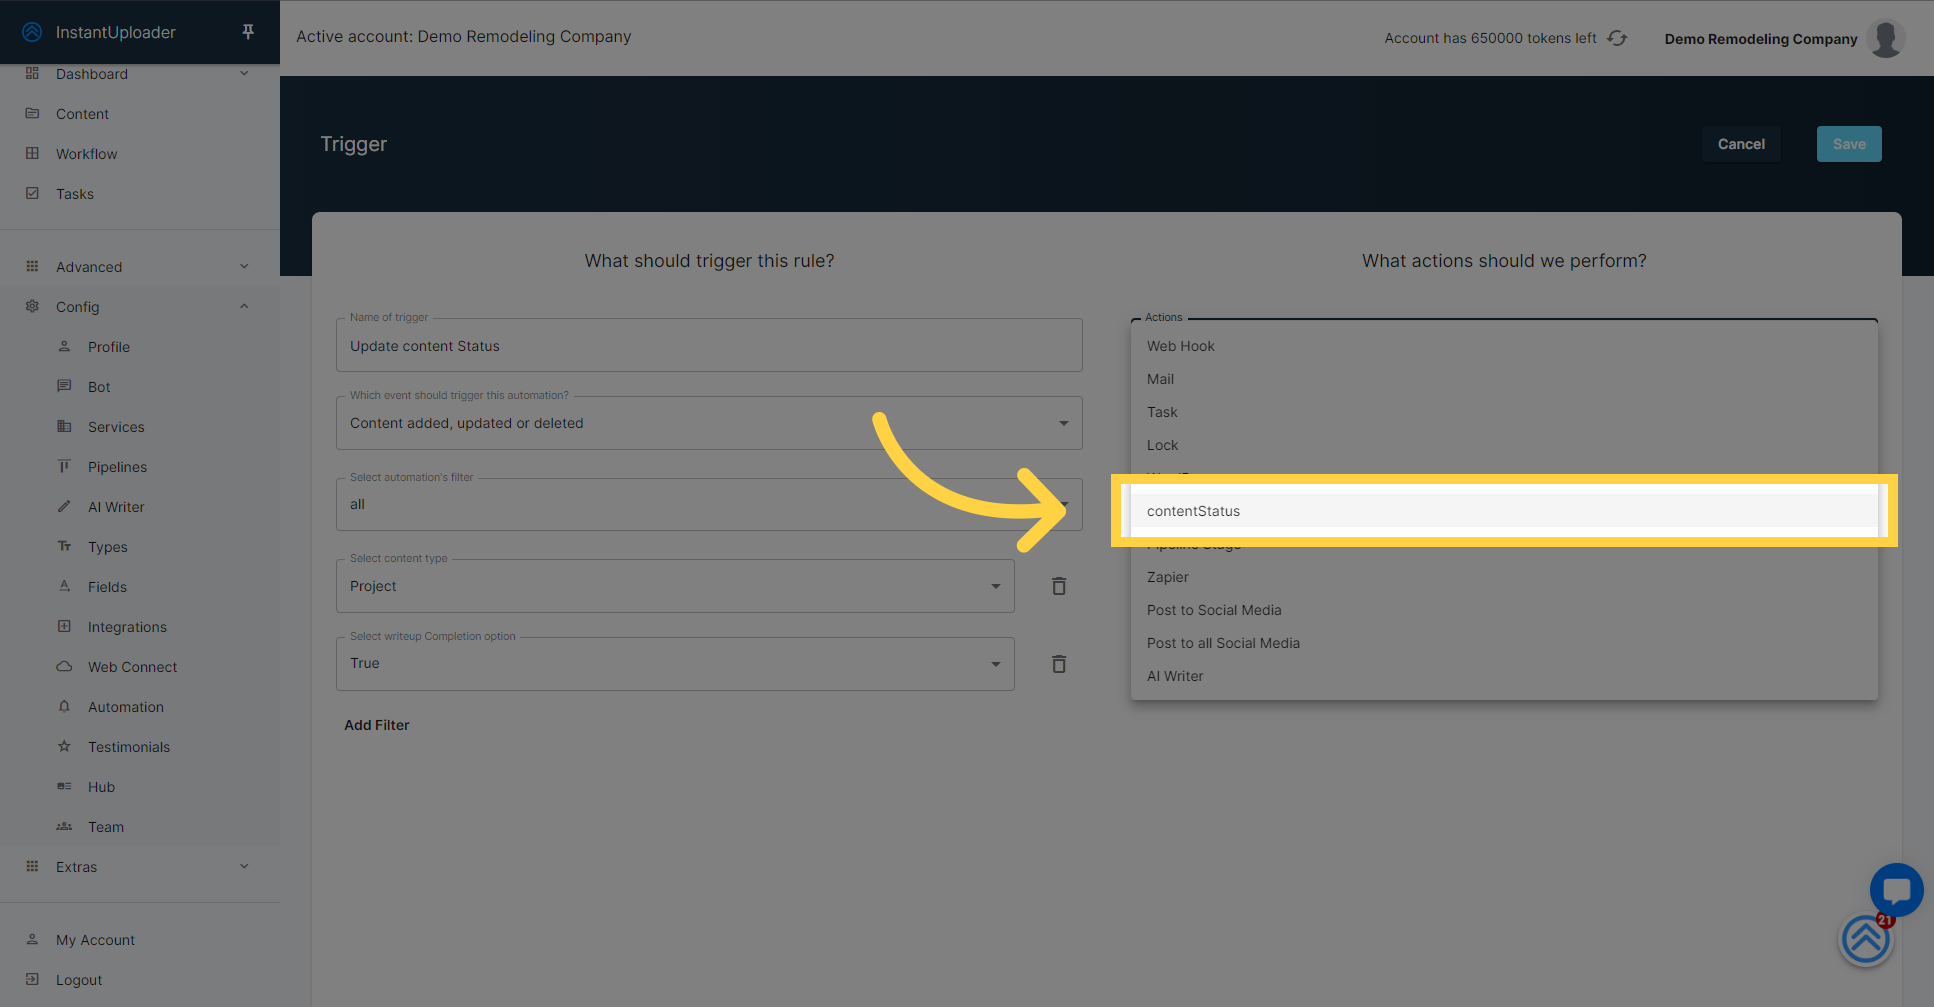
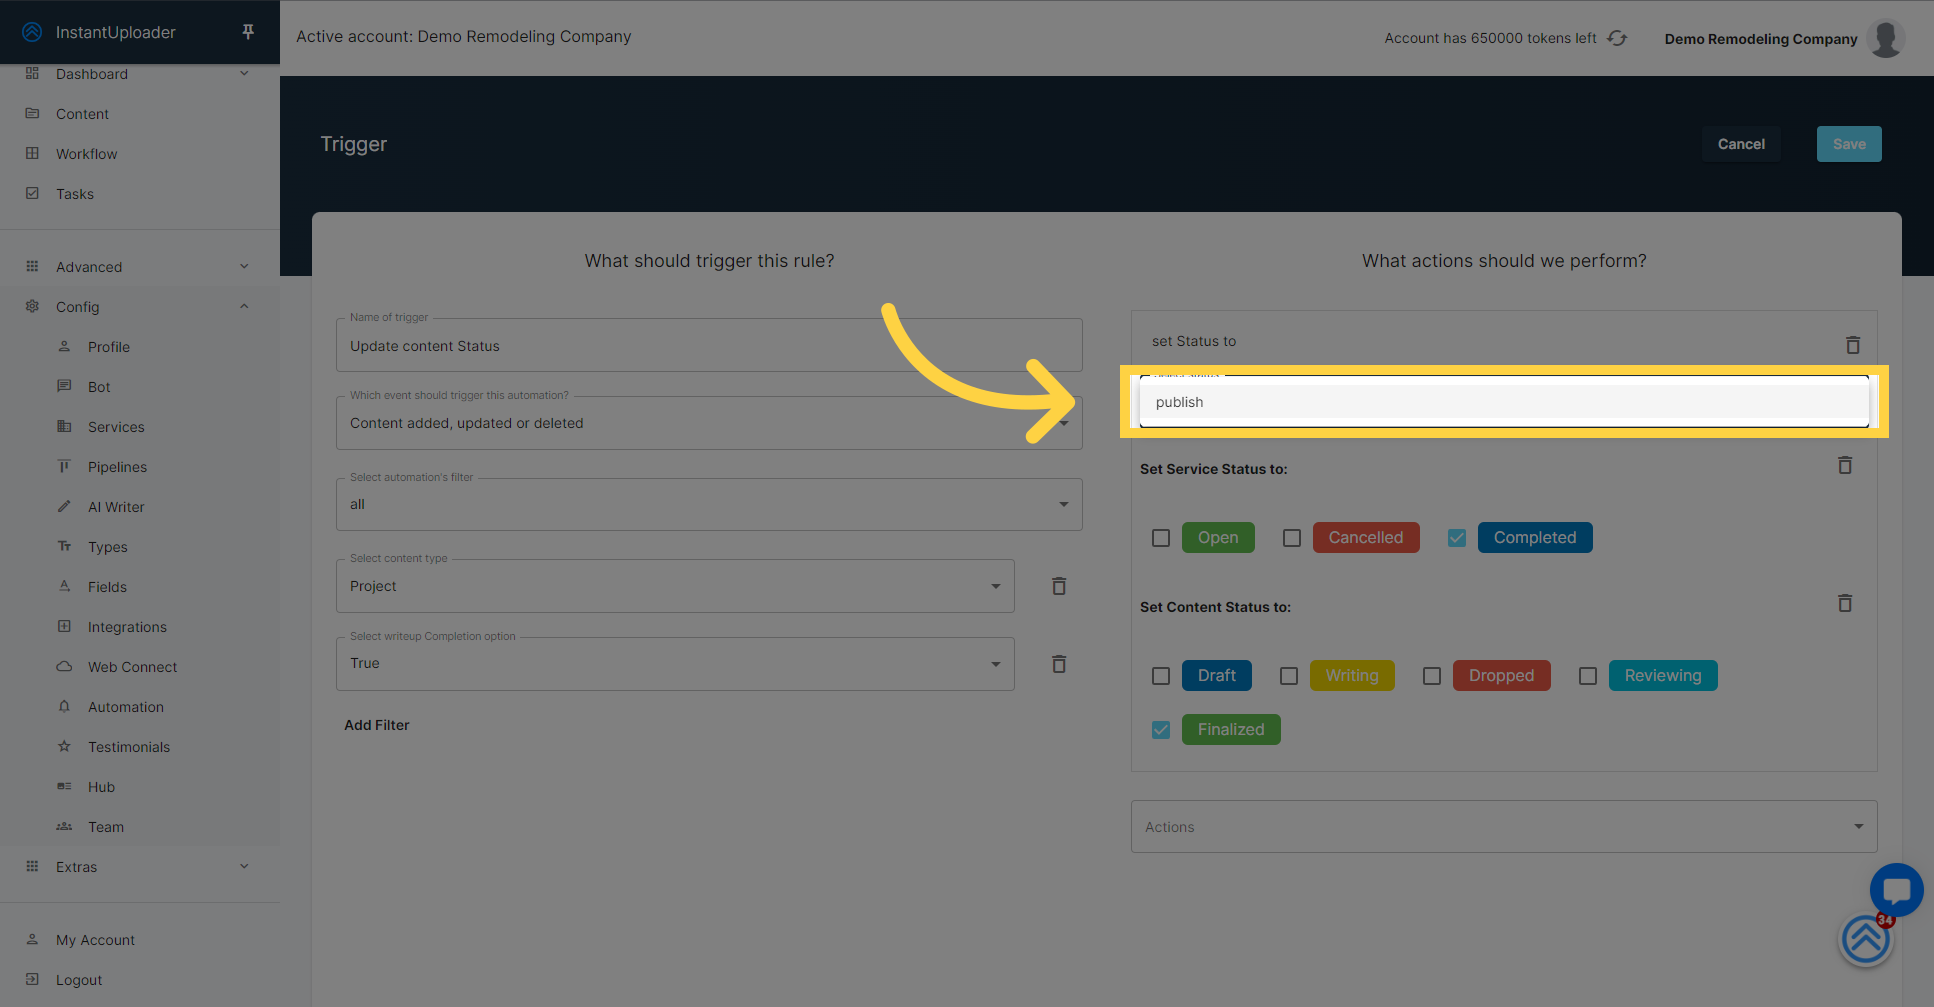
Within the "Actions" dropdown, you'll find a variety of automation actions at your disposal. For our current purpose, we're focusing on the "Content Status" option to update the status of our content. However, as you browse, note the other actions you can leverage for different automation strategies:
Web Hook
Task
Lock
WordPress
Pipeline Stage
Zapier
Post to Social Media
Post to All Social Media
AI Writer
These actions provide flexibility for a multitude of automation scenarios. For now, go ahead and select "Content Status" to continue with setting up our trigger.
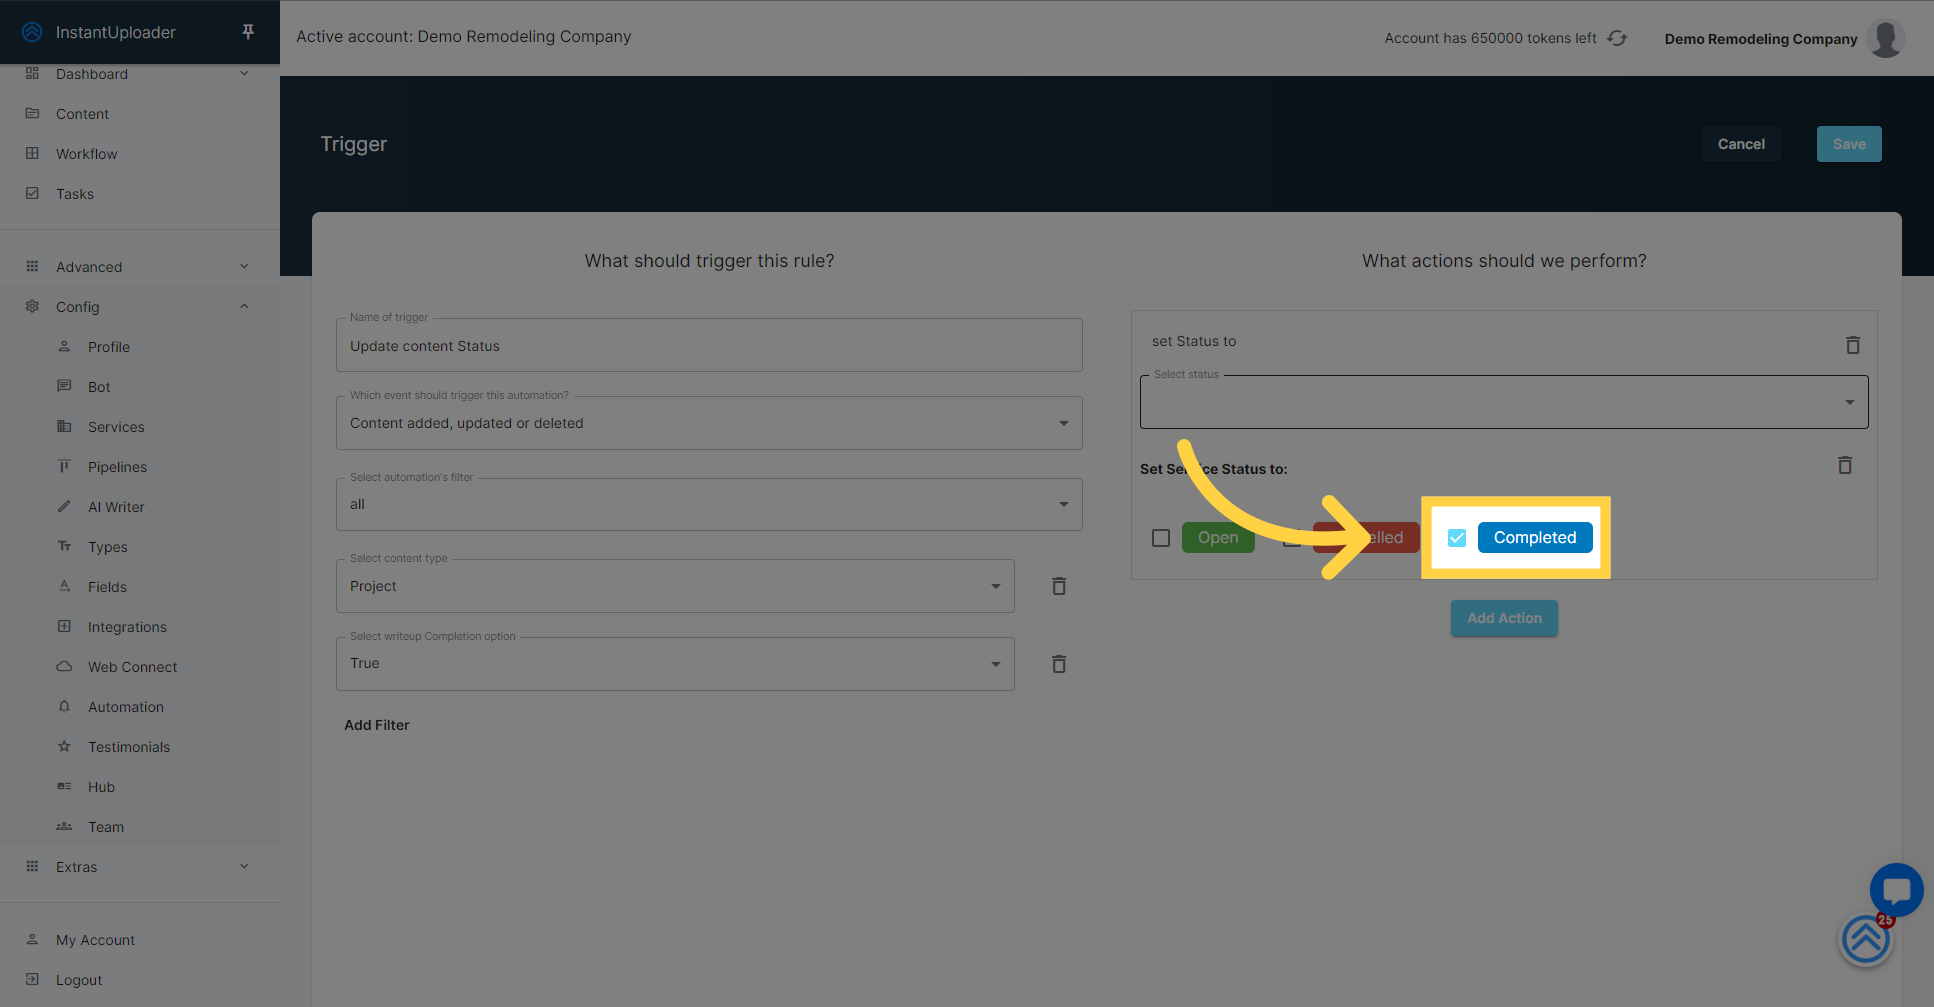
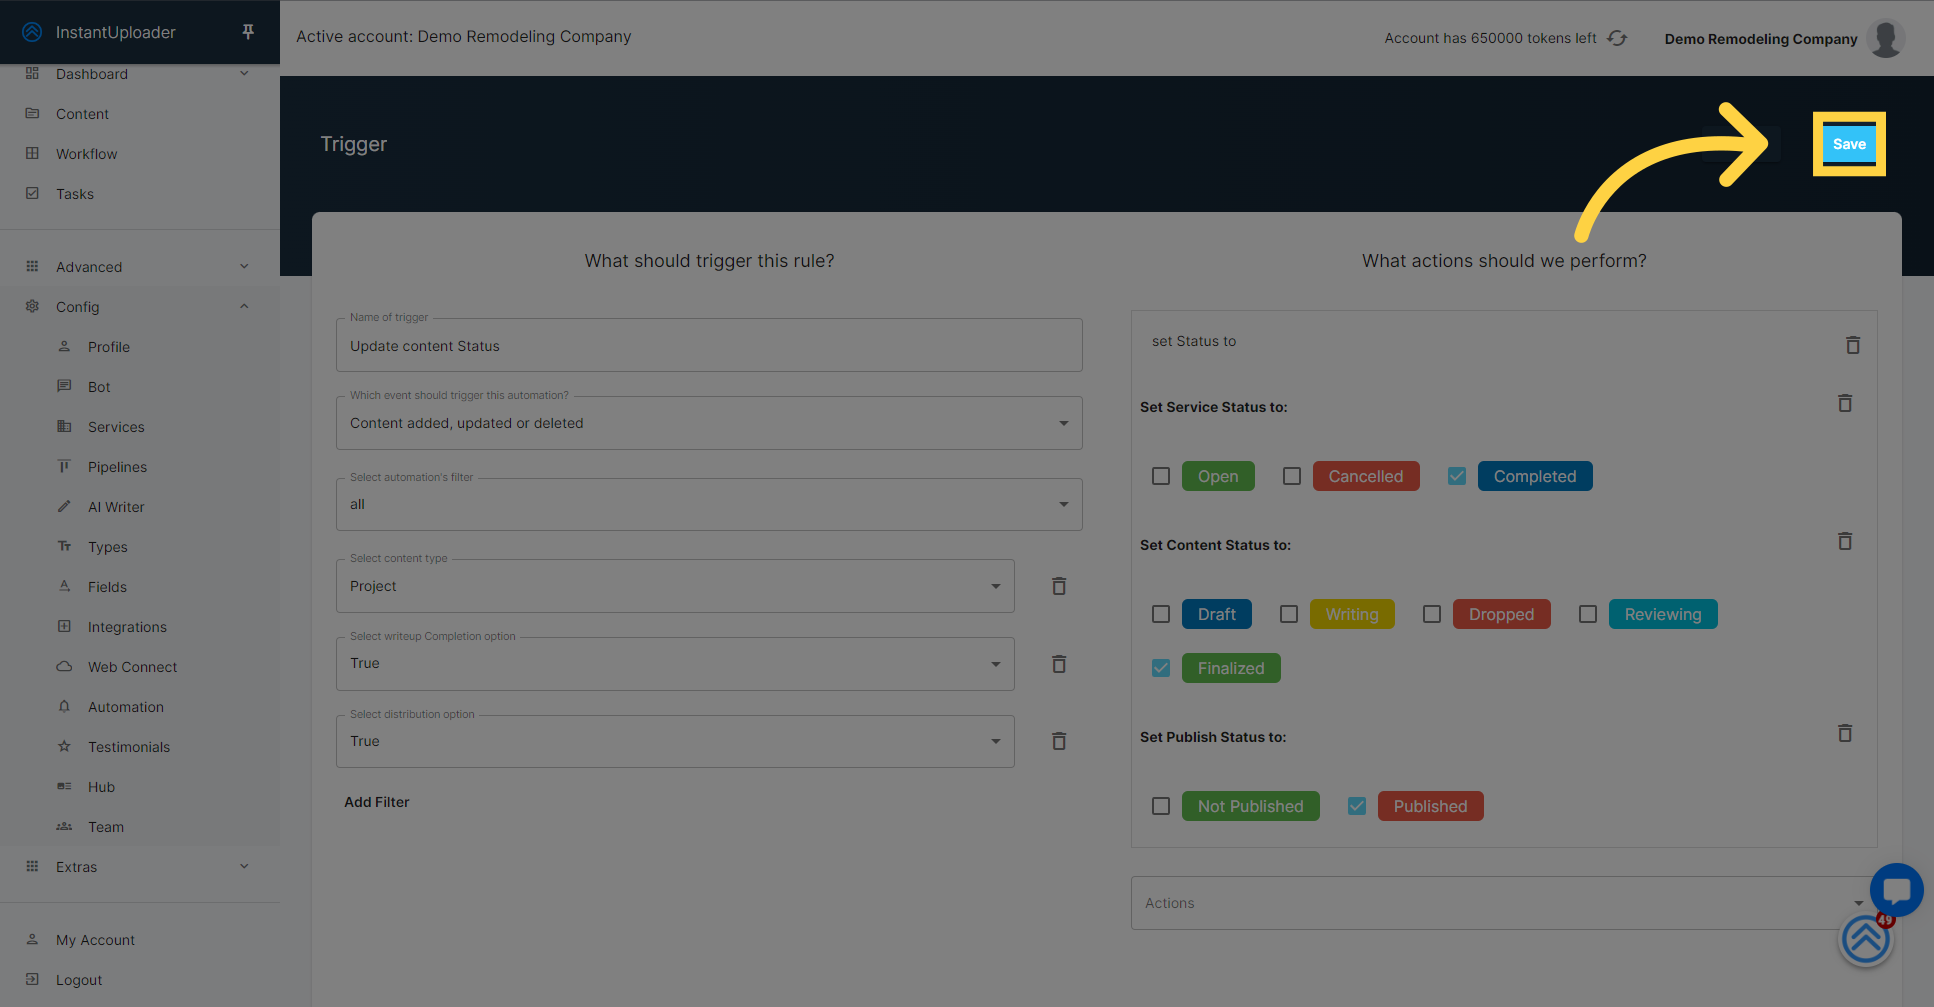
First, we'll update the status of the service associated with the content.

Find the option to set the 'Service' status.
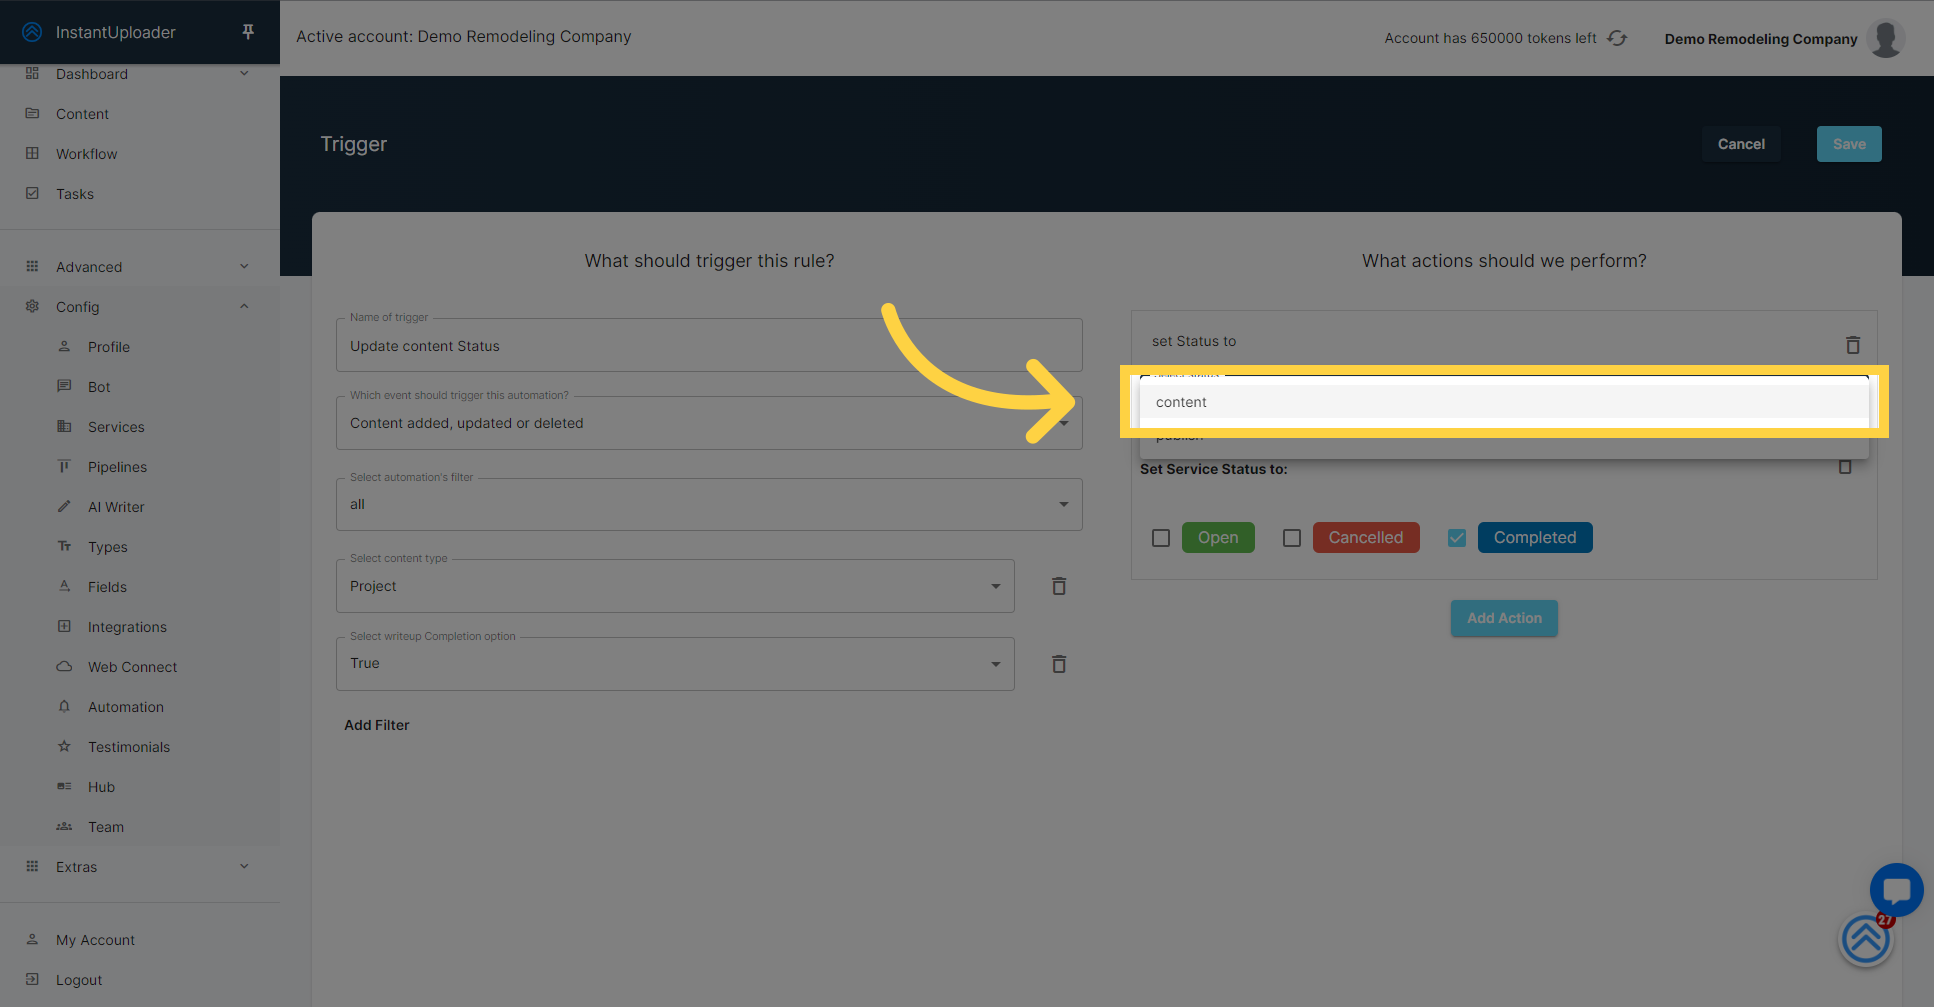
Check the status option labeled "Completed" to ensure that the service is marked as such when the trigger fires.
Next, let's define the status of the content itself.

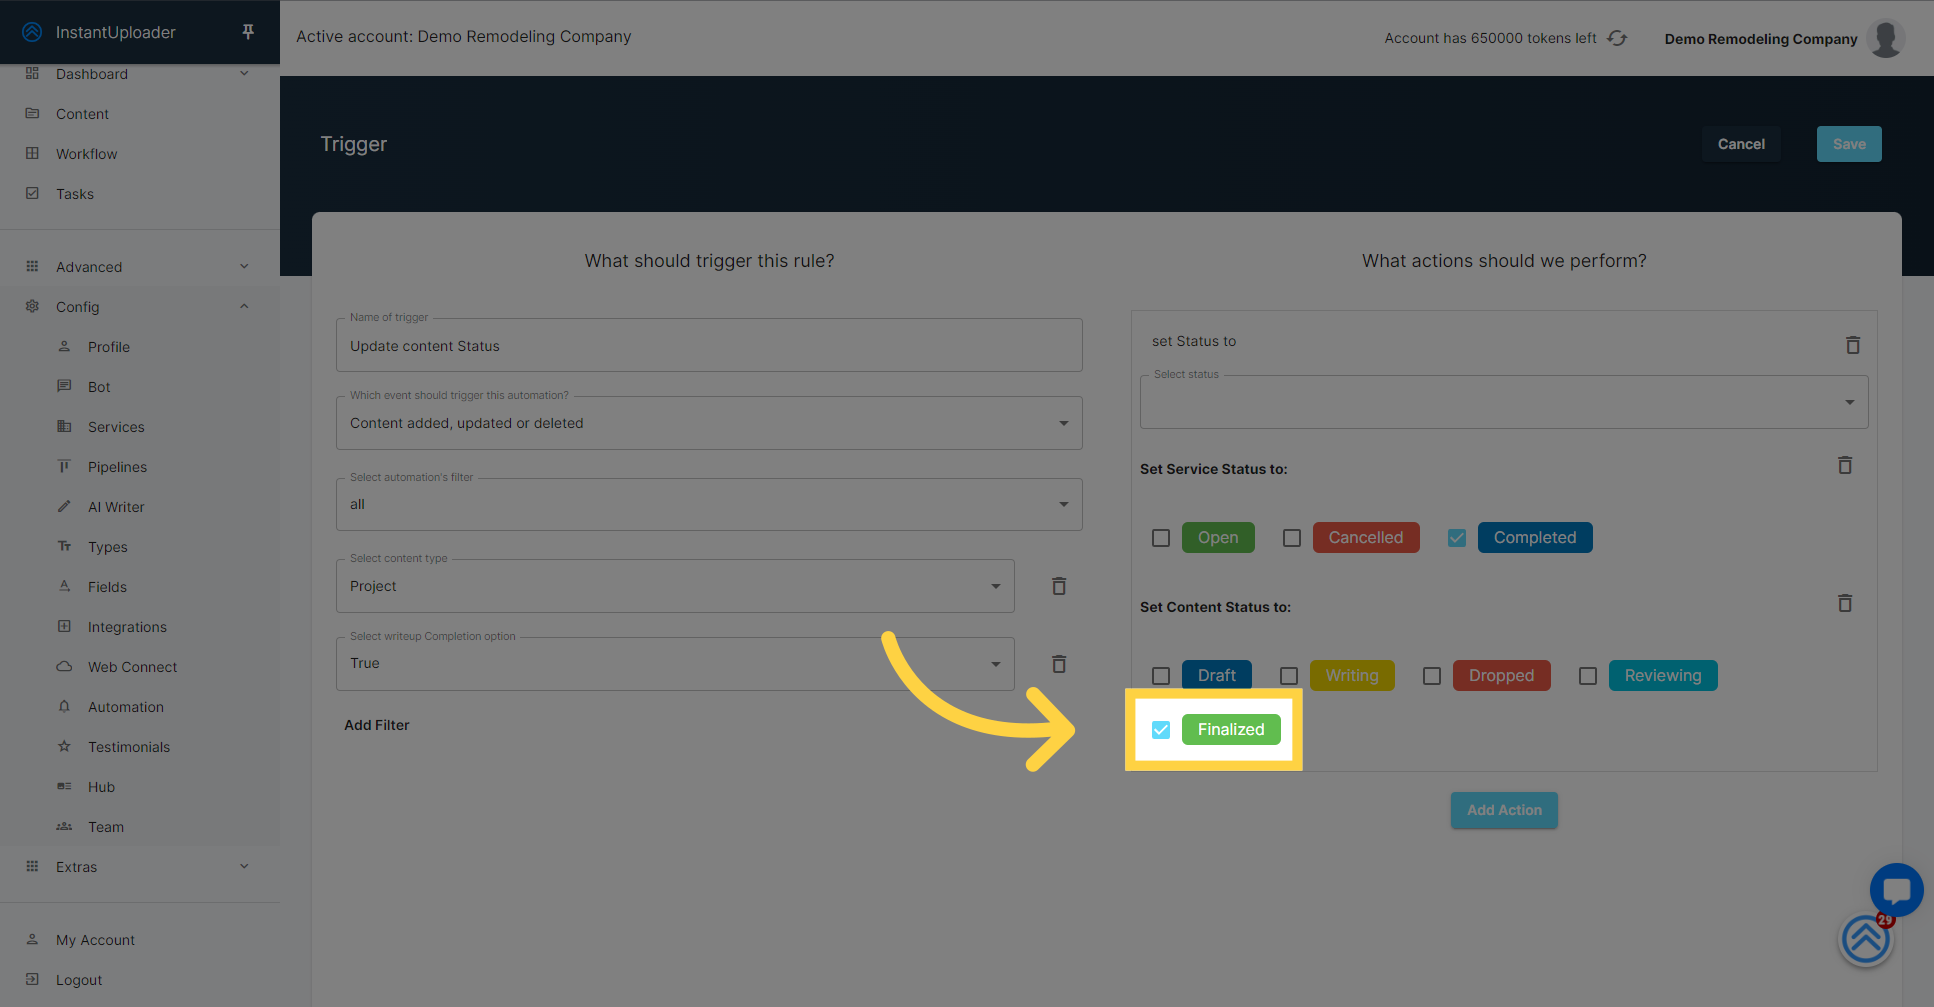
Continue through the options provided and select the 'Content' status settings.
Here, select "Finalized" to indicate that the content has reached its final stage in your workflow upon activation of the trigger.
Lastly, we'll specify the publication status.
Select the 'Publish' status.
Choose "Published." This will mark the content as officially published on your website or platform once the trigger conditions are met and the automation executes.

With all statuses set, you're ready to finalize your automation. Click the "Save" button to store the trigger and its associated actions. Your automation is now configured and ready to streamline your workflow.
Congratulations, you've successfully created a custom workflow automation! By meticulously setting your triggers and actions, you've tailored an efficient process that updates content statuses automatically upon distribution. Your new automation is now in place, ready to enhance productivity and ensure seamless content management. Remember, this is just the beginning—explore further to discover the full potential of automations within our platform.
