Welcome to our step-by-step guide on collecting client video testimonials. In this journey, you'll learn how to empower your clients to share their experiences in a way that's engaging and easy. Video testimonials are a powerful tool for building trust and showcasing the real-world impact of your services. We'll guide you through each stage of the process, from initial request to sharing on social media and featuring on your website. Get ready to amplify your business's success with the authentic voices of your satisfied clients. Let's get started!
Note: If you haven't already done so, please first go through the Testimonial Configuration Section of this Guide to ensure you're fully prepared to make the most of this video testimonial collection process.
Begin by navigating to the Applications menu on your platform. From there, locate and click on the "Content" option to access the content management screen.
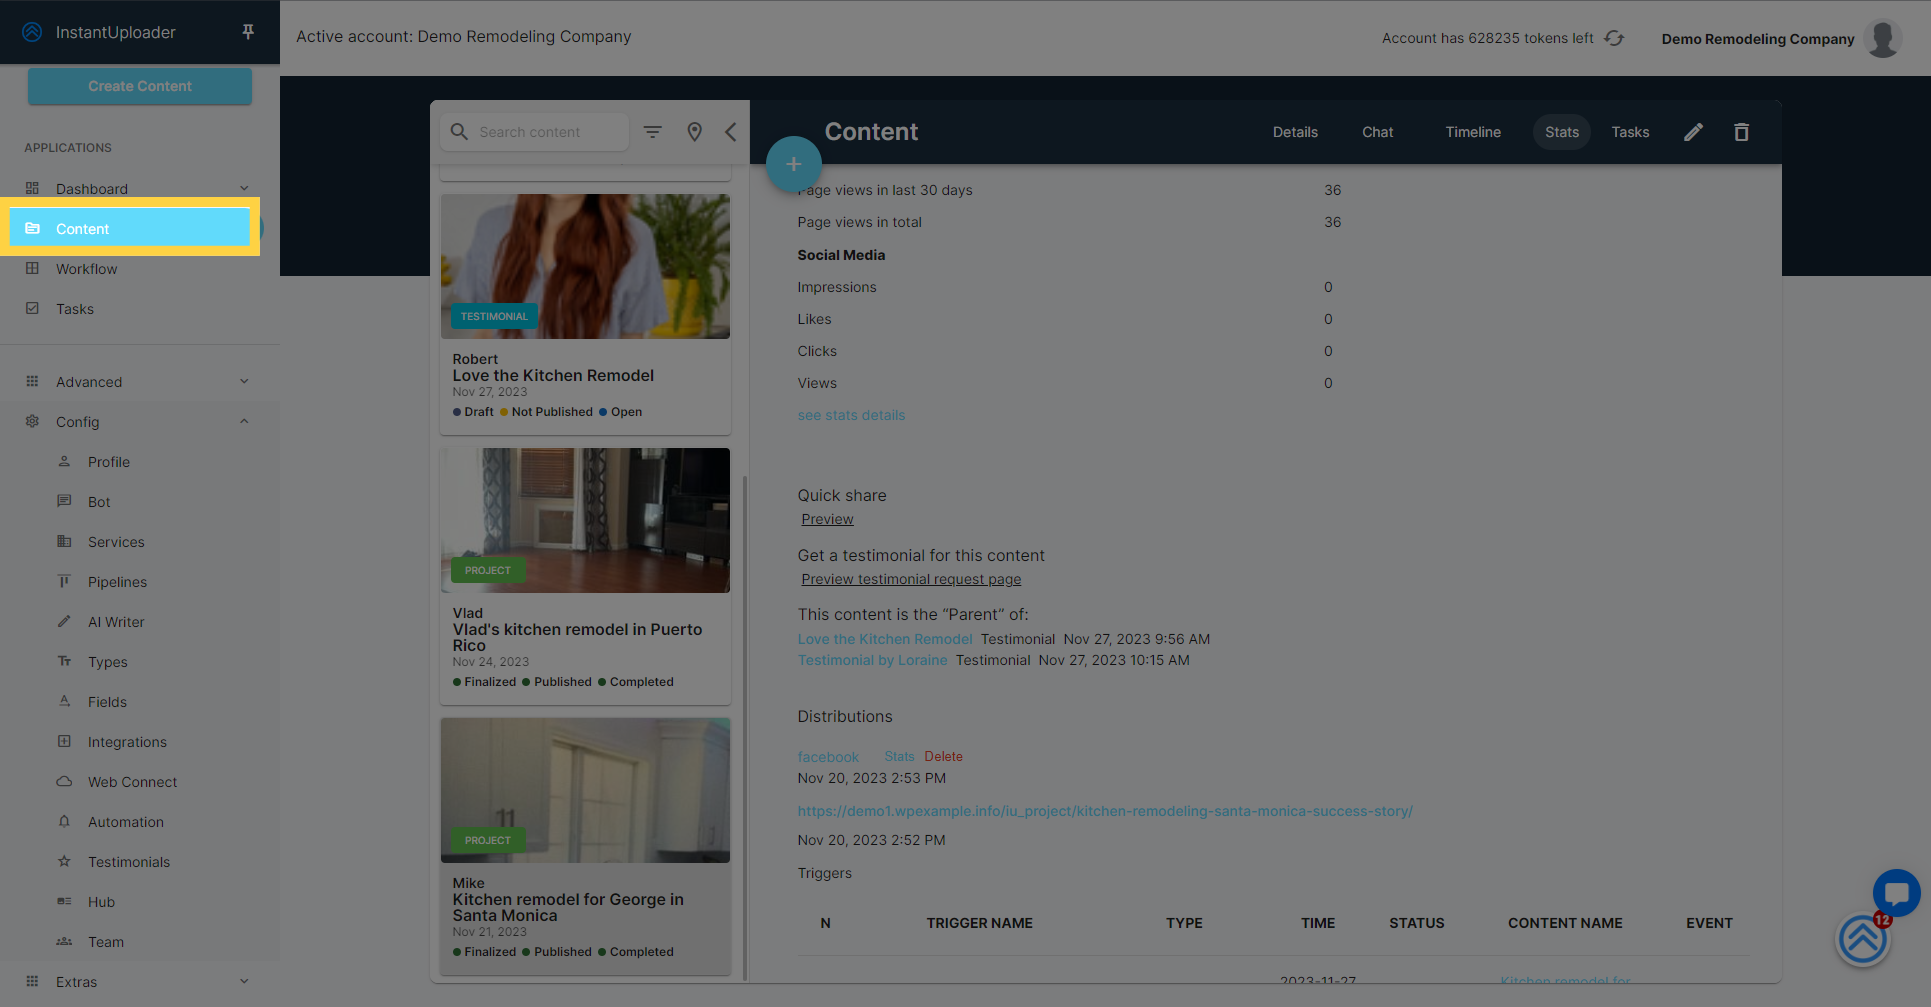
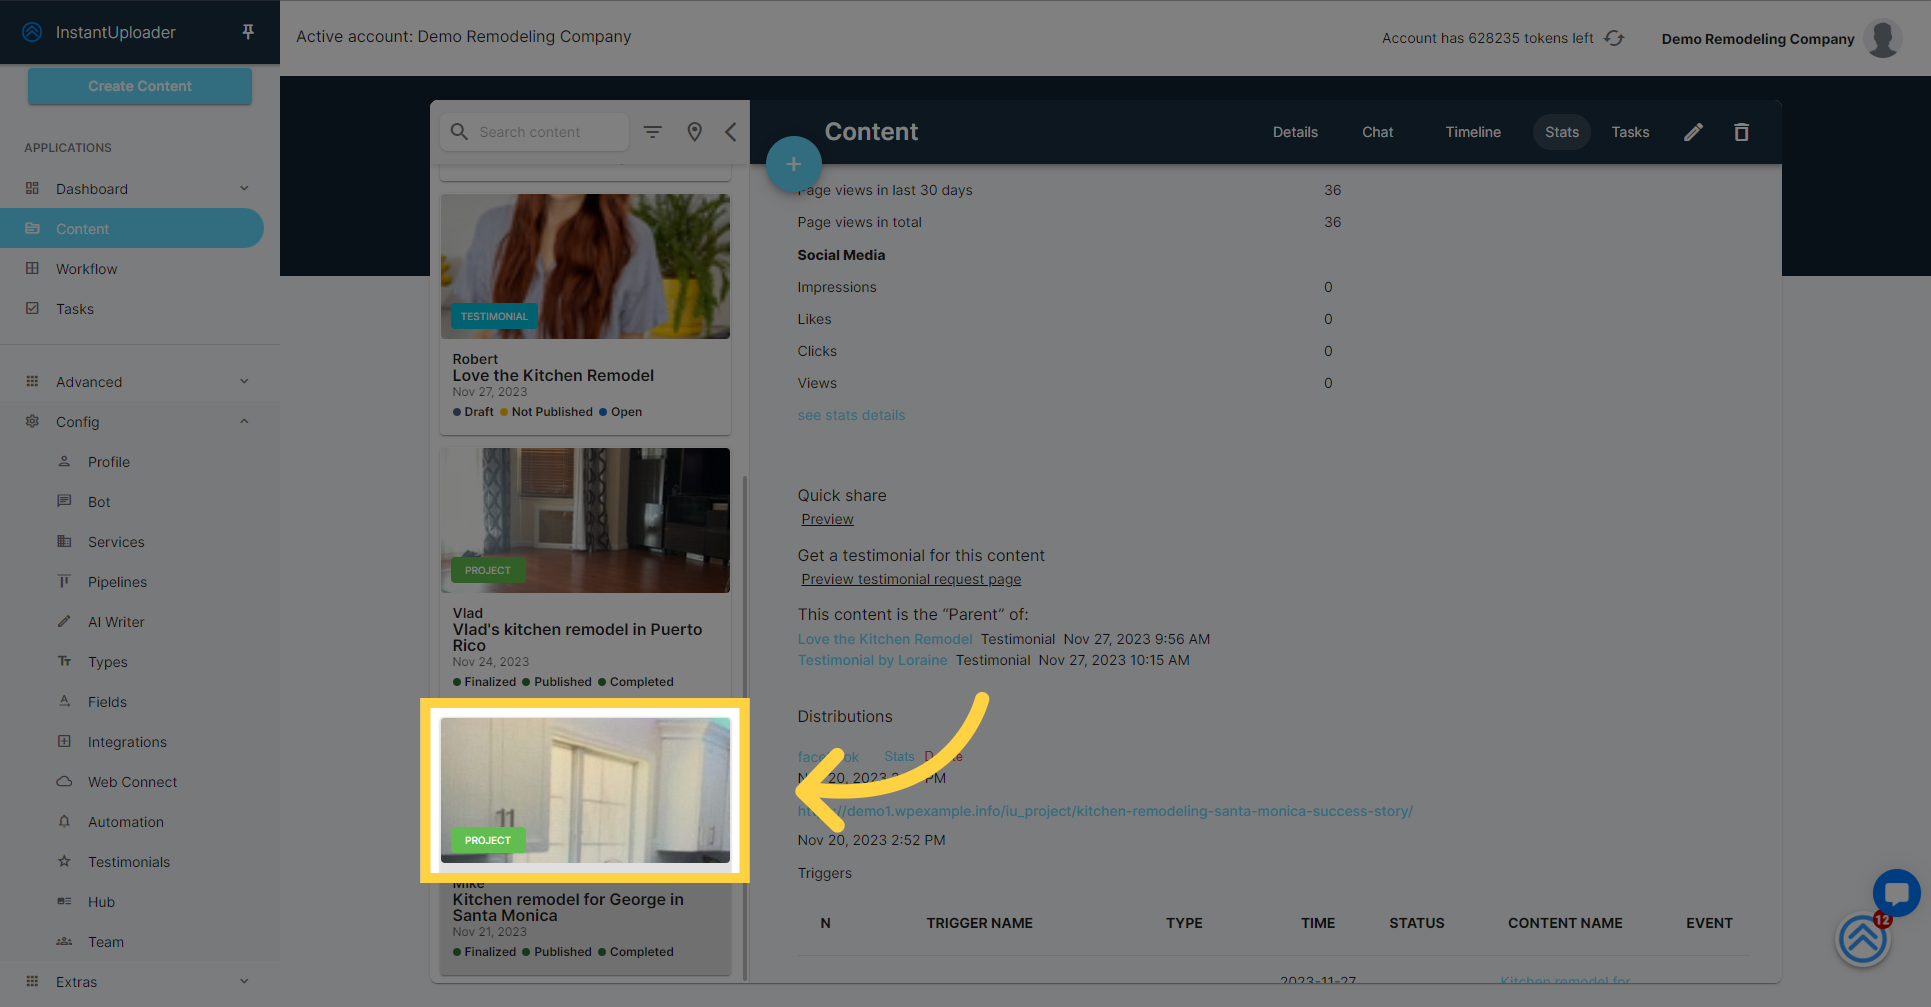
Within the content screen, you'll see a list of your projects. Click on the specific project for which you wish to collect testimonials.
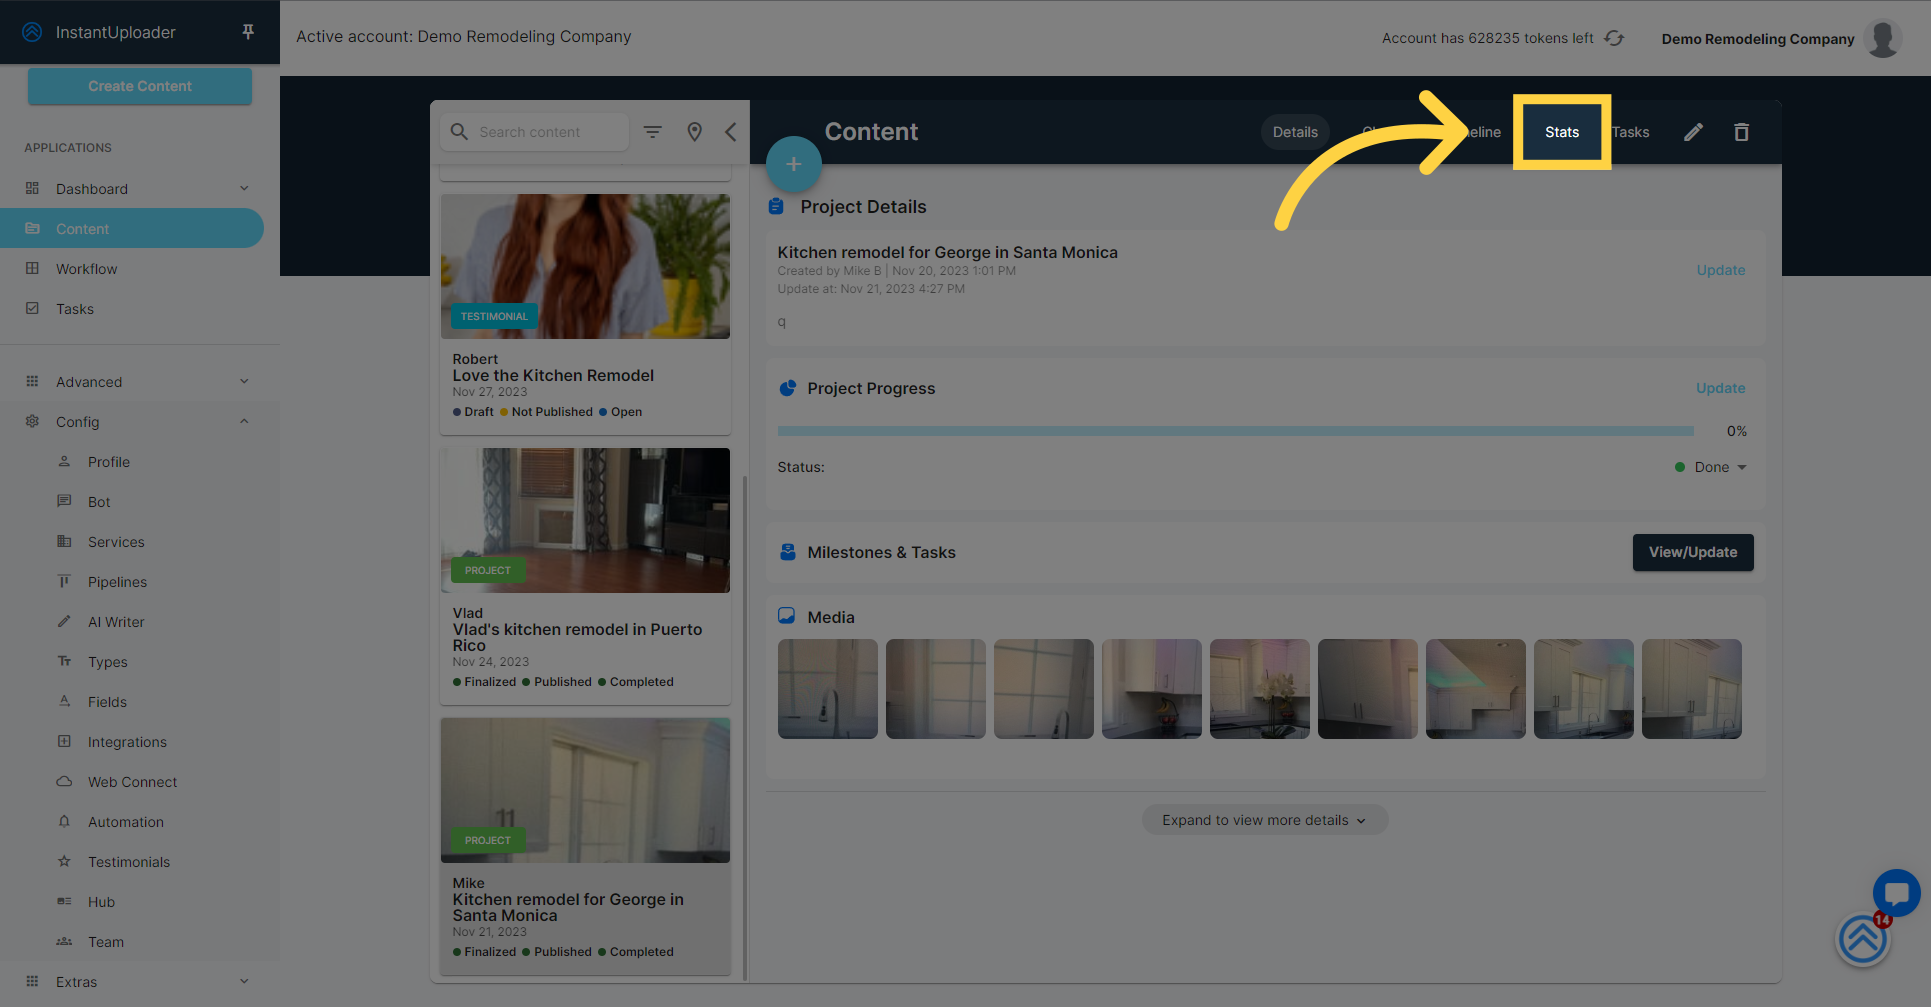
After selecting your project, go to the "Stats" tab. This section will provide you with various statistics and options related to the chosen project, including the tools to request and manage testimonials.
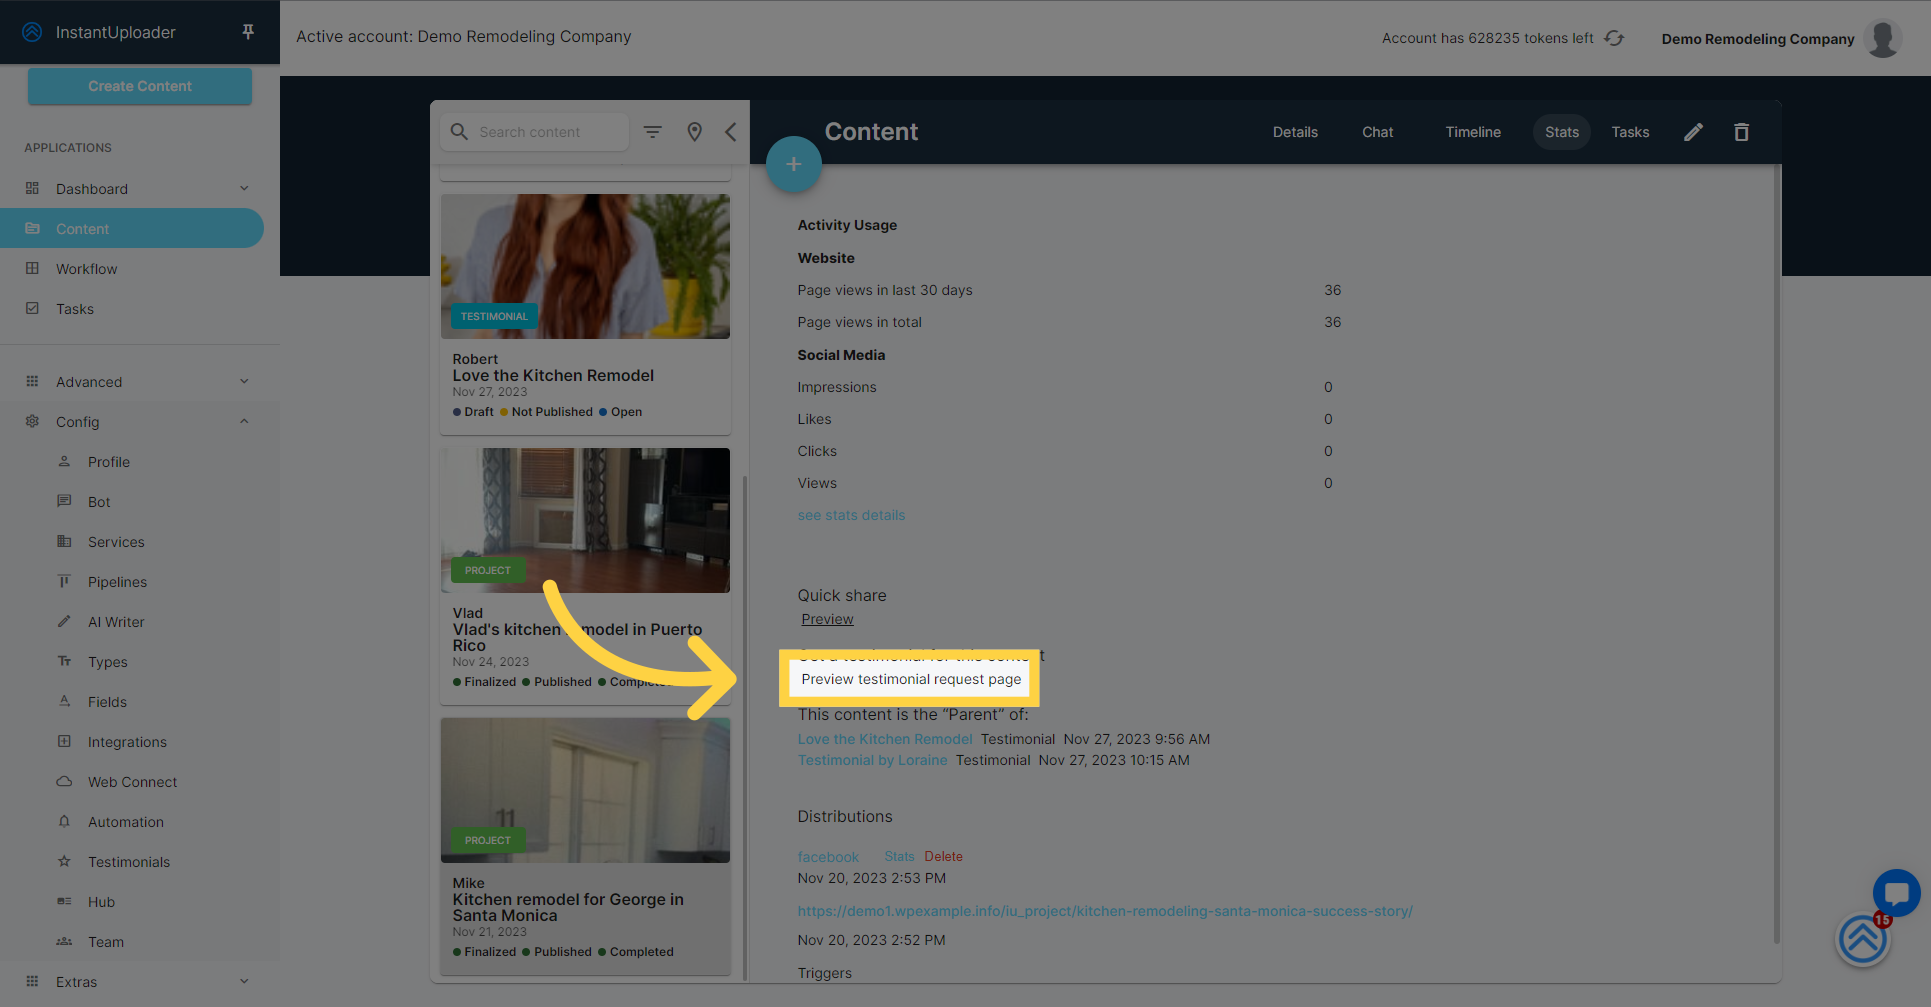
Click "Preview testimonial request page" to view what clients will see on their devices. This is the link you'll share for video testimonials.
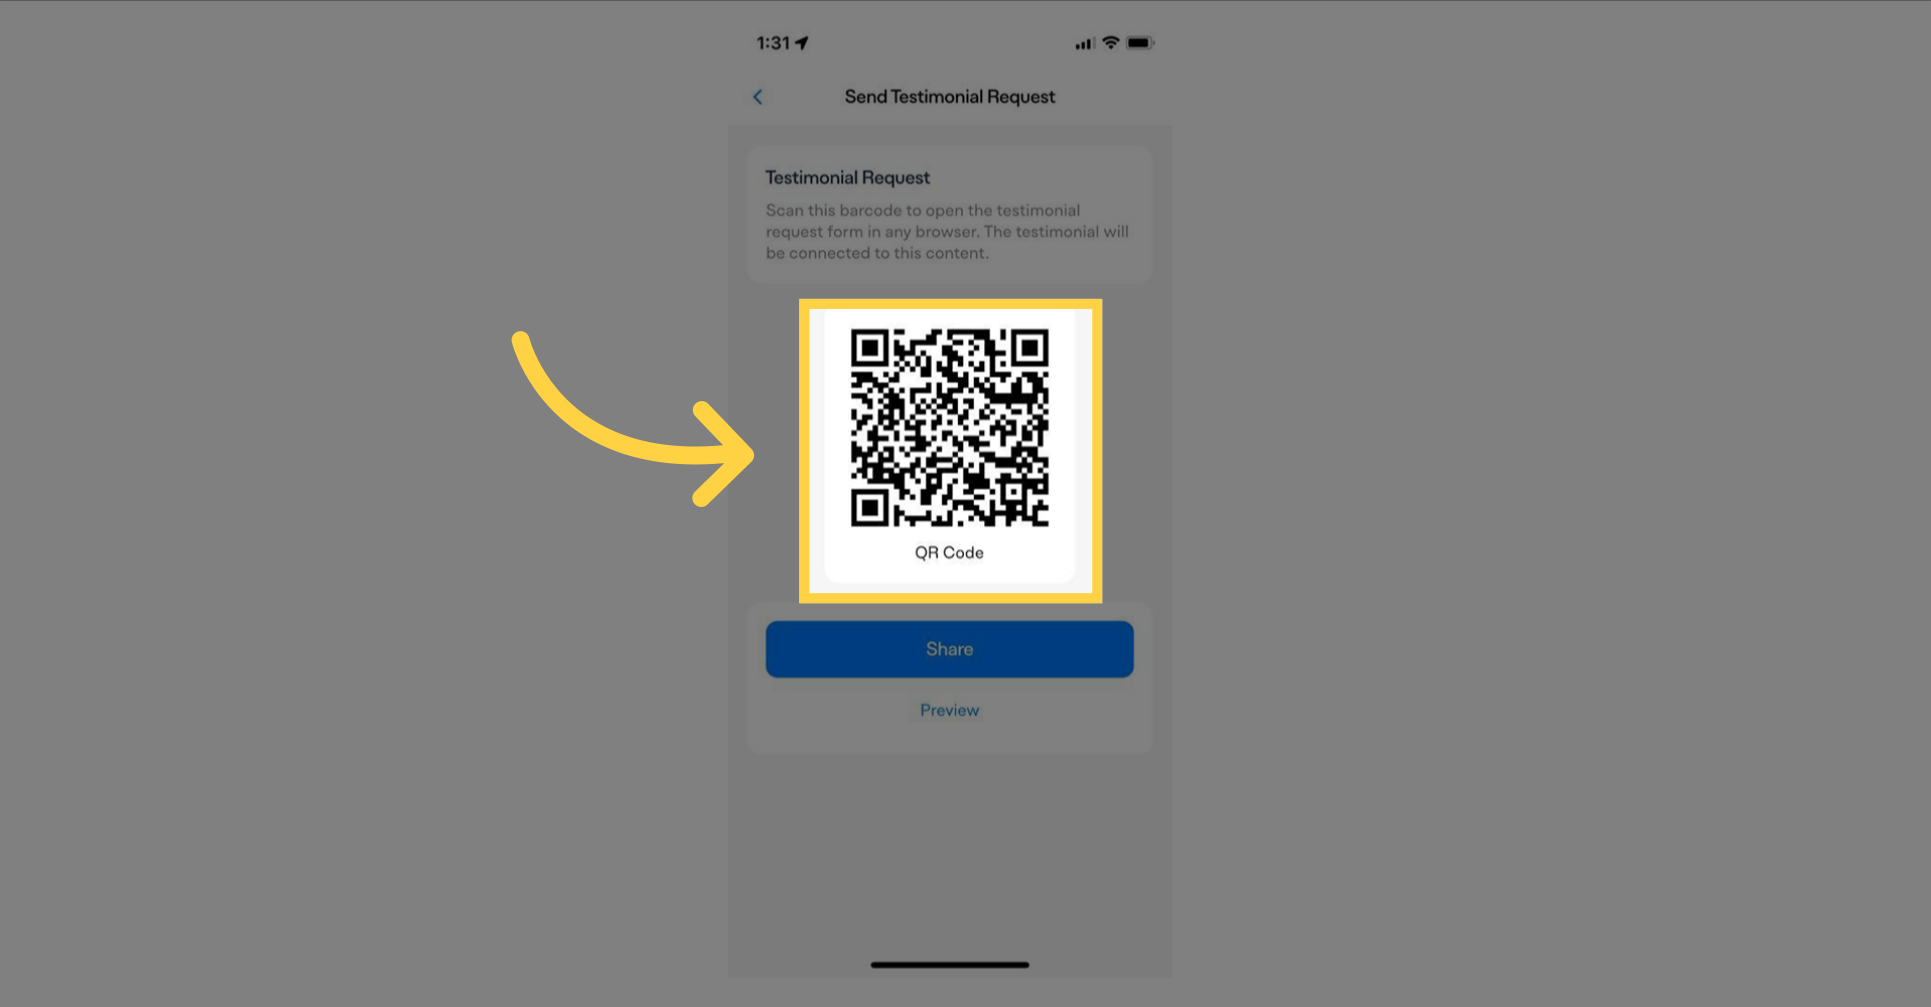
For mobile users, show the QR code from the "Testimonials" tab in your project details screen. Clients scan it with their camera to leave a testimonial.
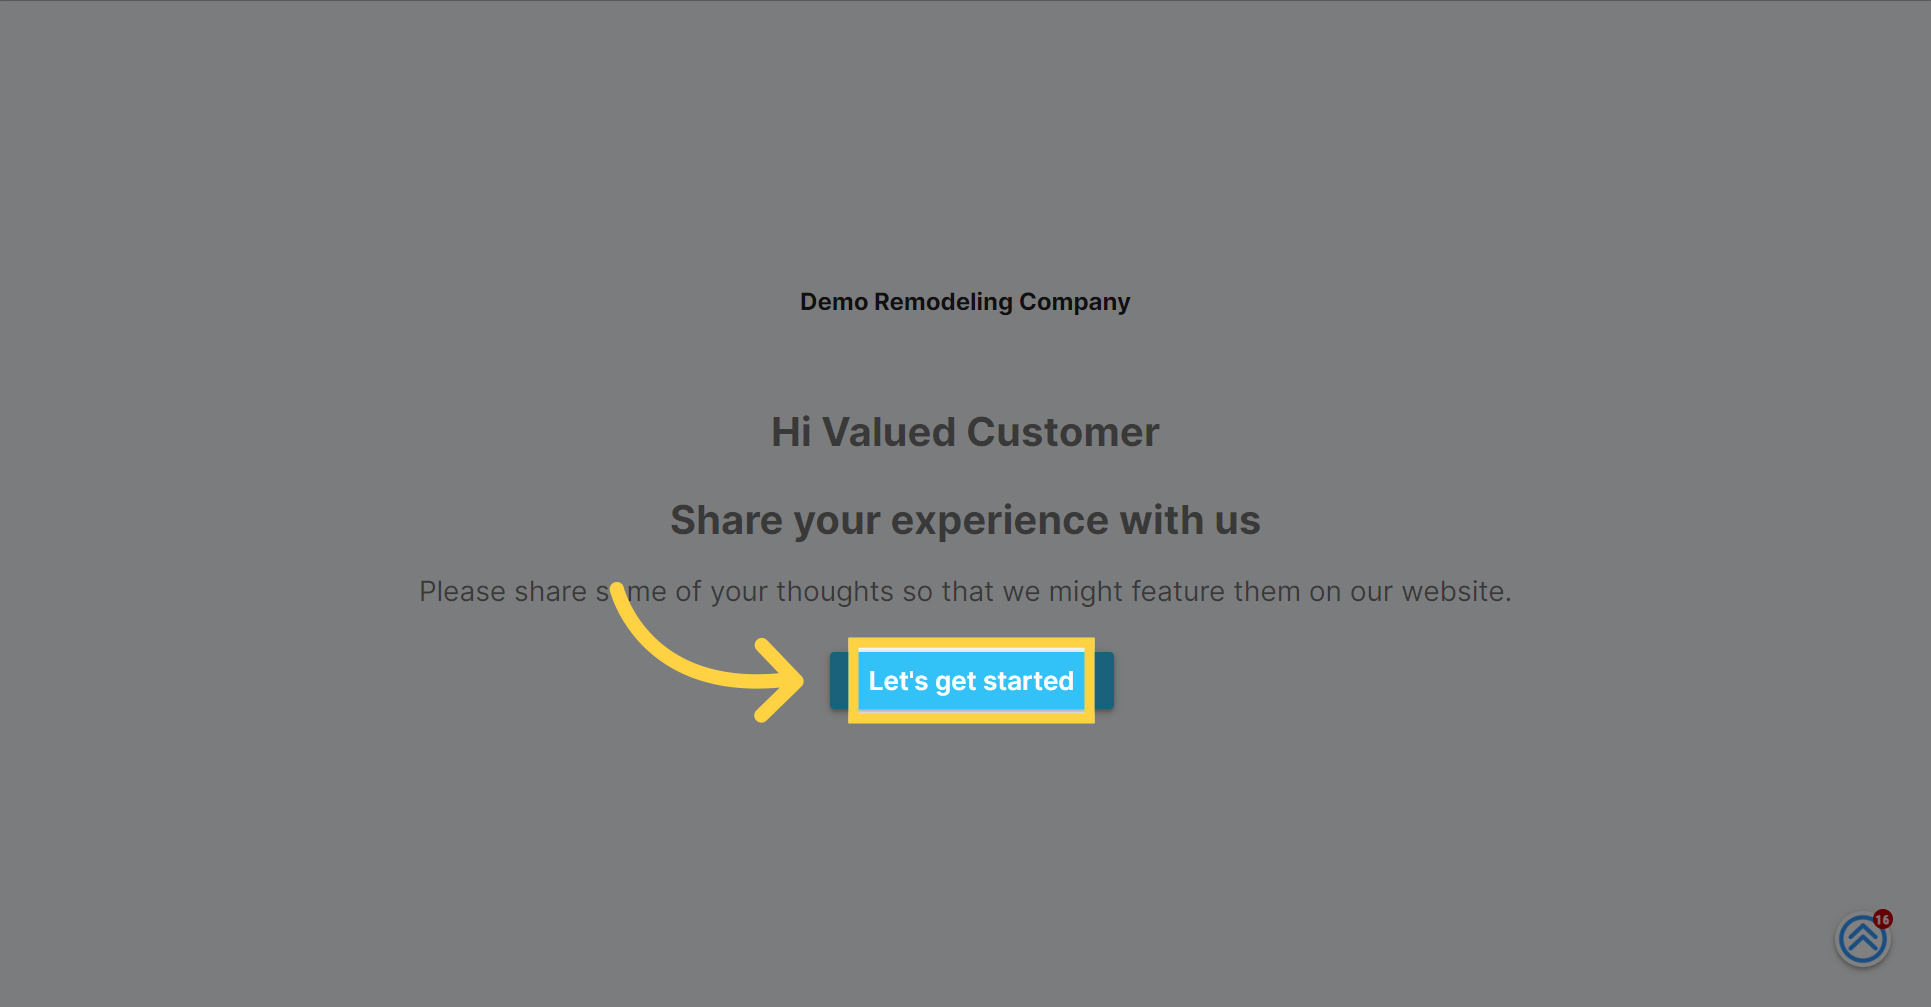
As your client accesses the testimonial link on their desktop, they'll encounter a "Let's Get Started" button. Encourage them to click this button to embark on the testimonial submission journey.
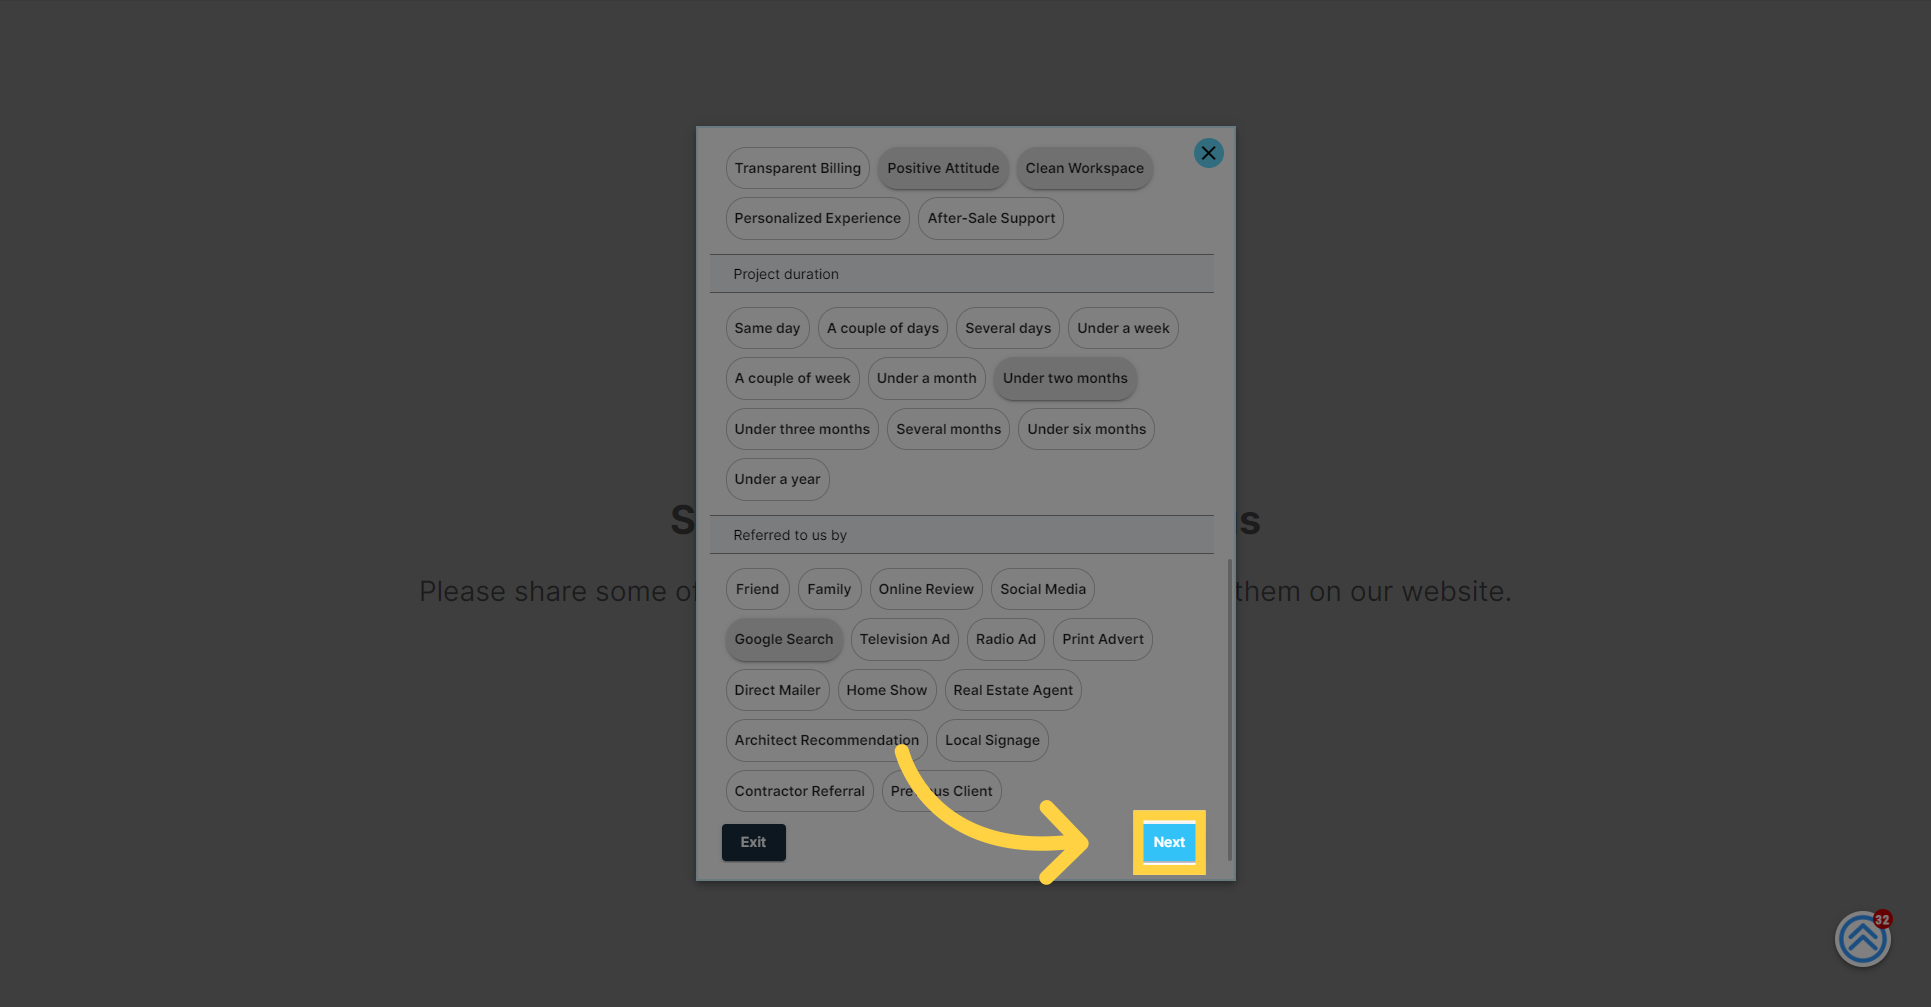
Upon starting, your client will be prompted to fill out a questionnaire. These questions, which you have either customized or selected from a template, are designed to capture their experience and thoughts about your service.

Once your client has provided their responses in the questionnaire, they can click the "Next" button to complete the survey and proceed to the subsequent step.
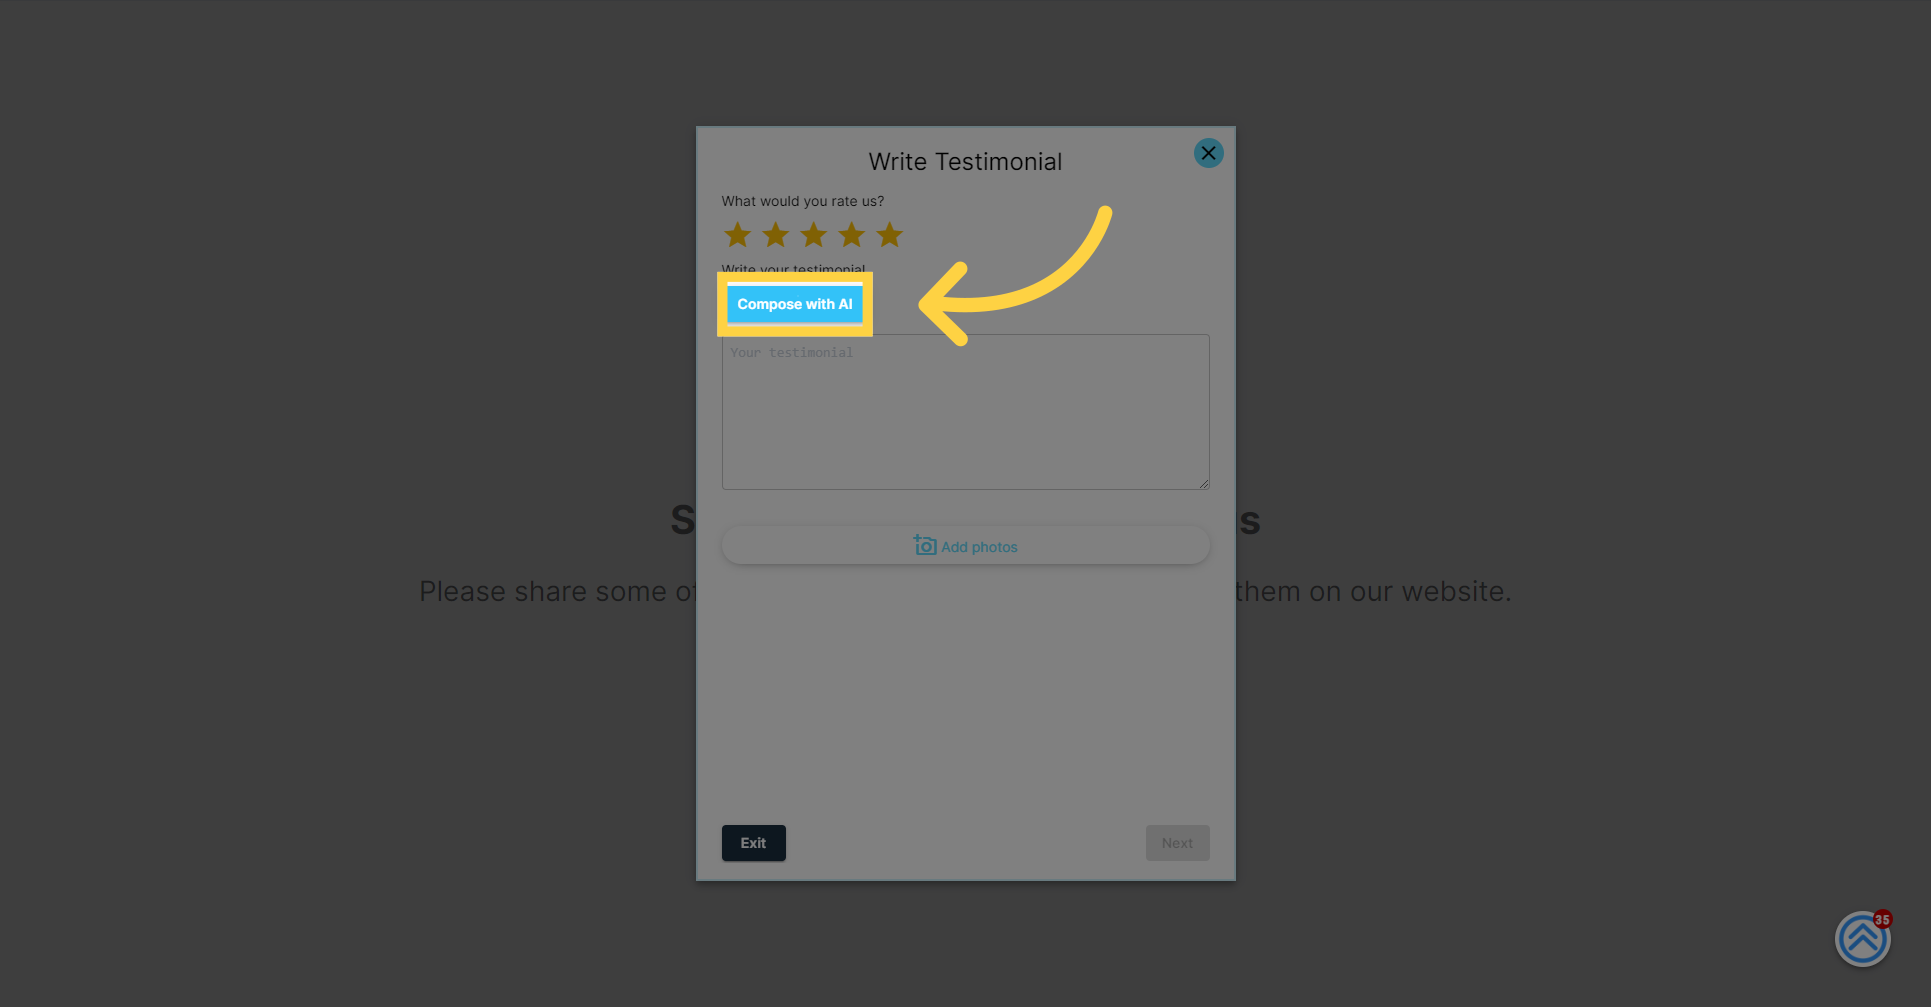
The following screen will prompt your client to leave a star rating for your service. This is an opportunity for them to quickly express their level of satisfaction with a simple yet impactful visual endorsement.

Clients are now given the option to write a personal testimonial, sharing their experience in their own words. This step allows them to reflect on the service provided and express their appreciation or feedback.

If clients are hesitant to write their own, they can opt for an auto-generated testimonial. This feature takes into account both their survey responses and the project details provided by the business, ensuring a personalized and relevant testimonial is crafted on their behalf.
Clients can now review an example of an auto-generated testimonial. This instant draft showcases how the system intelligently incorporates their survey feedback and your project details to create a coherent and personalized testimonial.
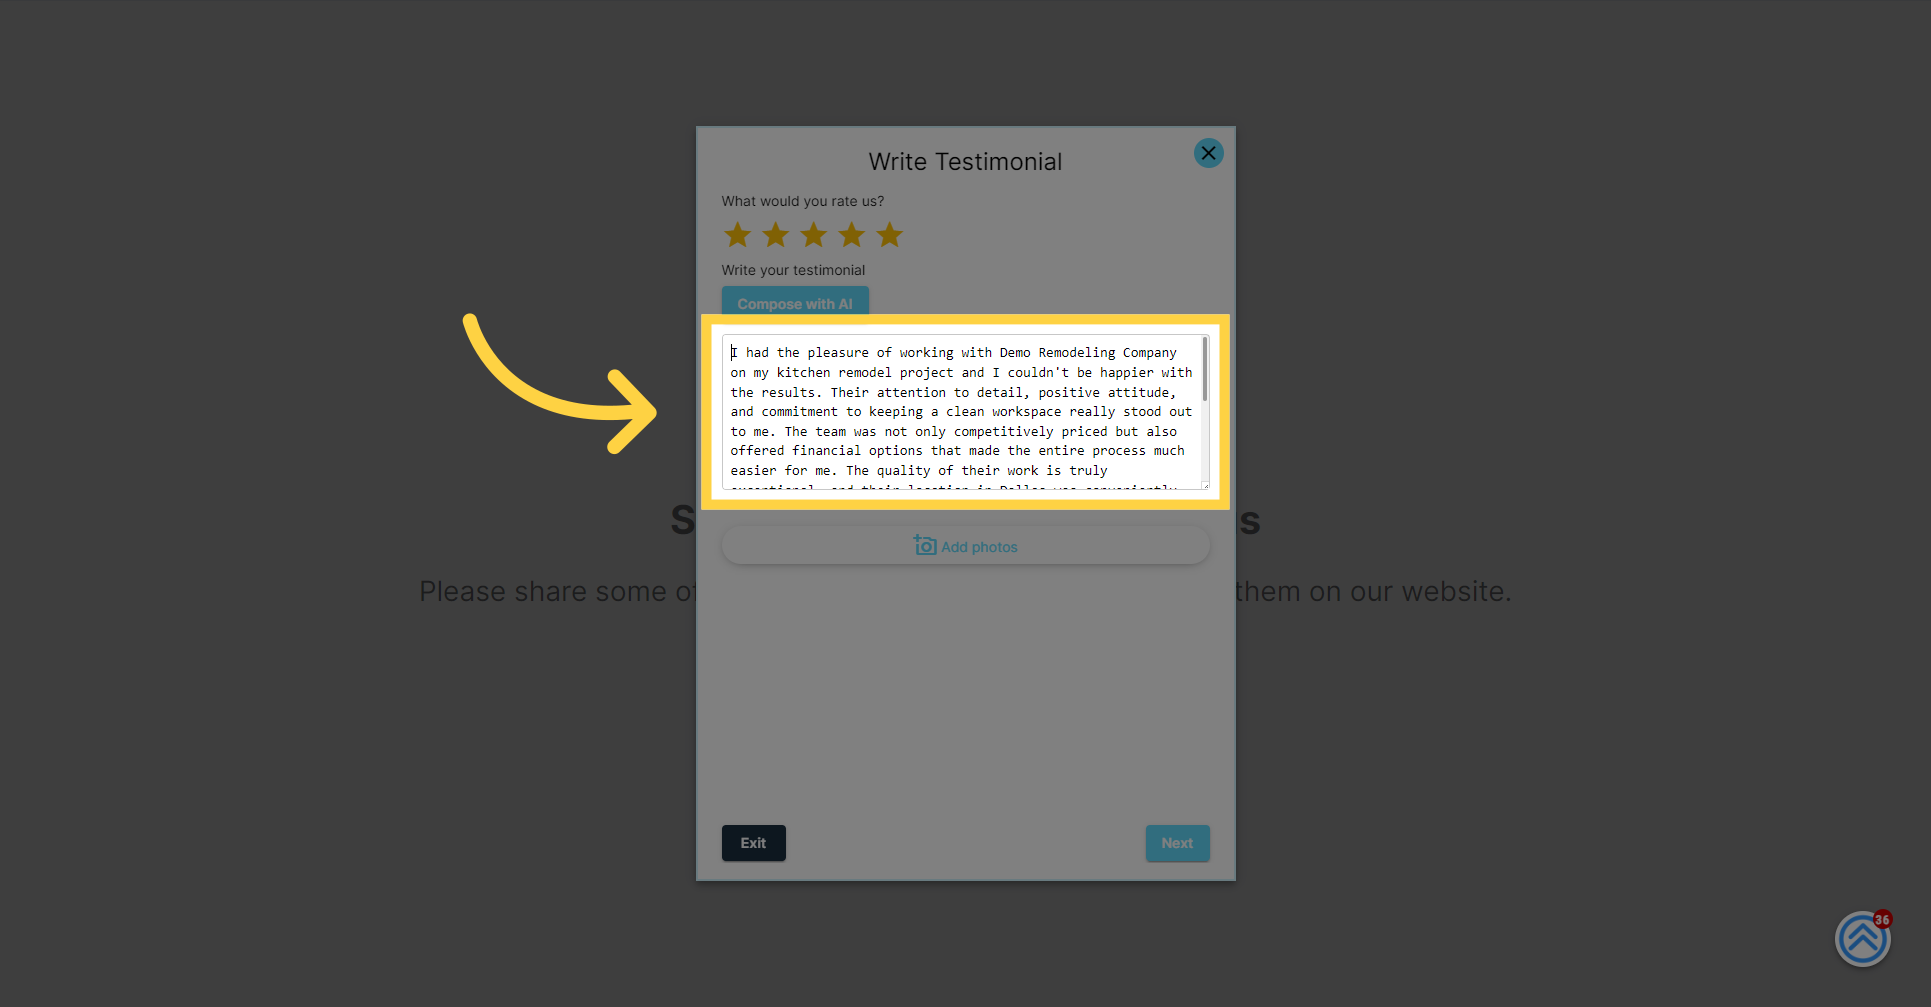
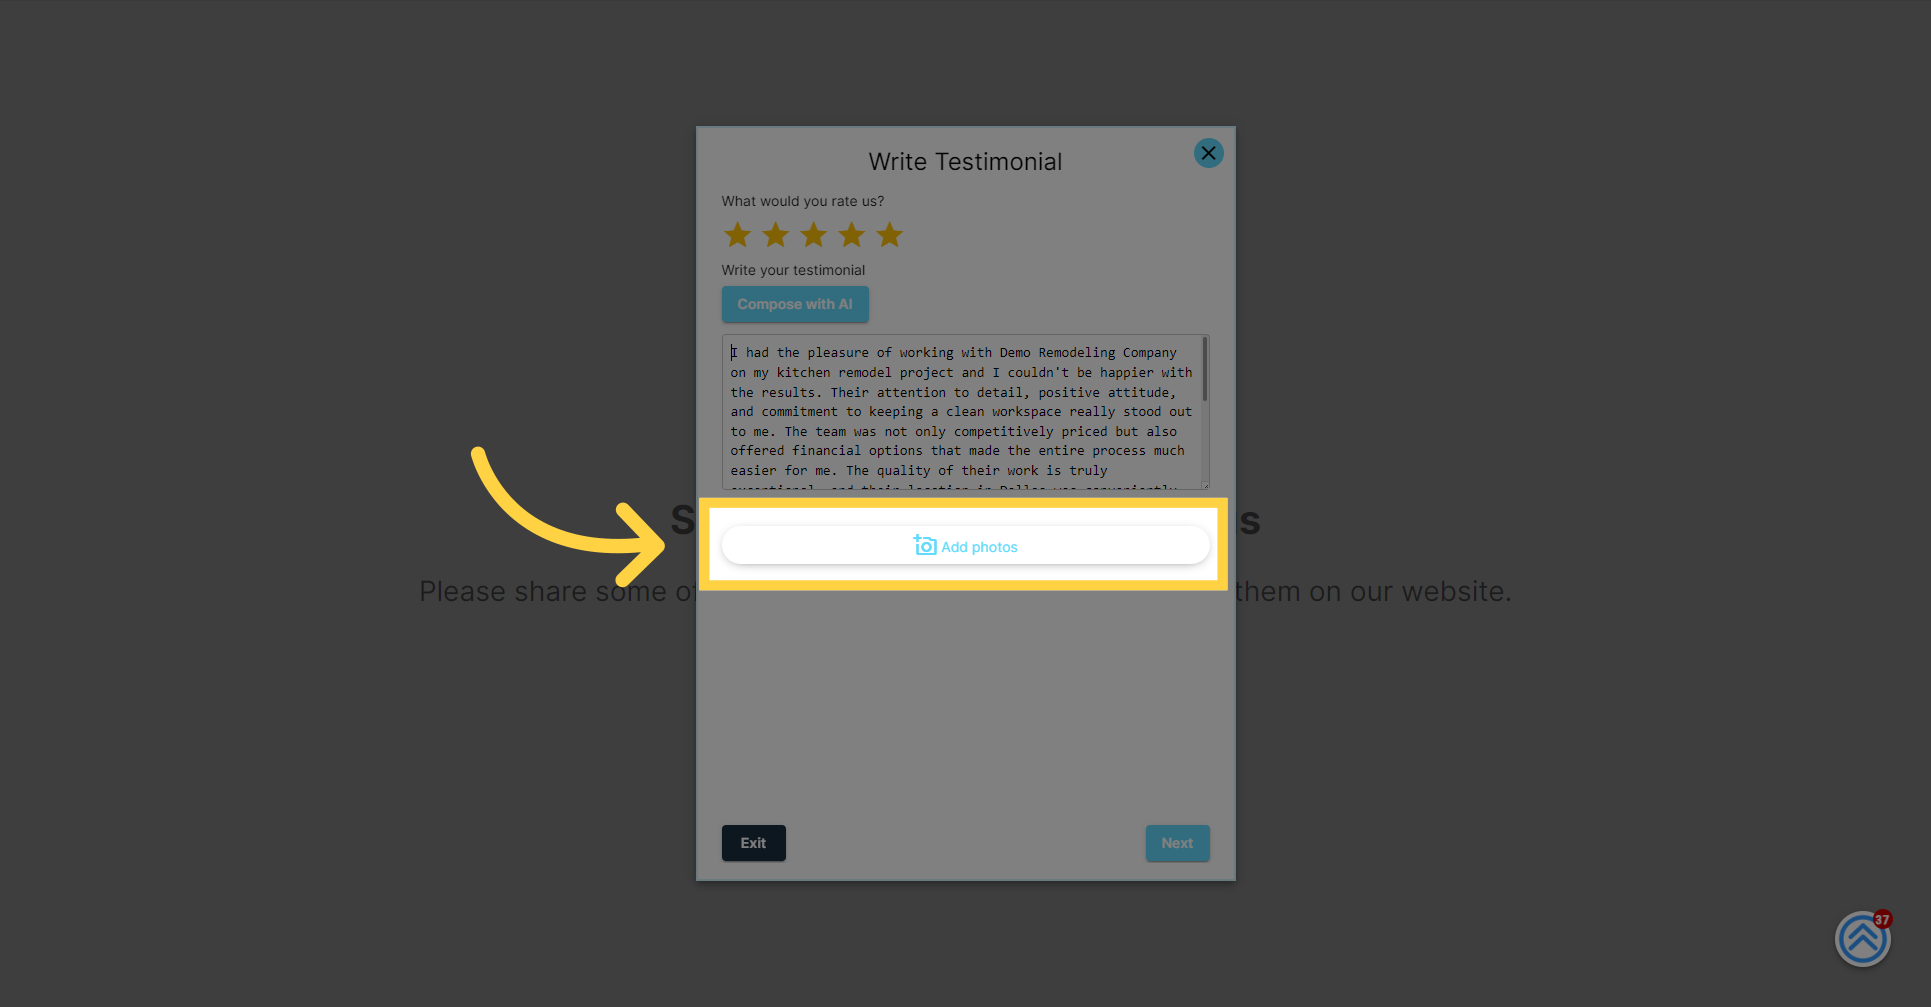
Clients have the option to further personalize their testimonial by clicking the "Add Photos" button. This allows them to upload images related to the service provided, offering authentic visual content that enhances the impact of their testimonial.
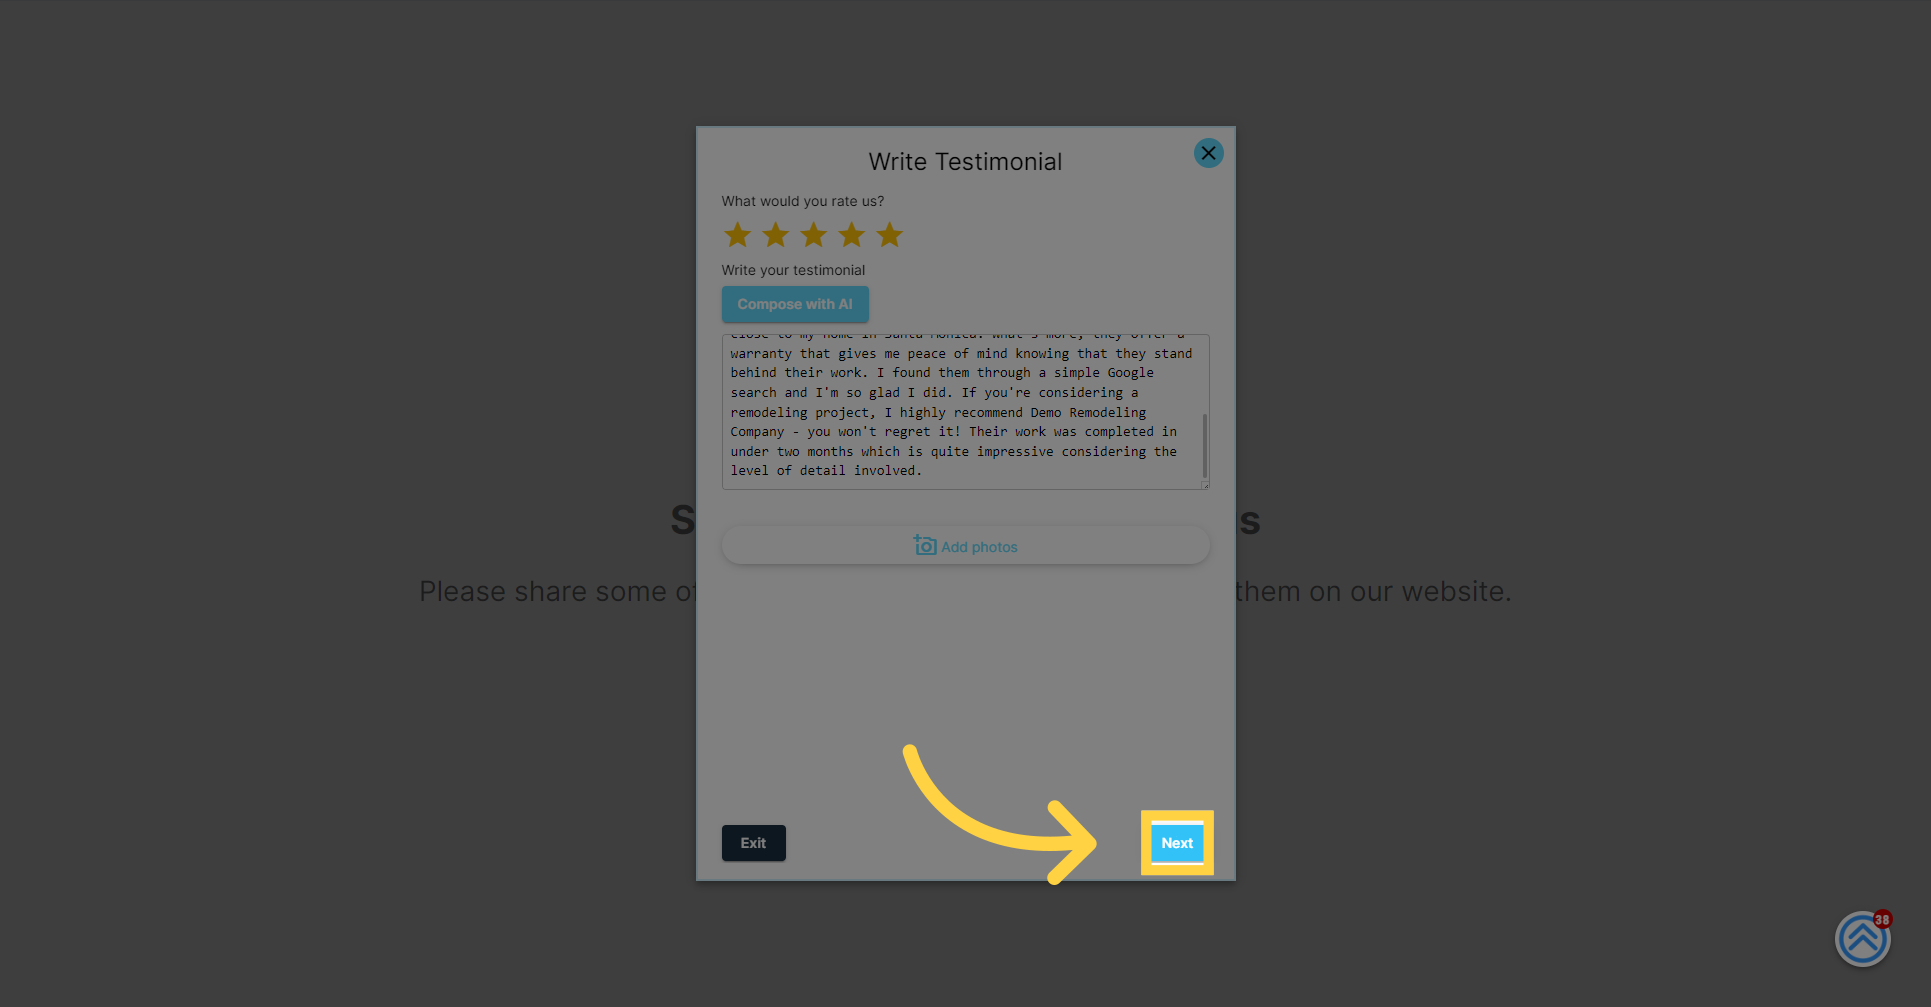
Click "Next" to move on to the next step in the testimonial submission process
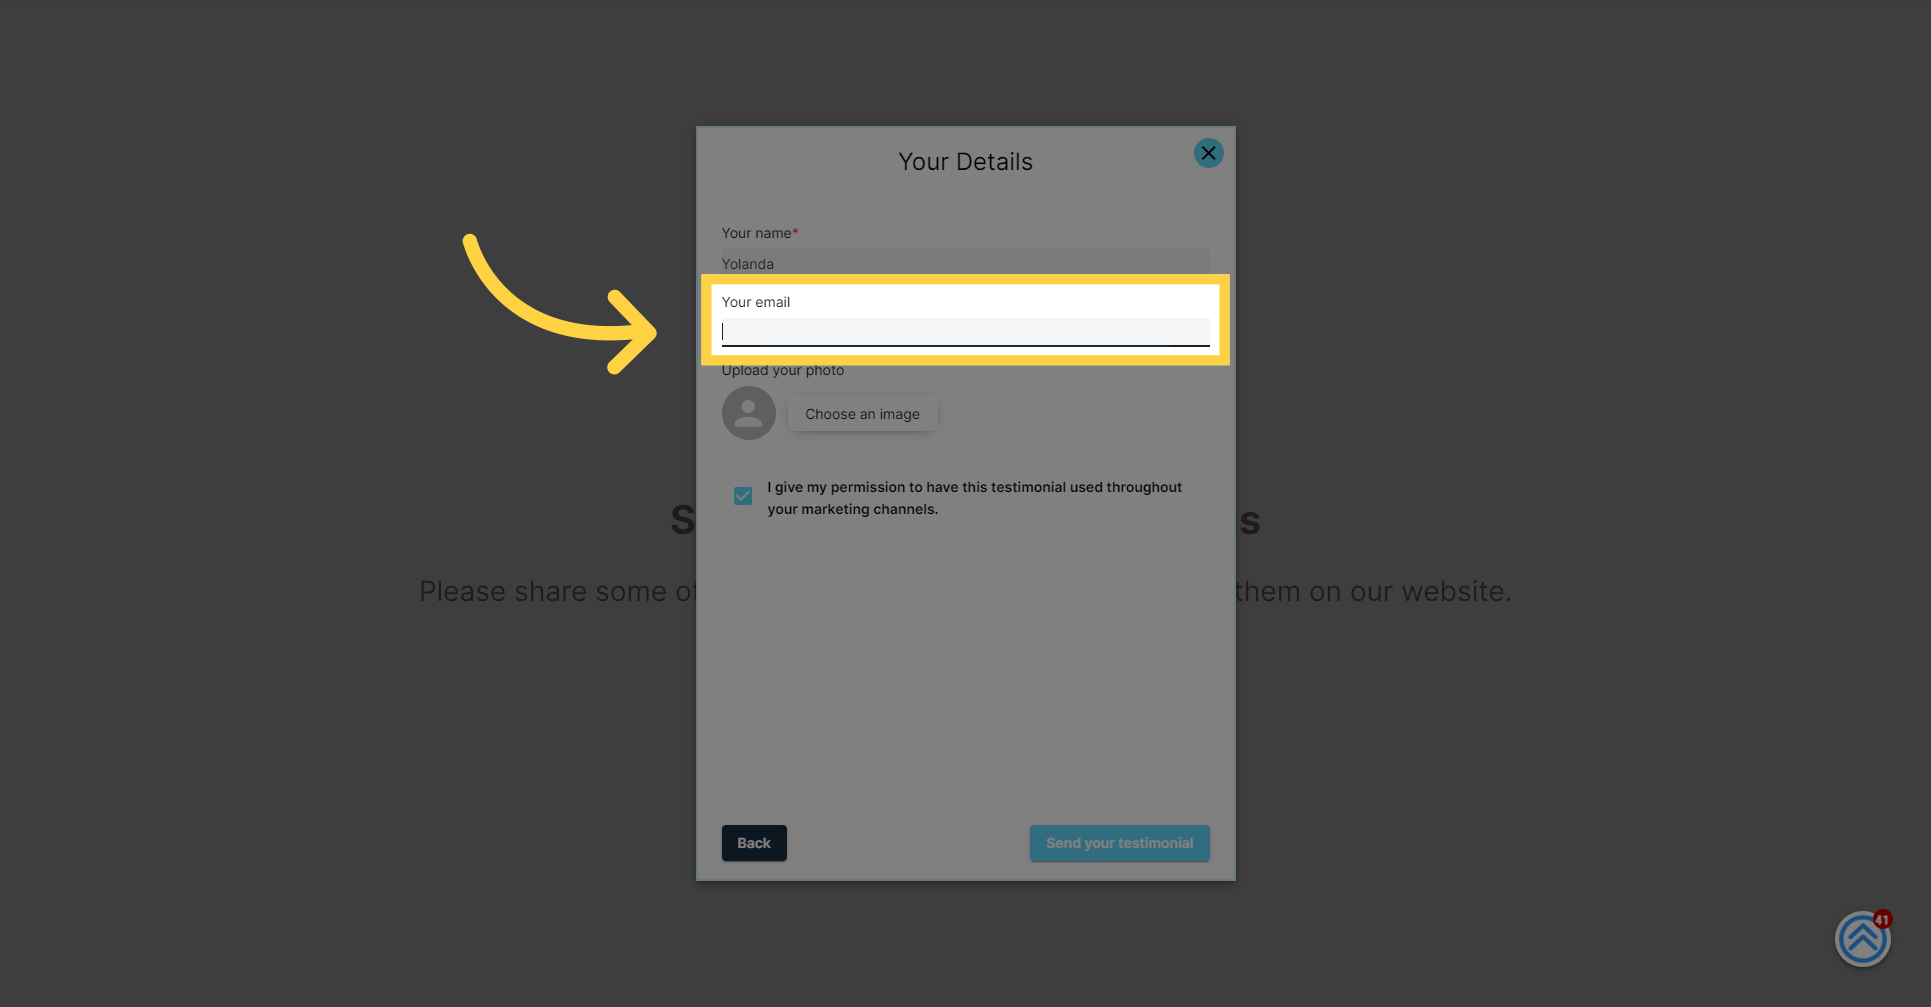
The next step invites the client to enter their name, which will accompany their testimonial, adding a personal and credible touch to their endorsement.
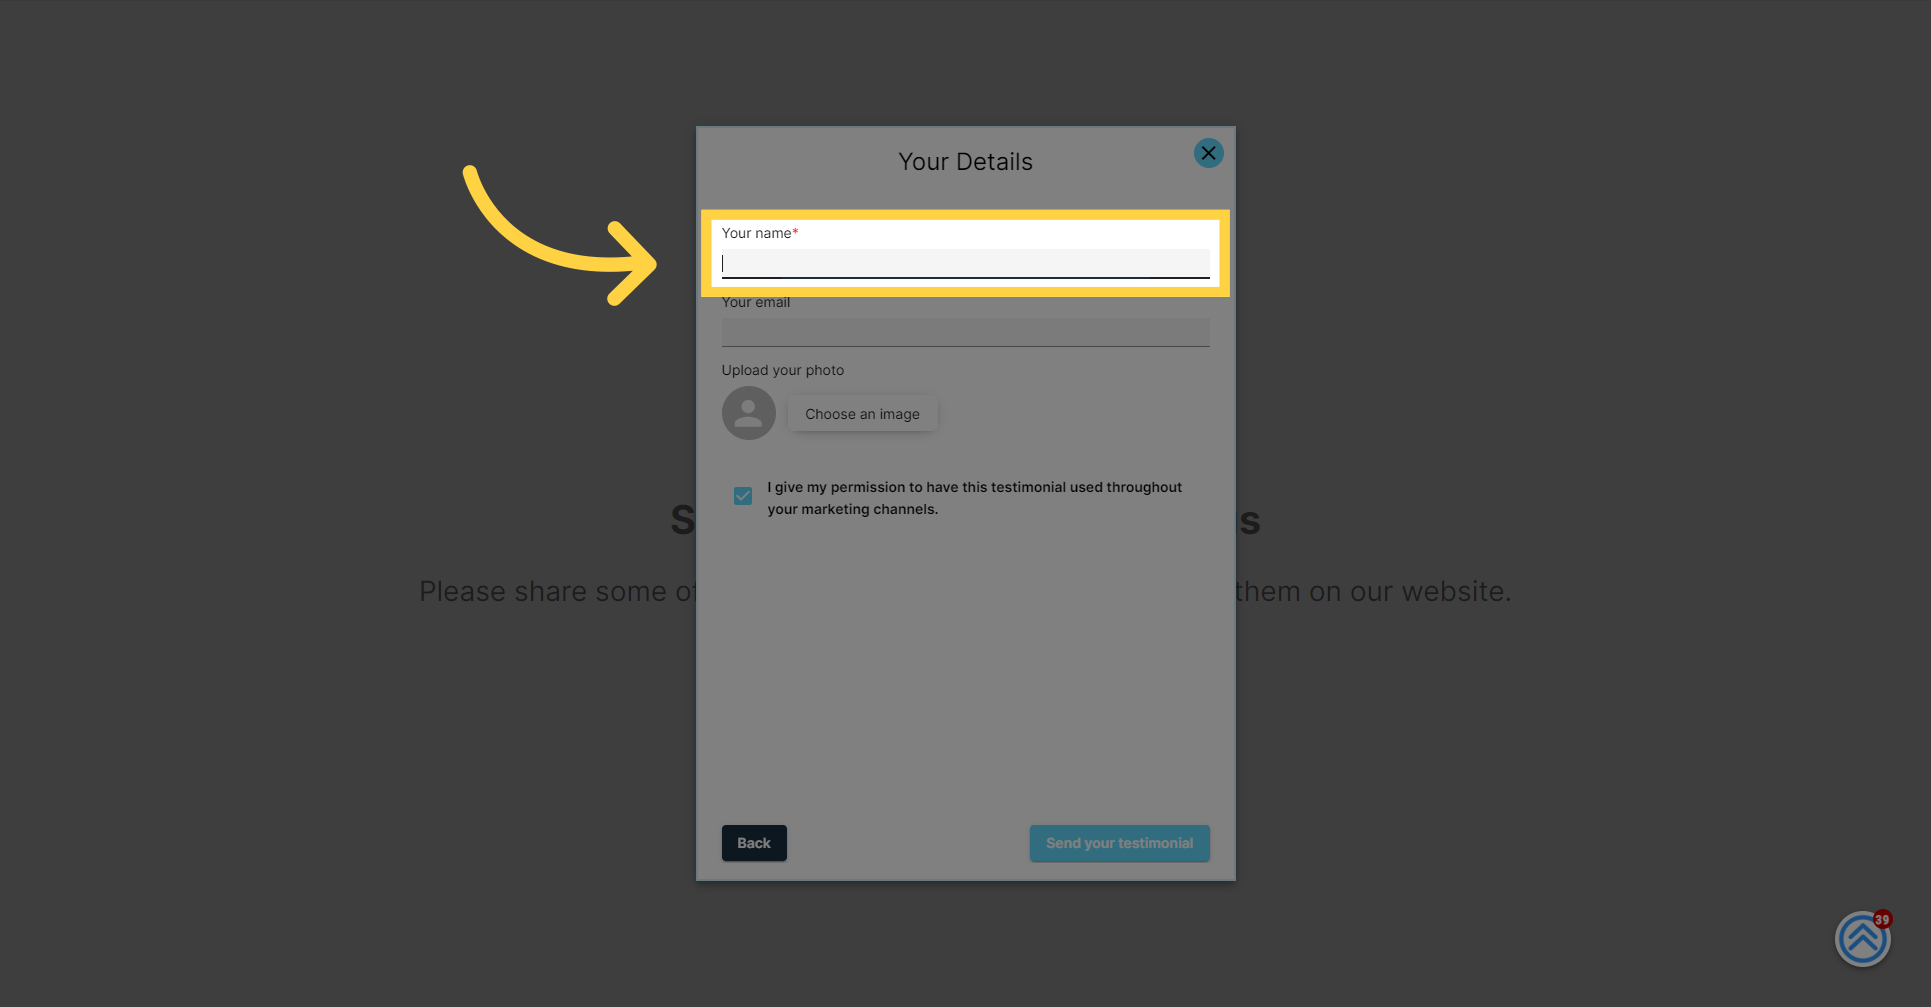
Clients will then have the option to enter their email address. While this step is optional, it can be helpful for verification purposes and future correspondence, should they choose to provide it.
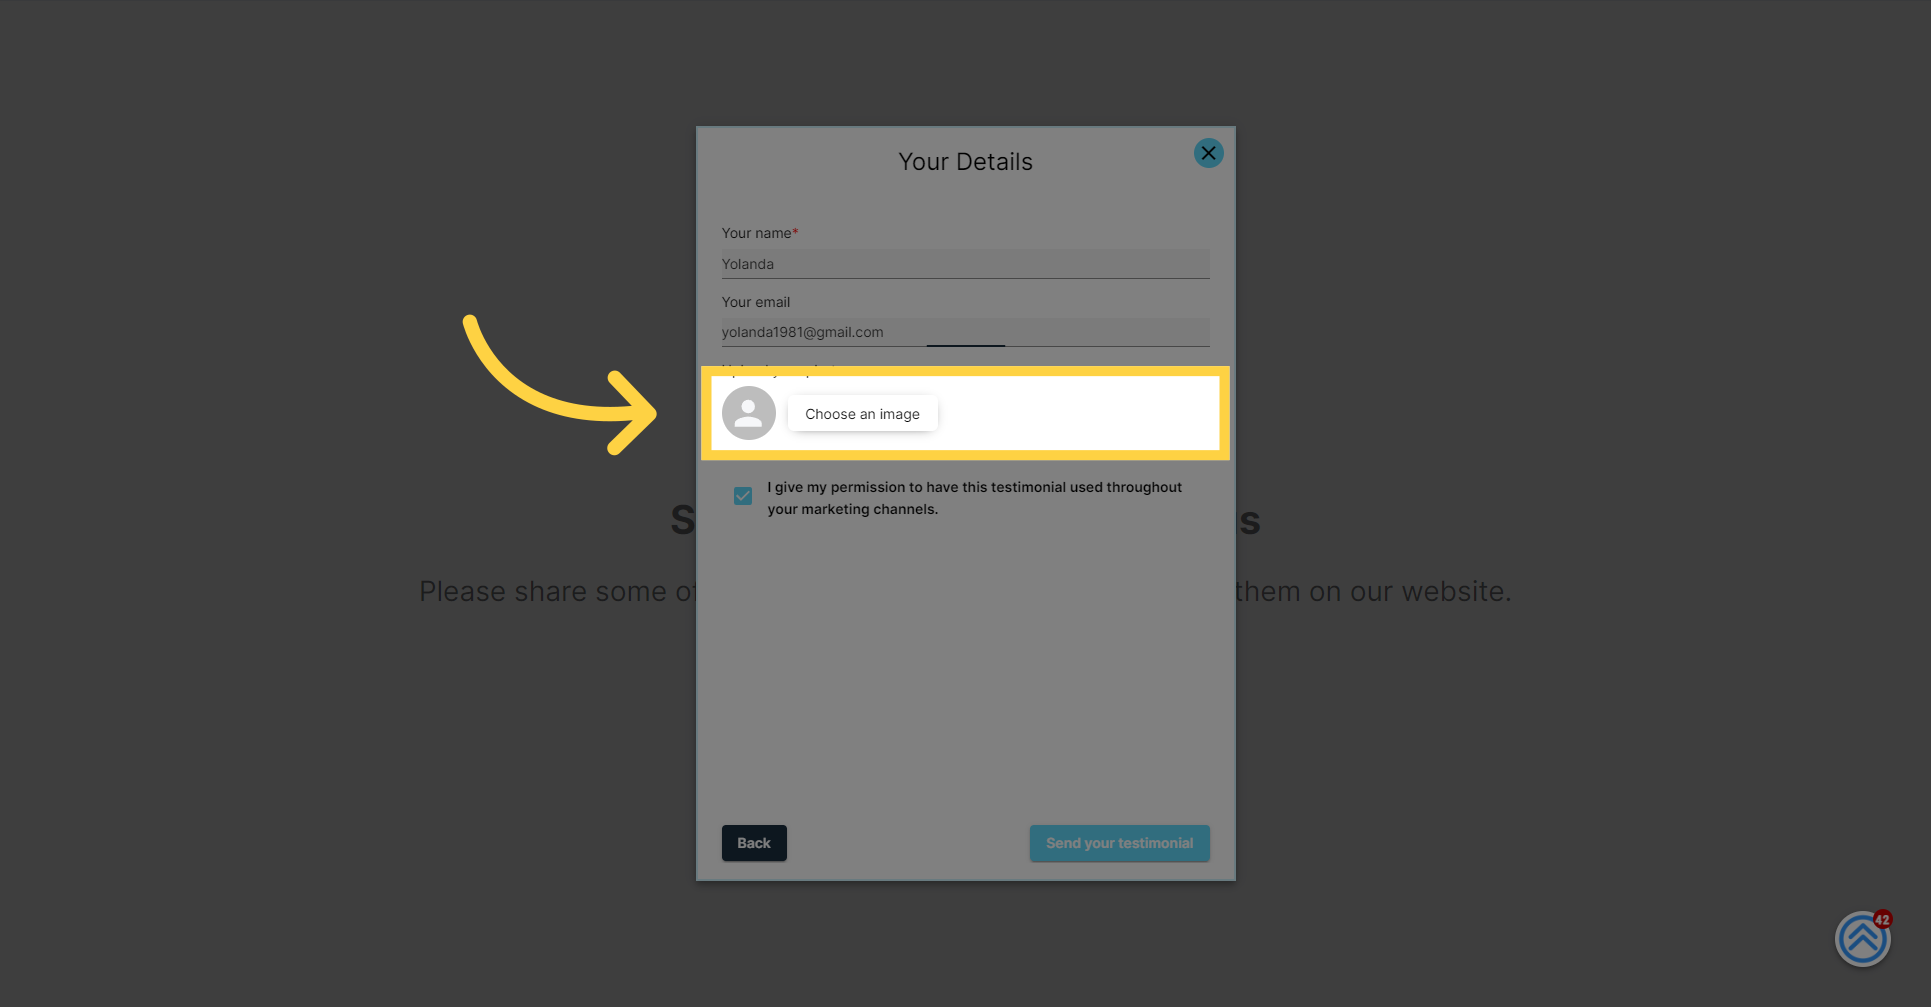
Next, clients are given the opportunity to upload a profile photo. Adding a personal image lends authenticity to the testimonial and helps to create a more engaging and relatable experience for those who will view it.
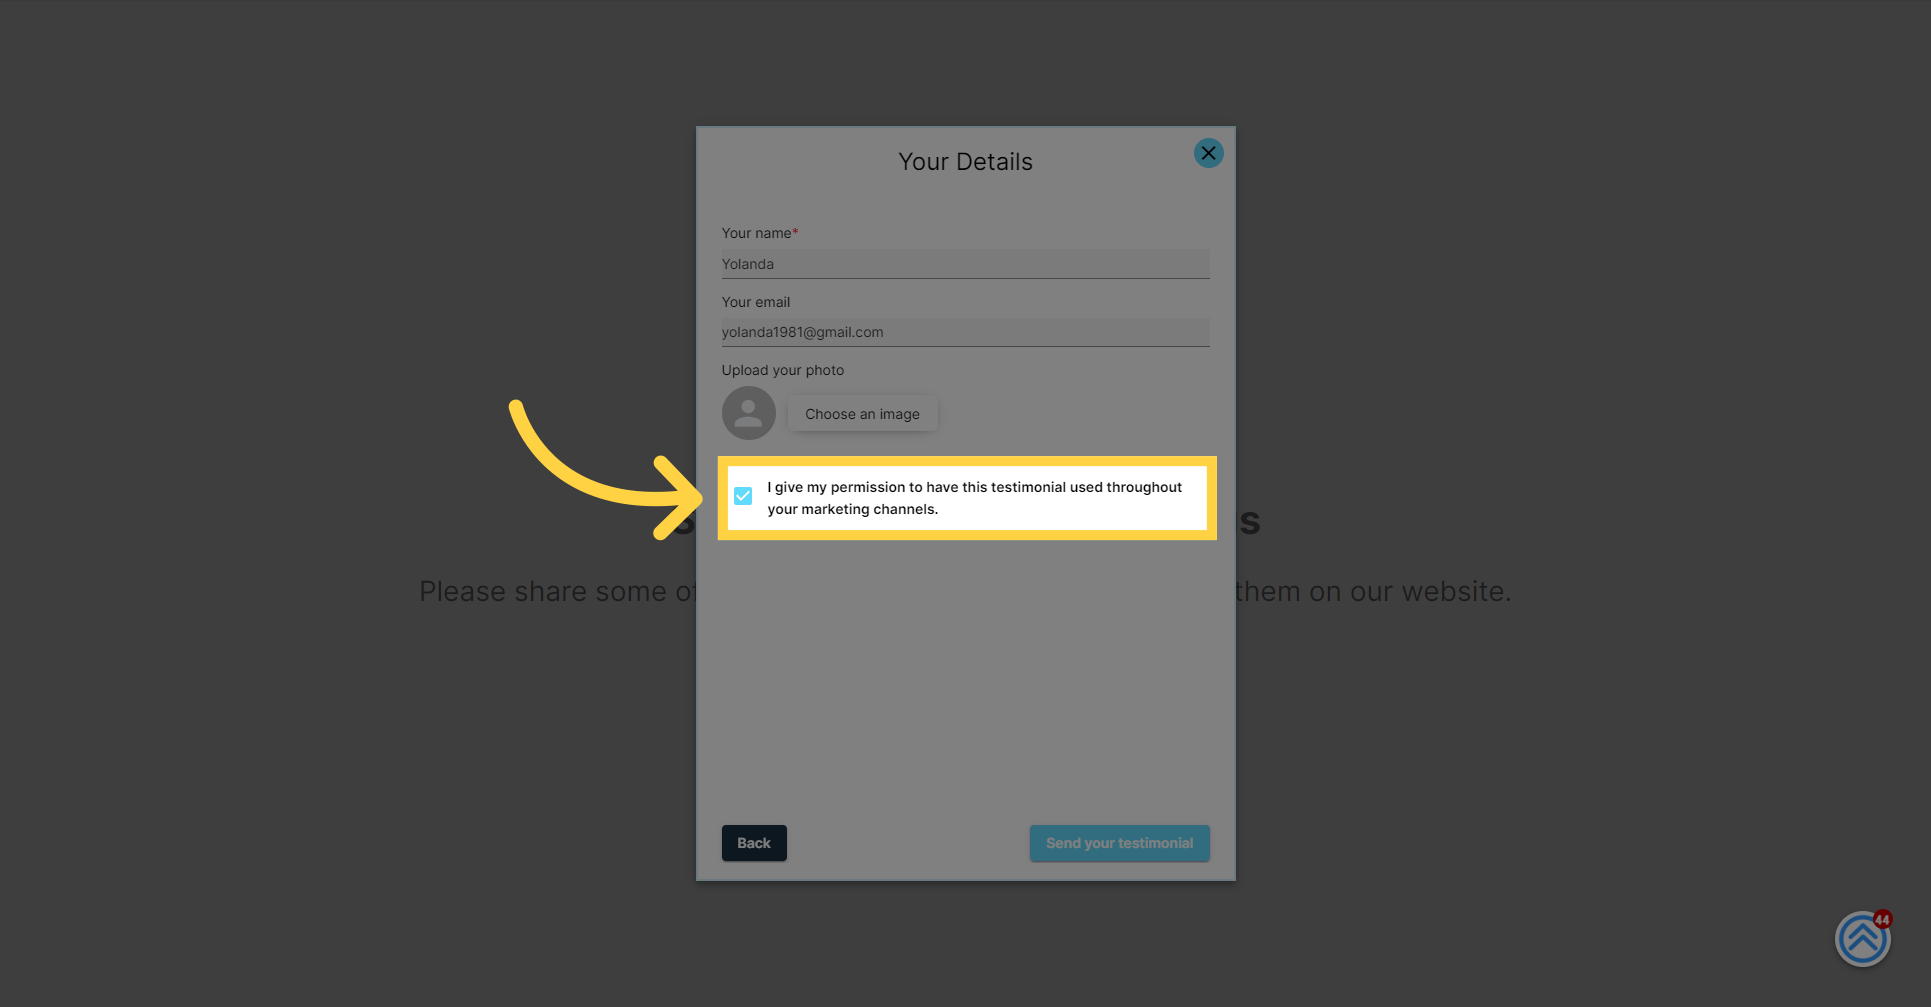
Before finalizing their testimonial, clients will be asked to give their consent. This is an important step to ensure that they agree to the use and sharing of their testimonial and any personal information they have provided.
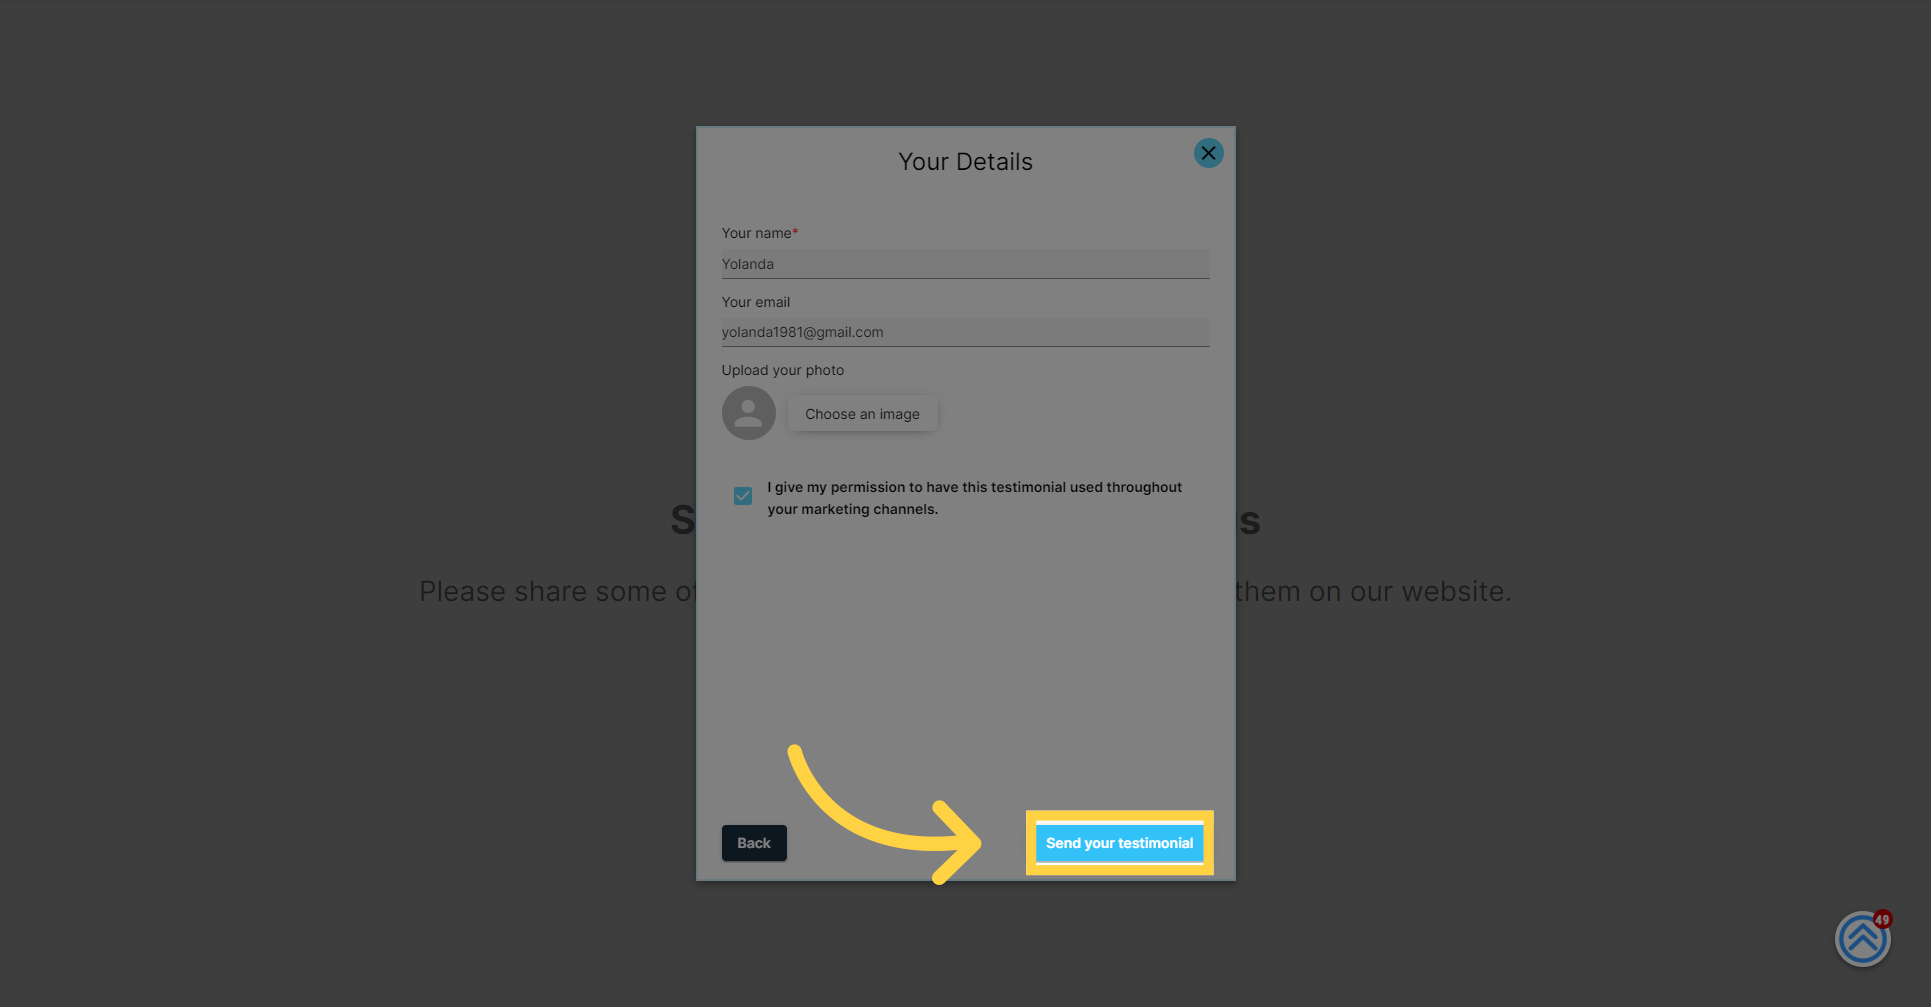
Once consent is given, clients can complete the process by clicking the "Send your testimonial" button. This action submits their written testimonial and any accompanying photos or personal details they've chosen to include.
Following the submission of the written testimonial, clients will see a new prompt encouraging them to leave a video testimonial. This adds a dynamic and personal element to their feedback.
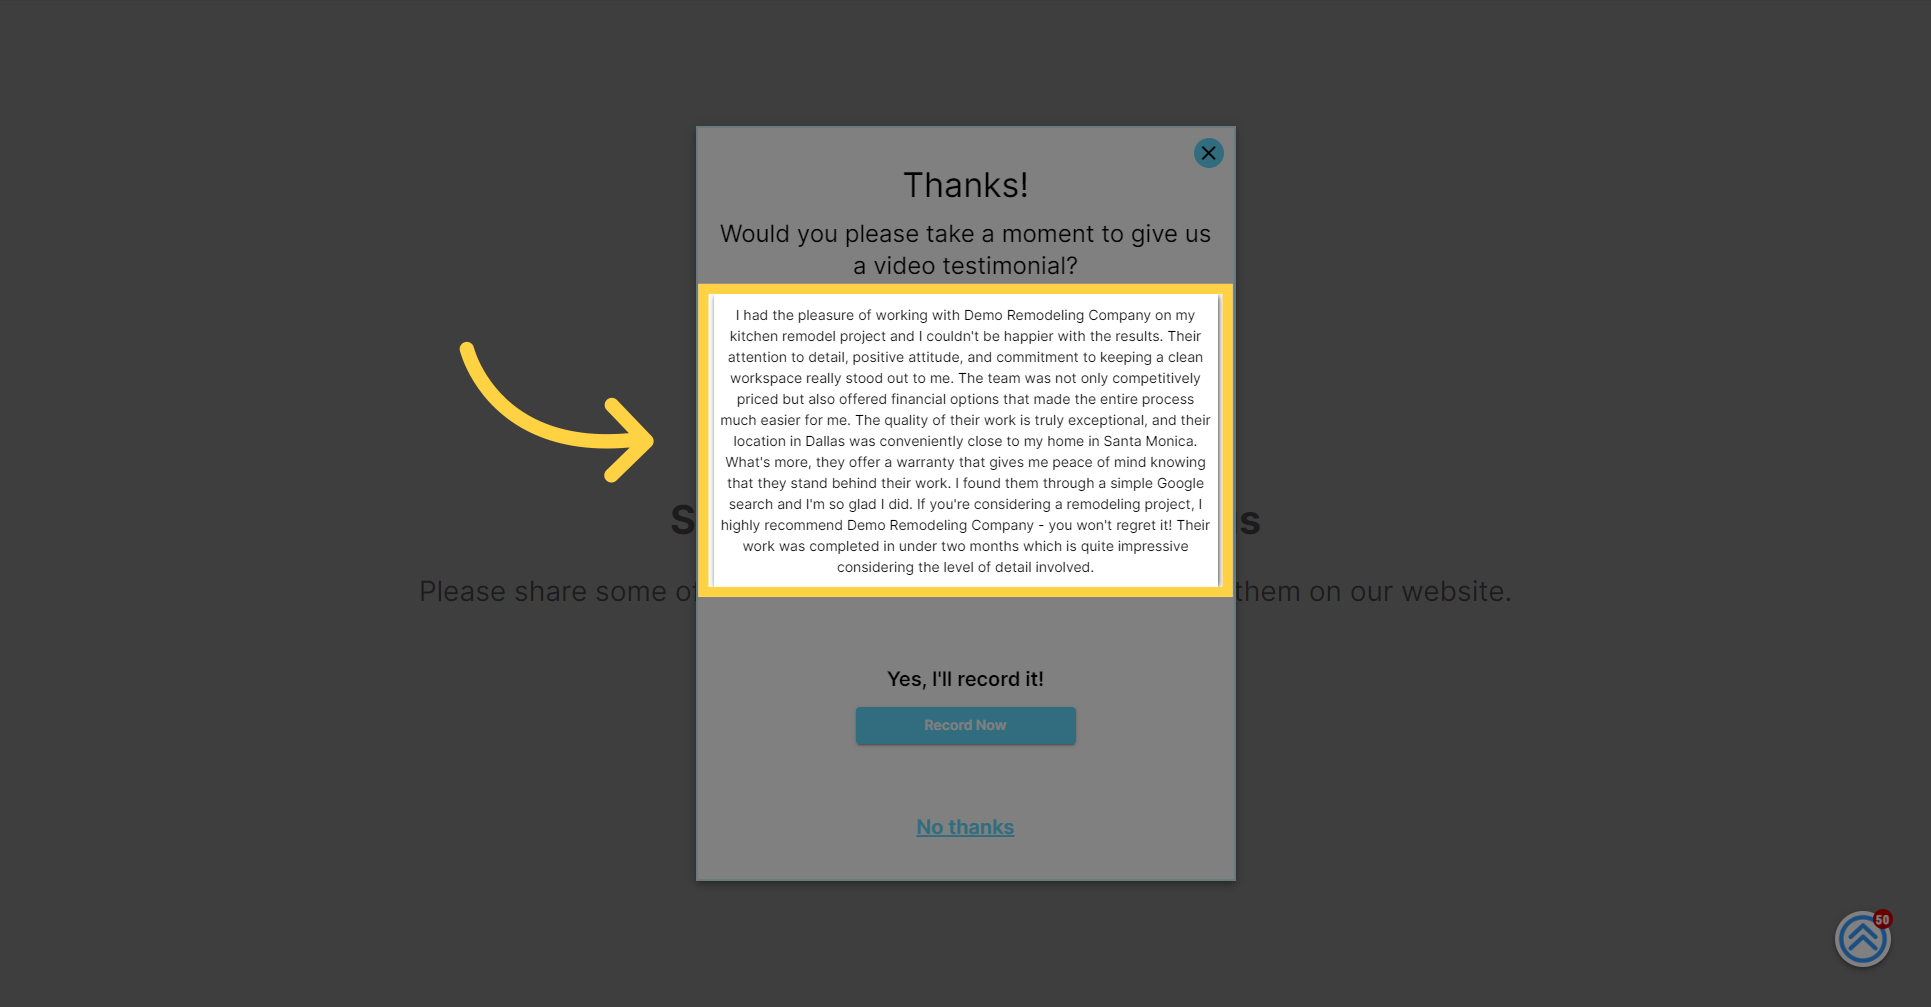
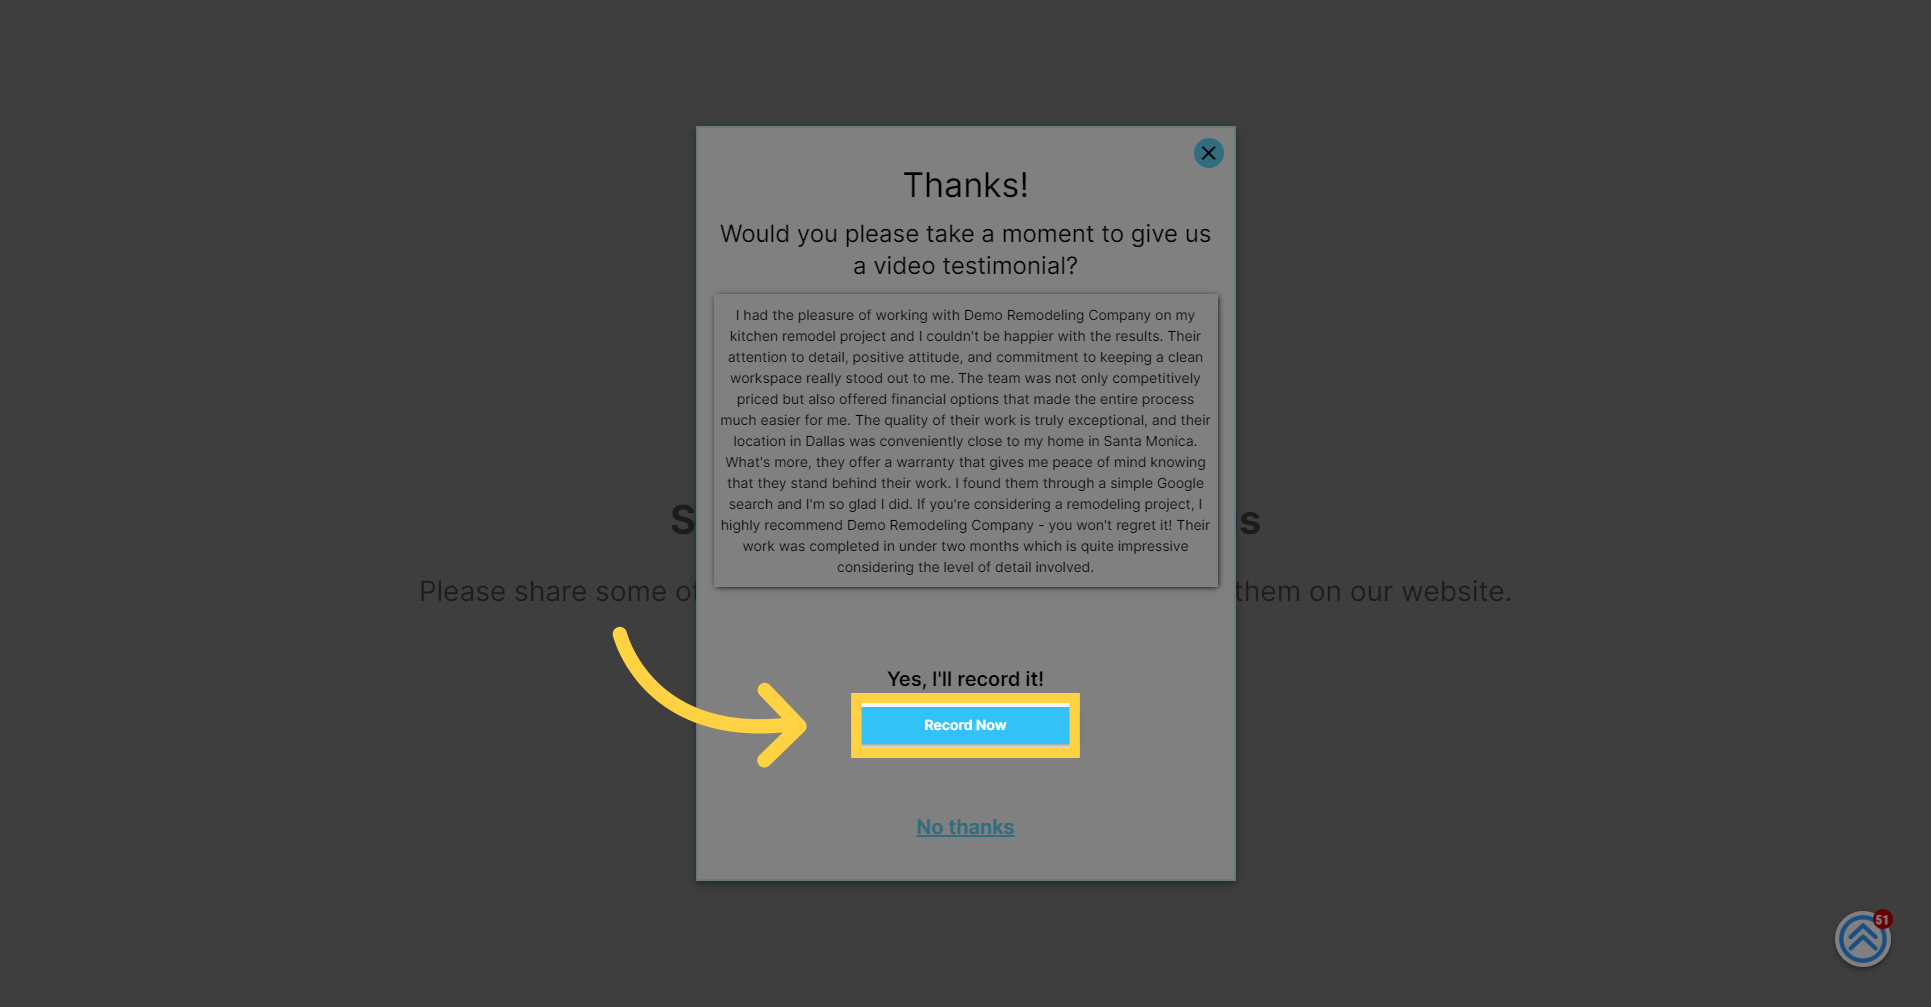
Choose the "Record Now" option
For clients opting to record a video testimonial, the next step is to give the necessary permissions. A prompt will ask them to allow access to their device's camera and microphone, ensuring that the video and voice can be recorded clearly.
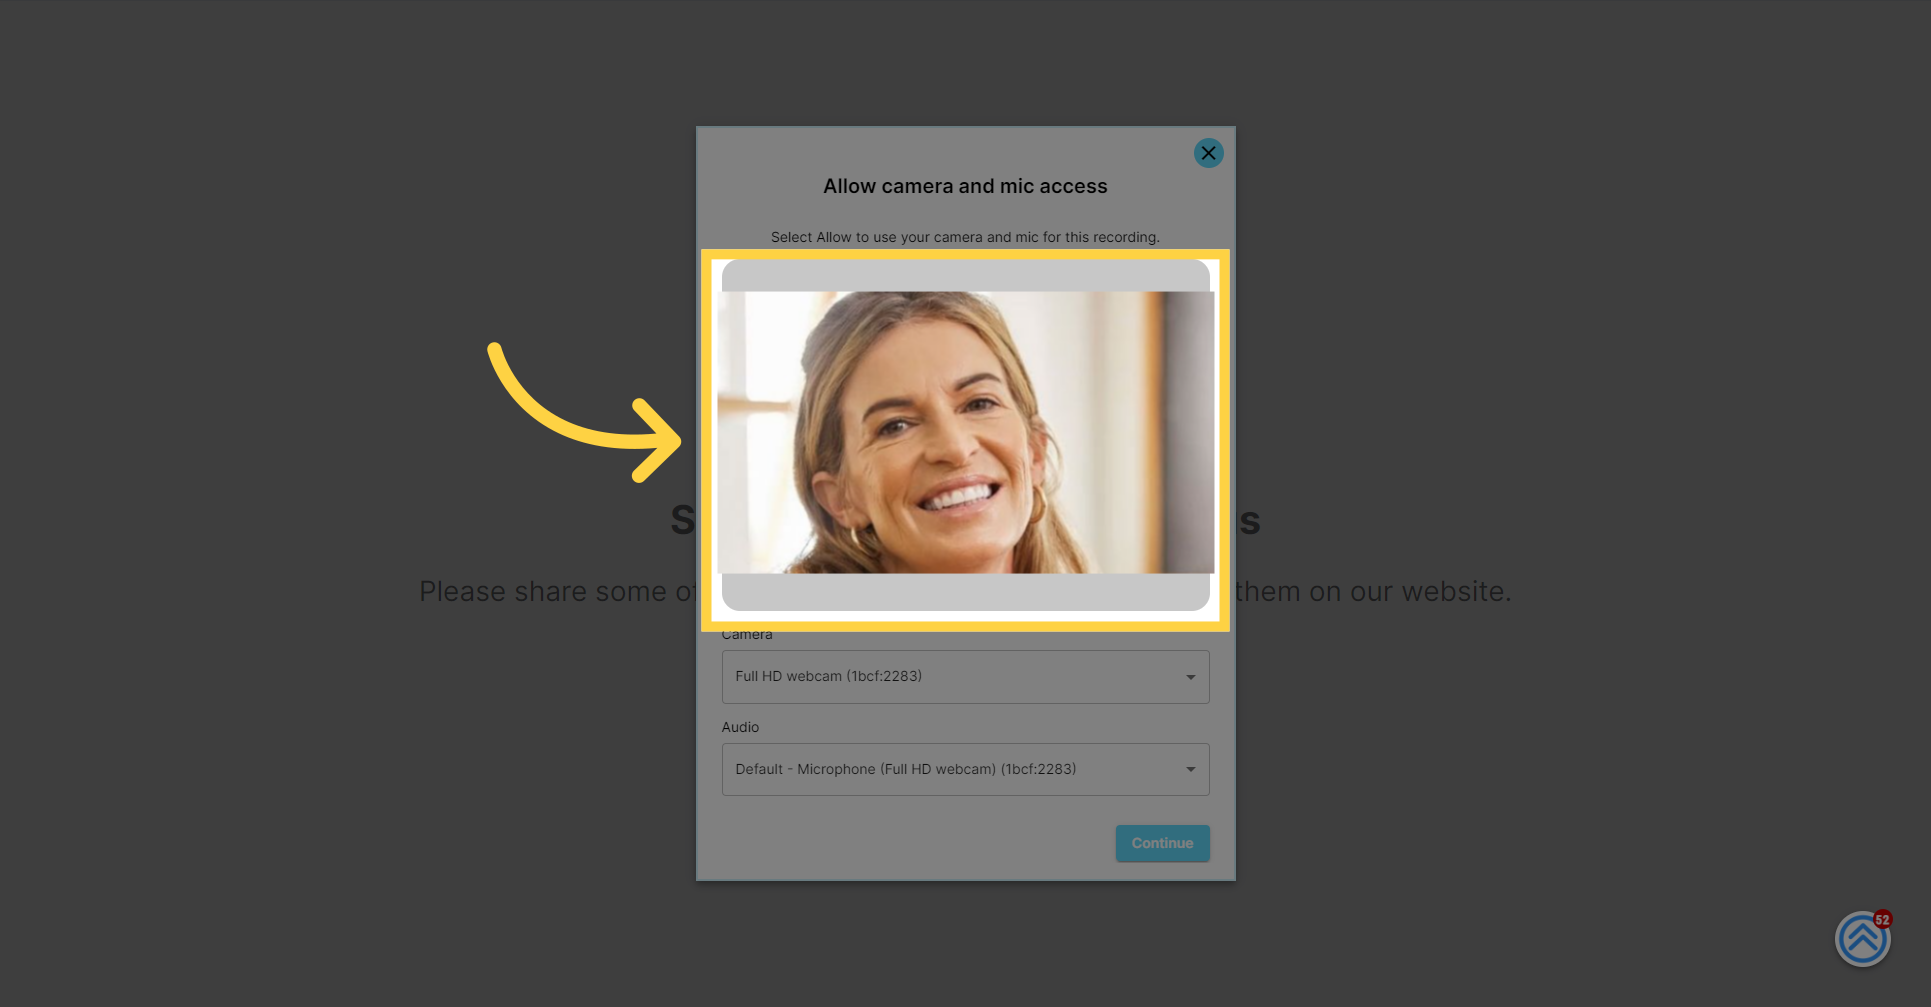
Once the permissions are granted, clients can click the "Continue" button to proceed to the video recording interface where they will capture their testimonial.

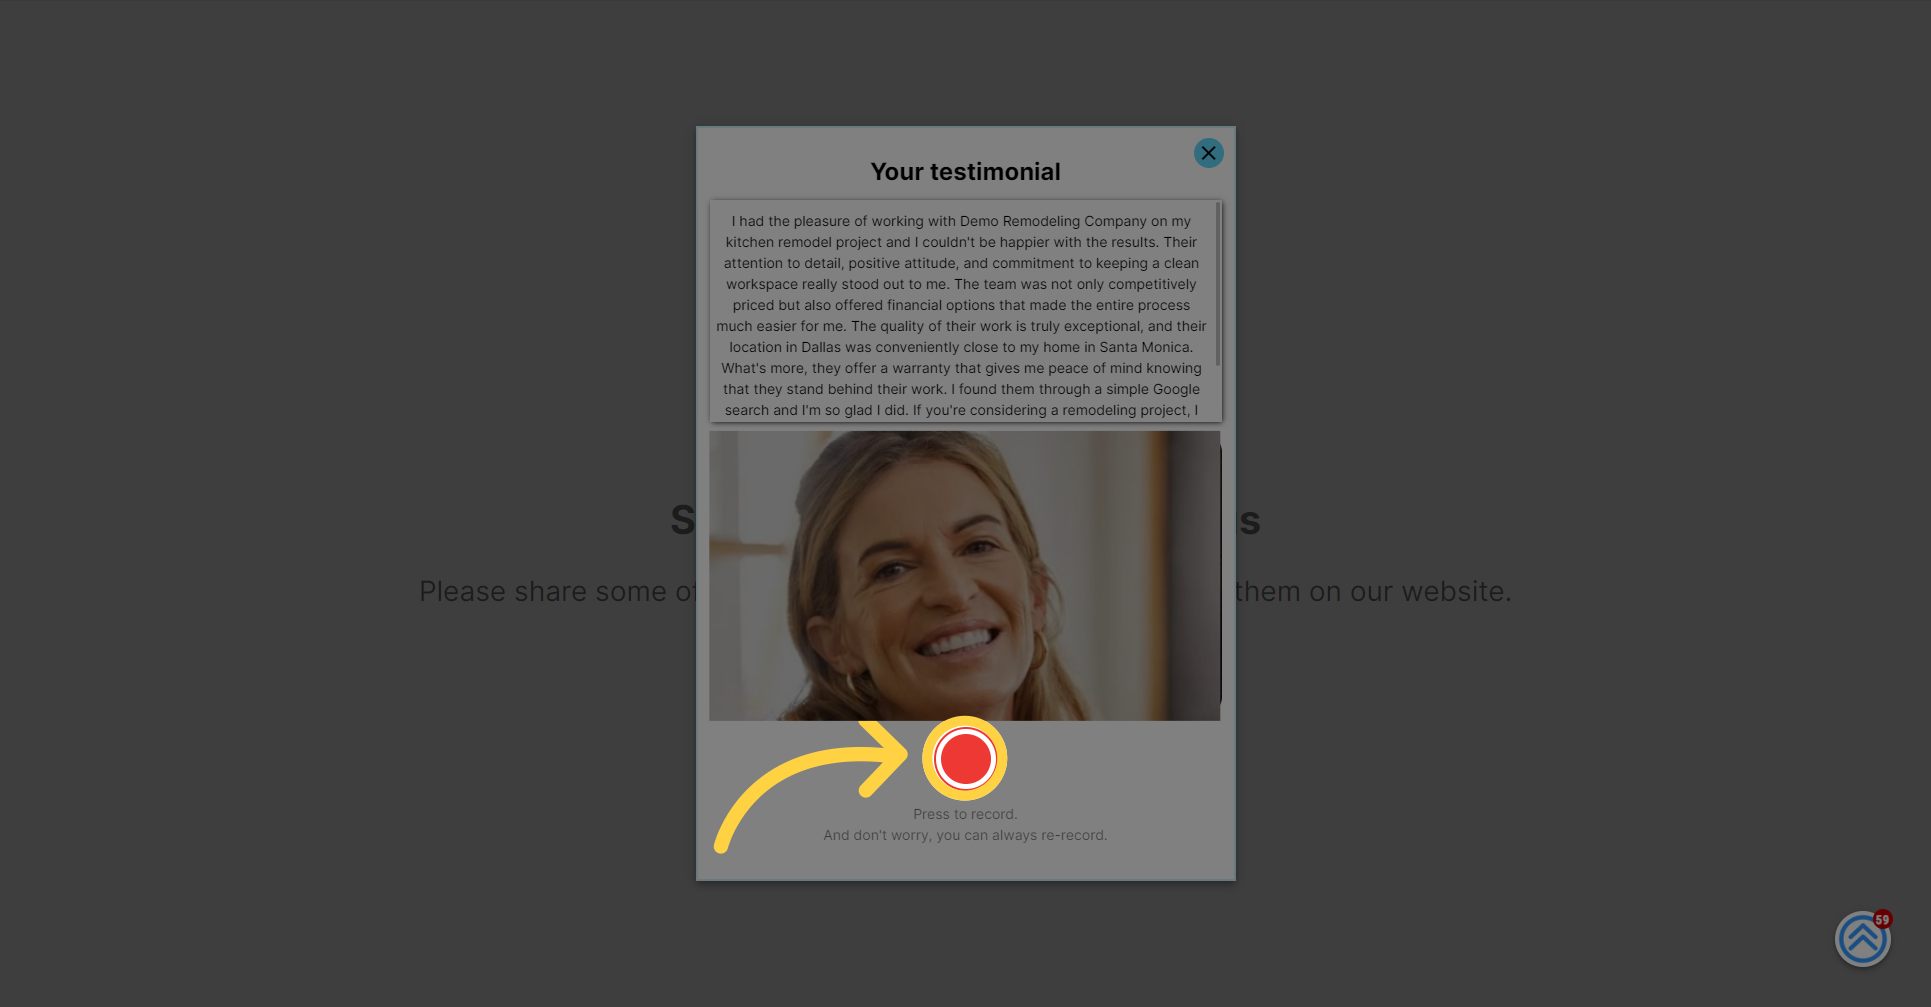
Before recording, clients will have the opportunity to review their written testimonial on the screen. This text can serve as a helpful teleprompter during their video recording, allowing them to convey their message consistently and confidently.
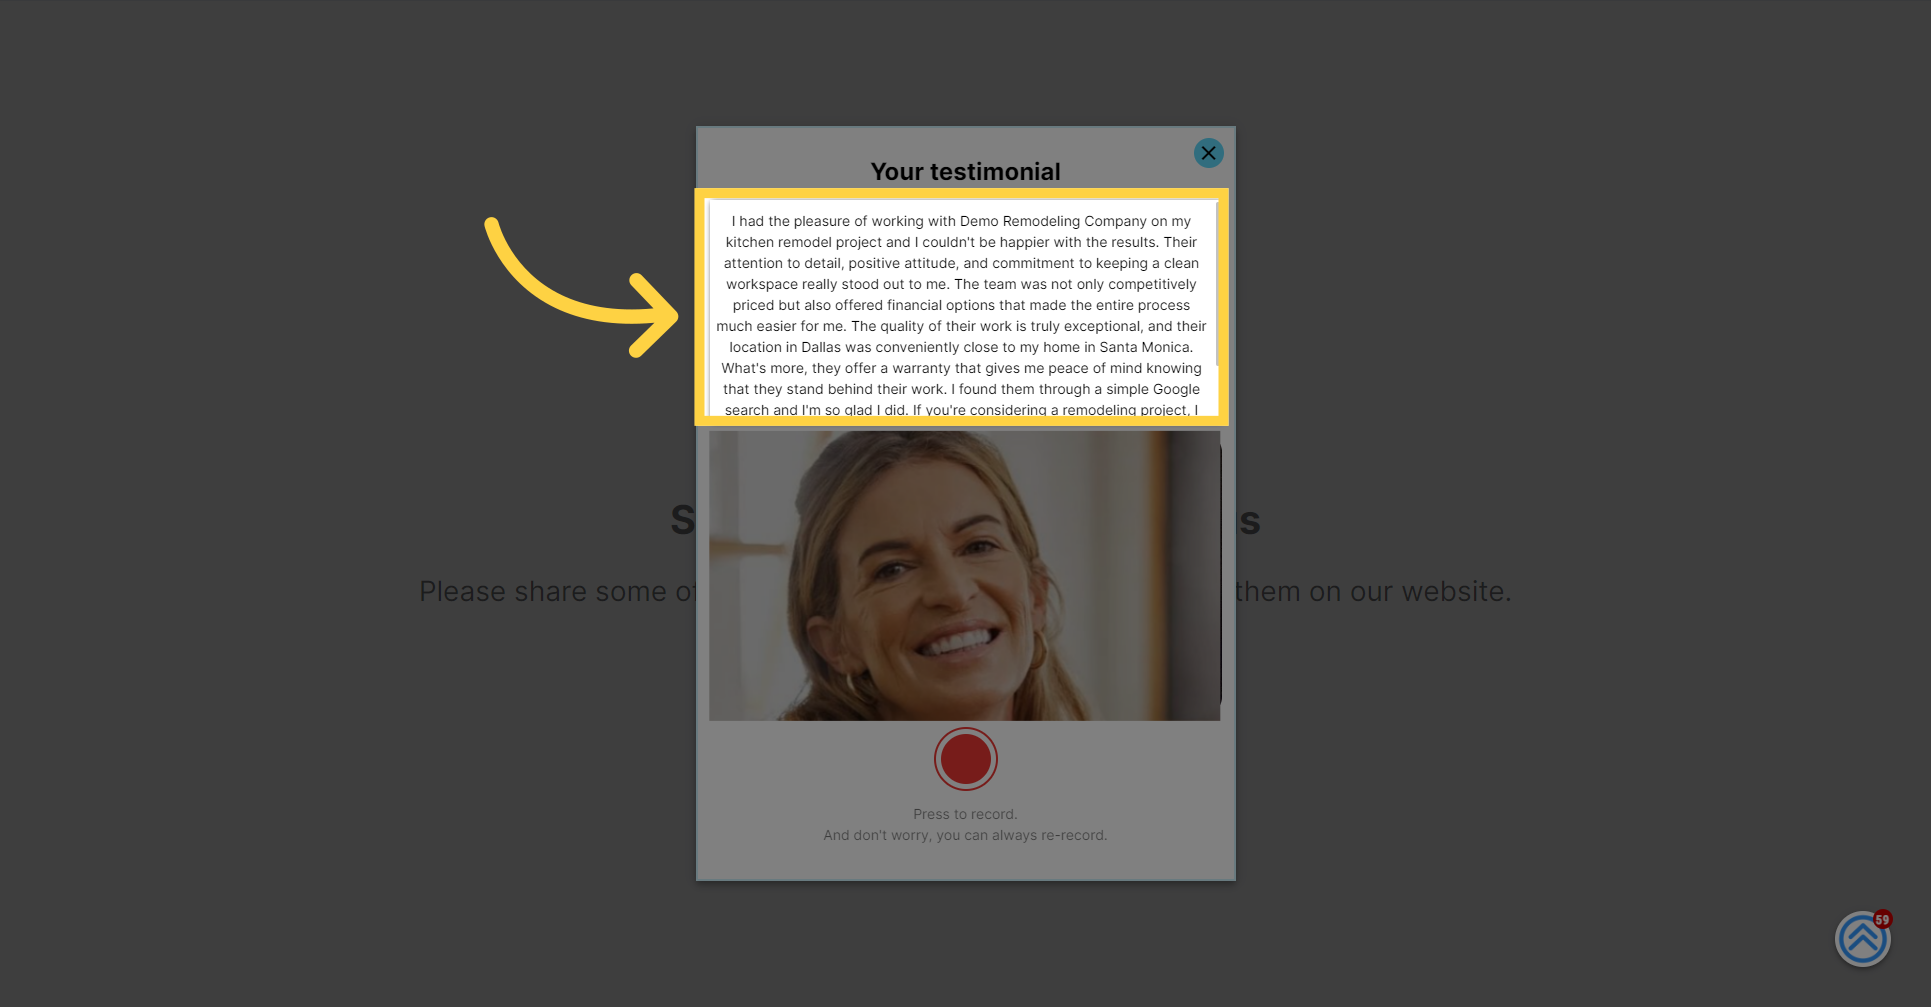
Clients will click the "Record" button to begin filming their video testimonial. Once they have finished sharing their experiences, they can click the same button again to stop the recording.
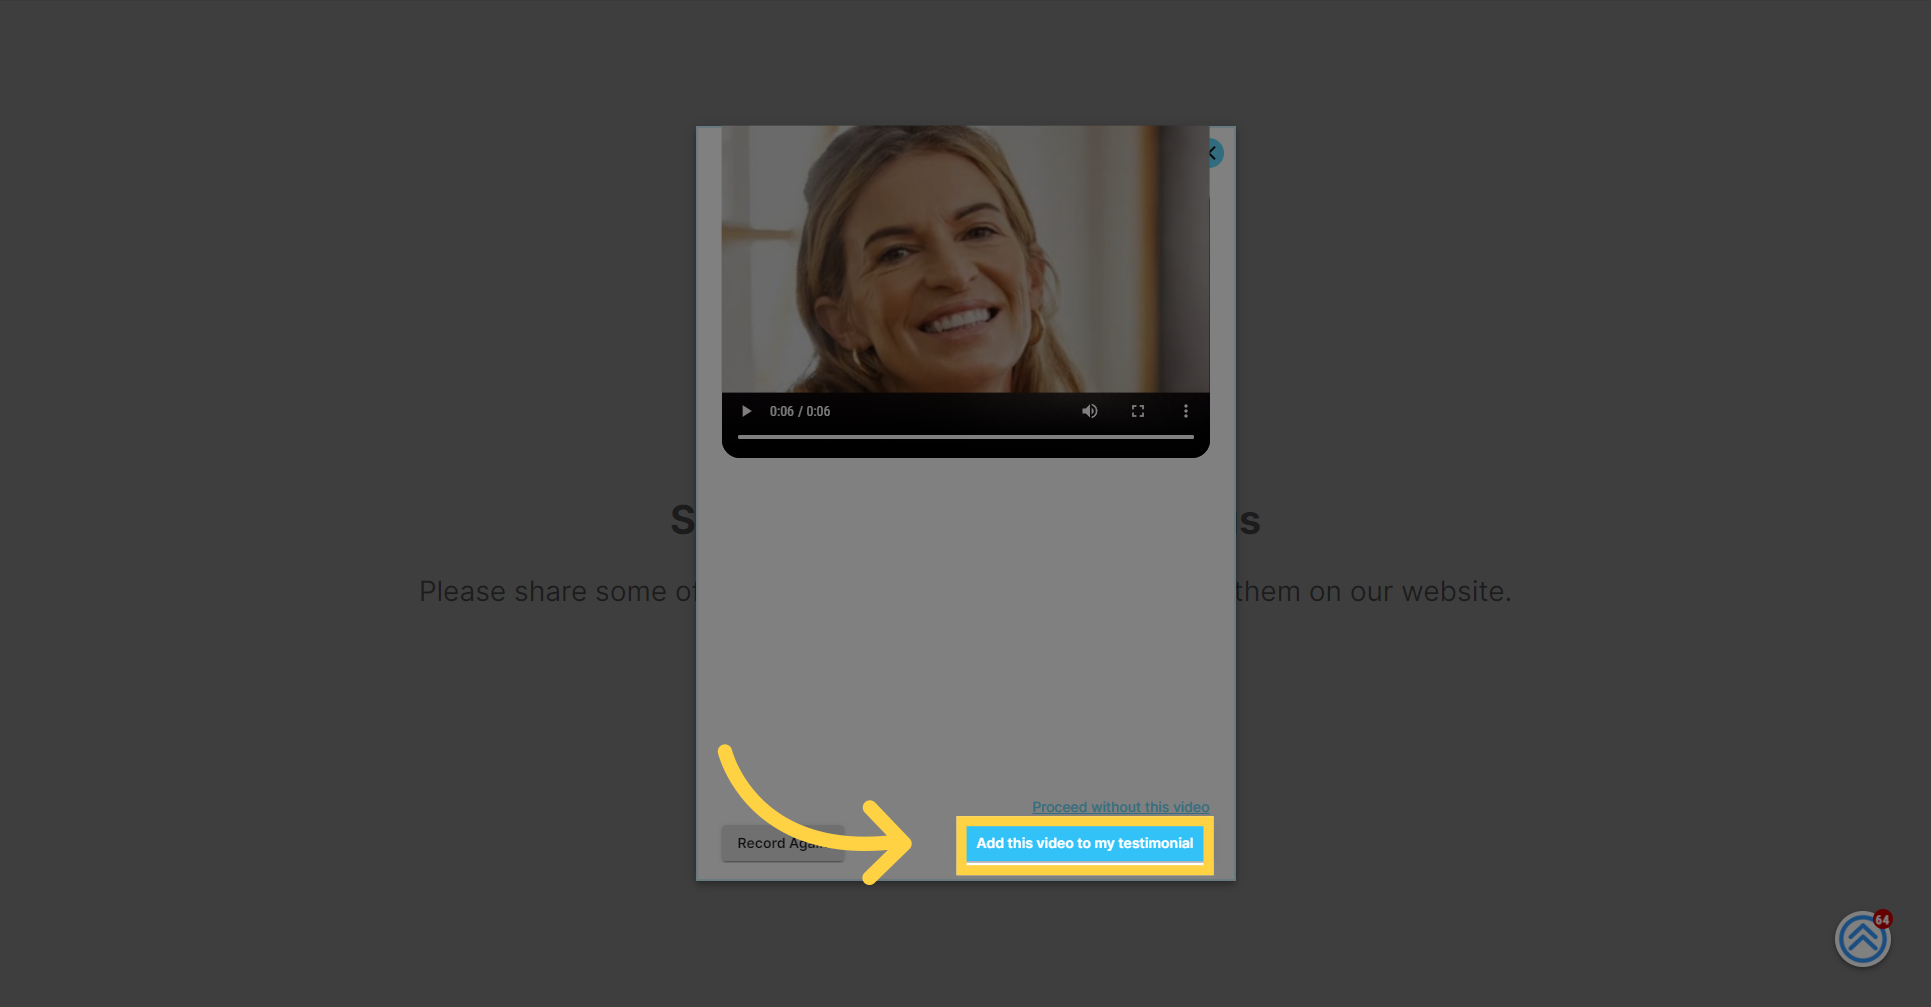
After recording, clients can preview their video to ensure it captures their message as intended. If satisfied, they can add it to their testimonial. Should they wish to improve it, they have the option to re-record as needed.
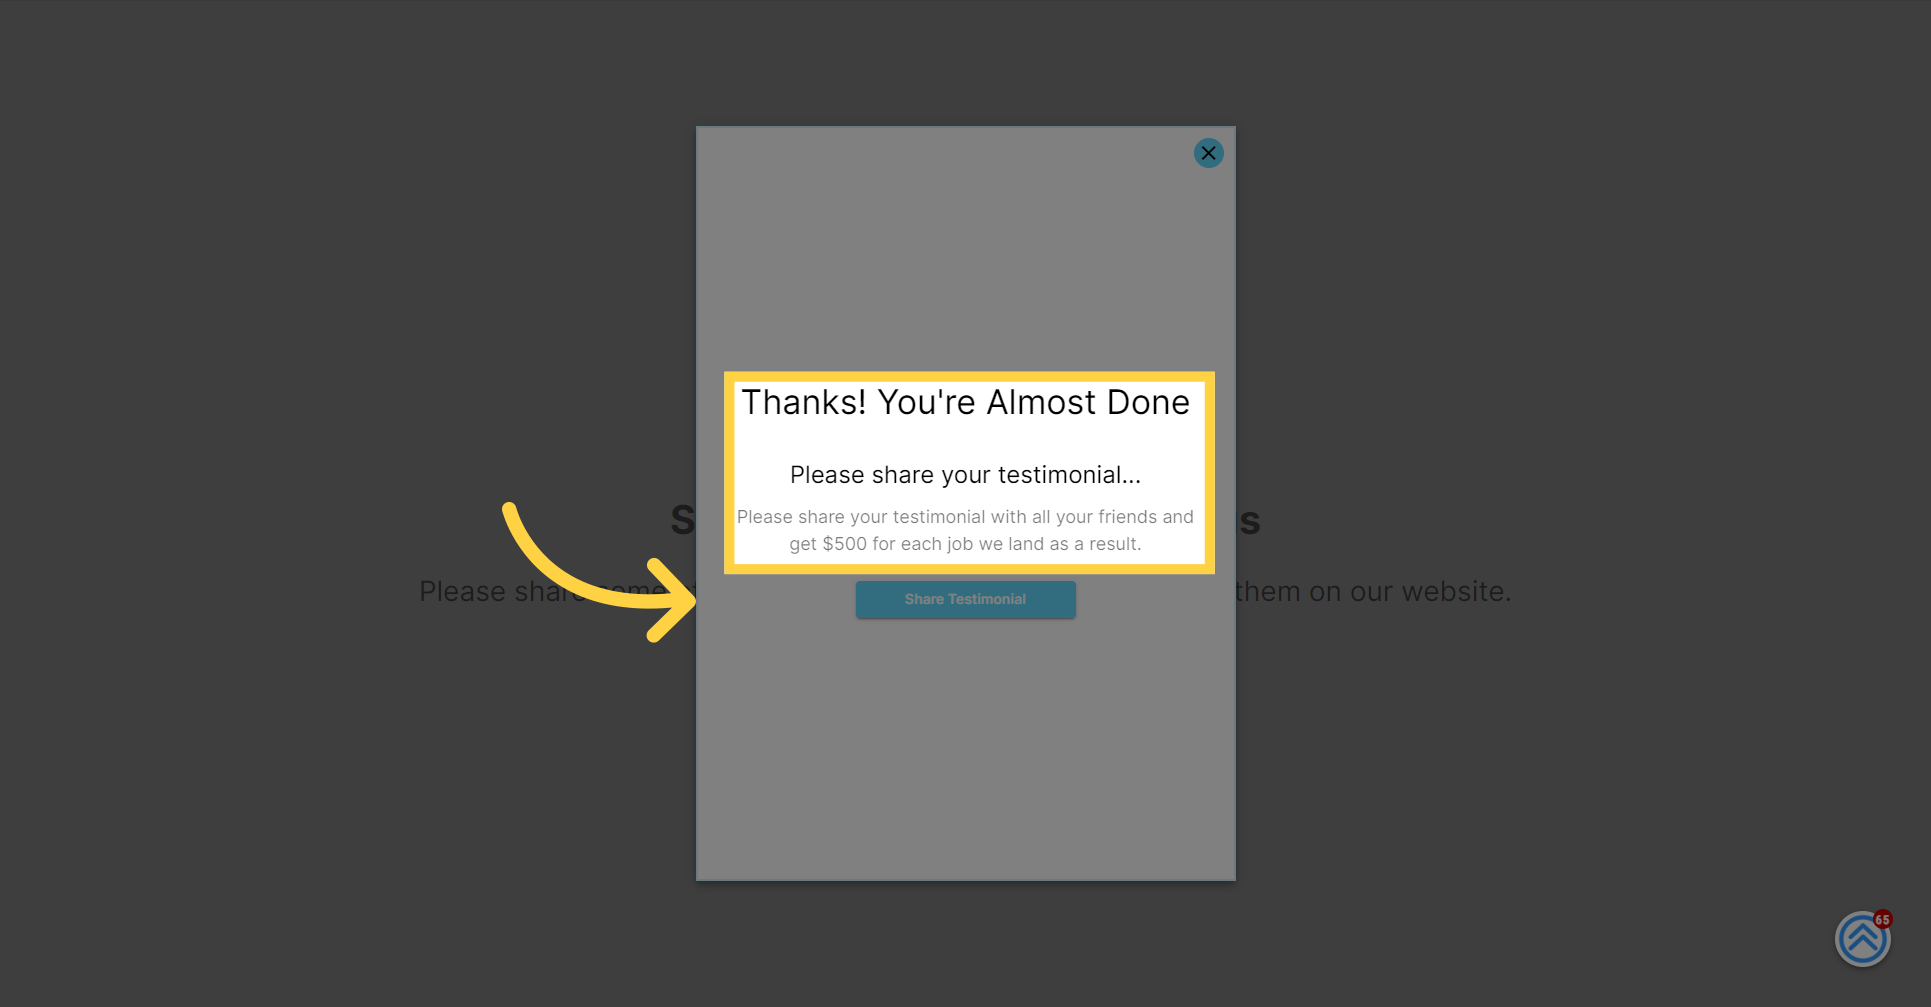
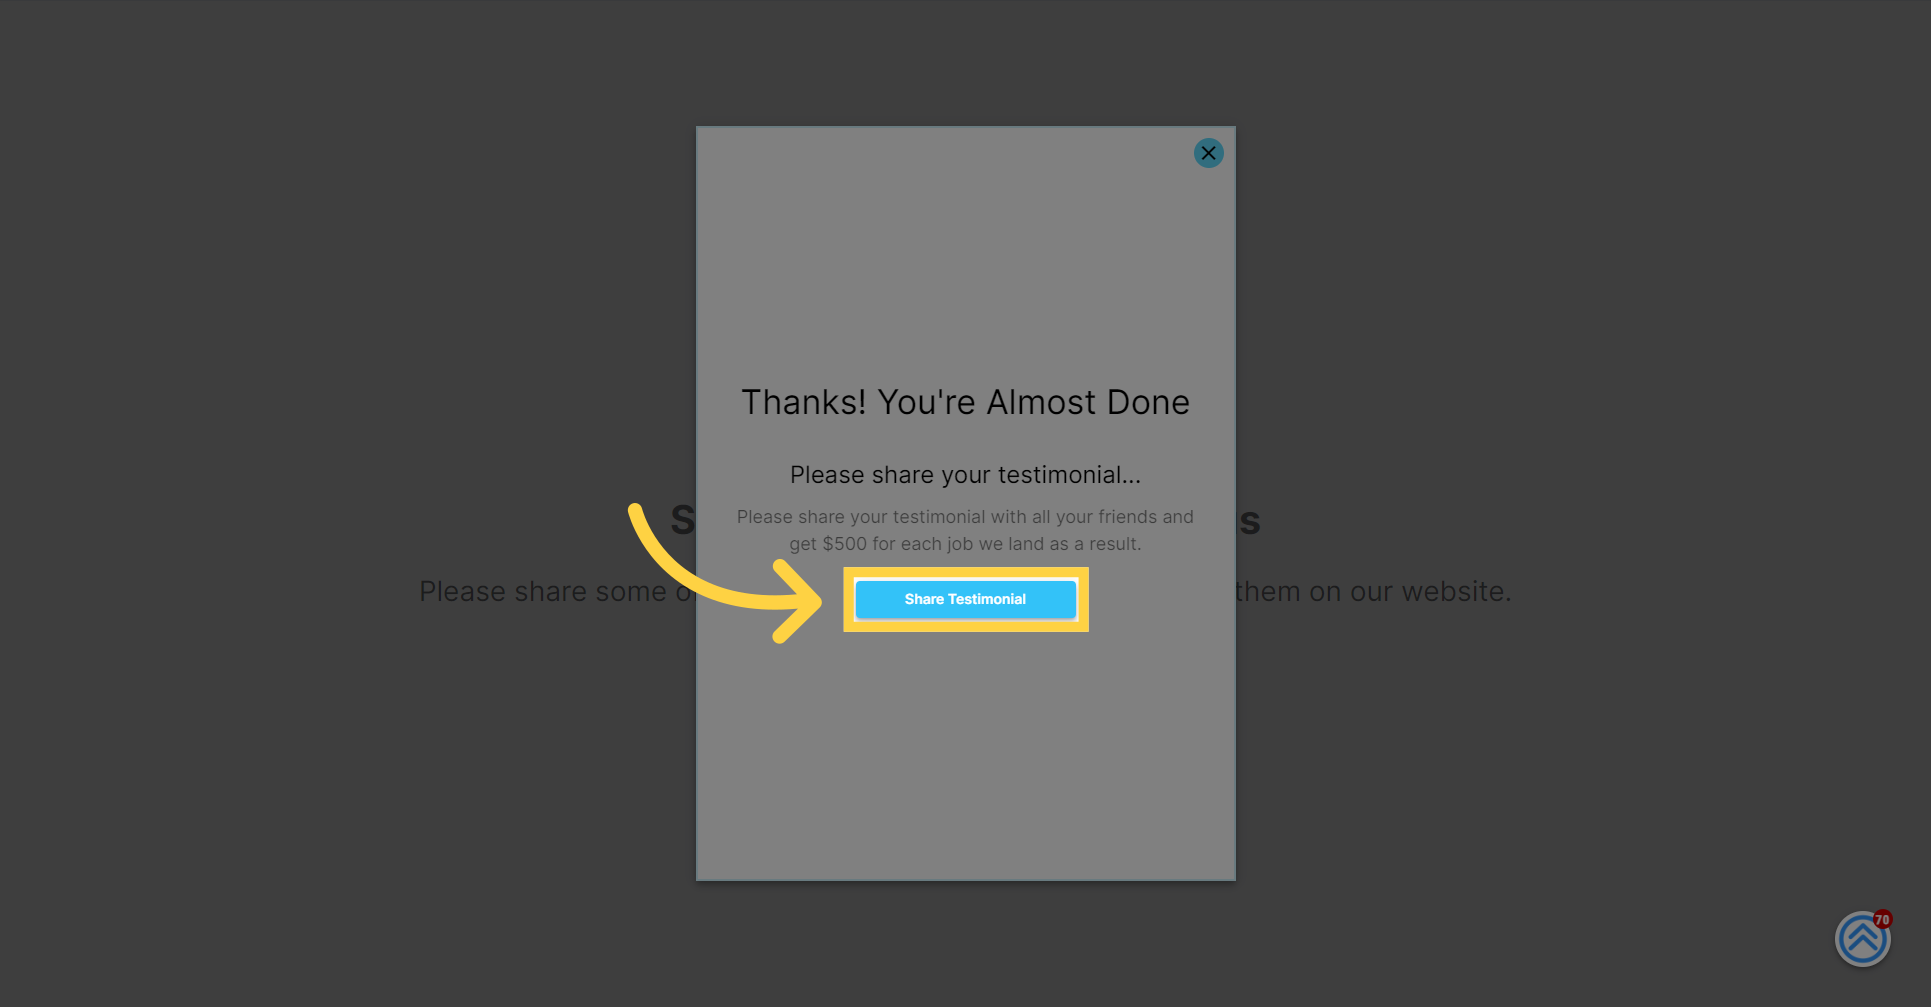
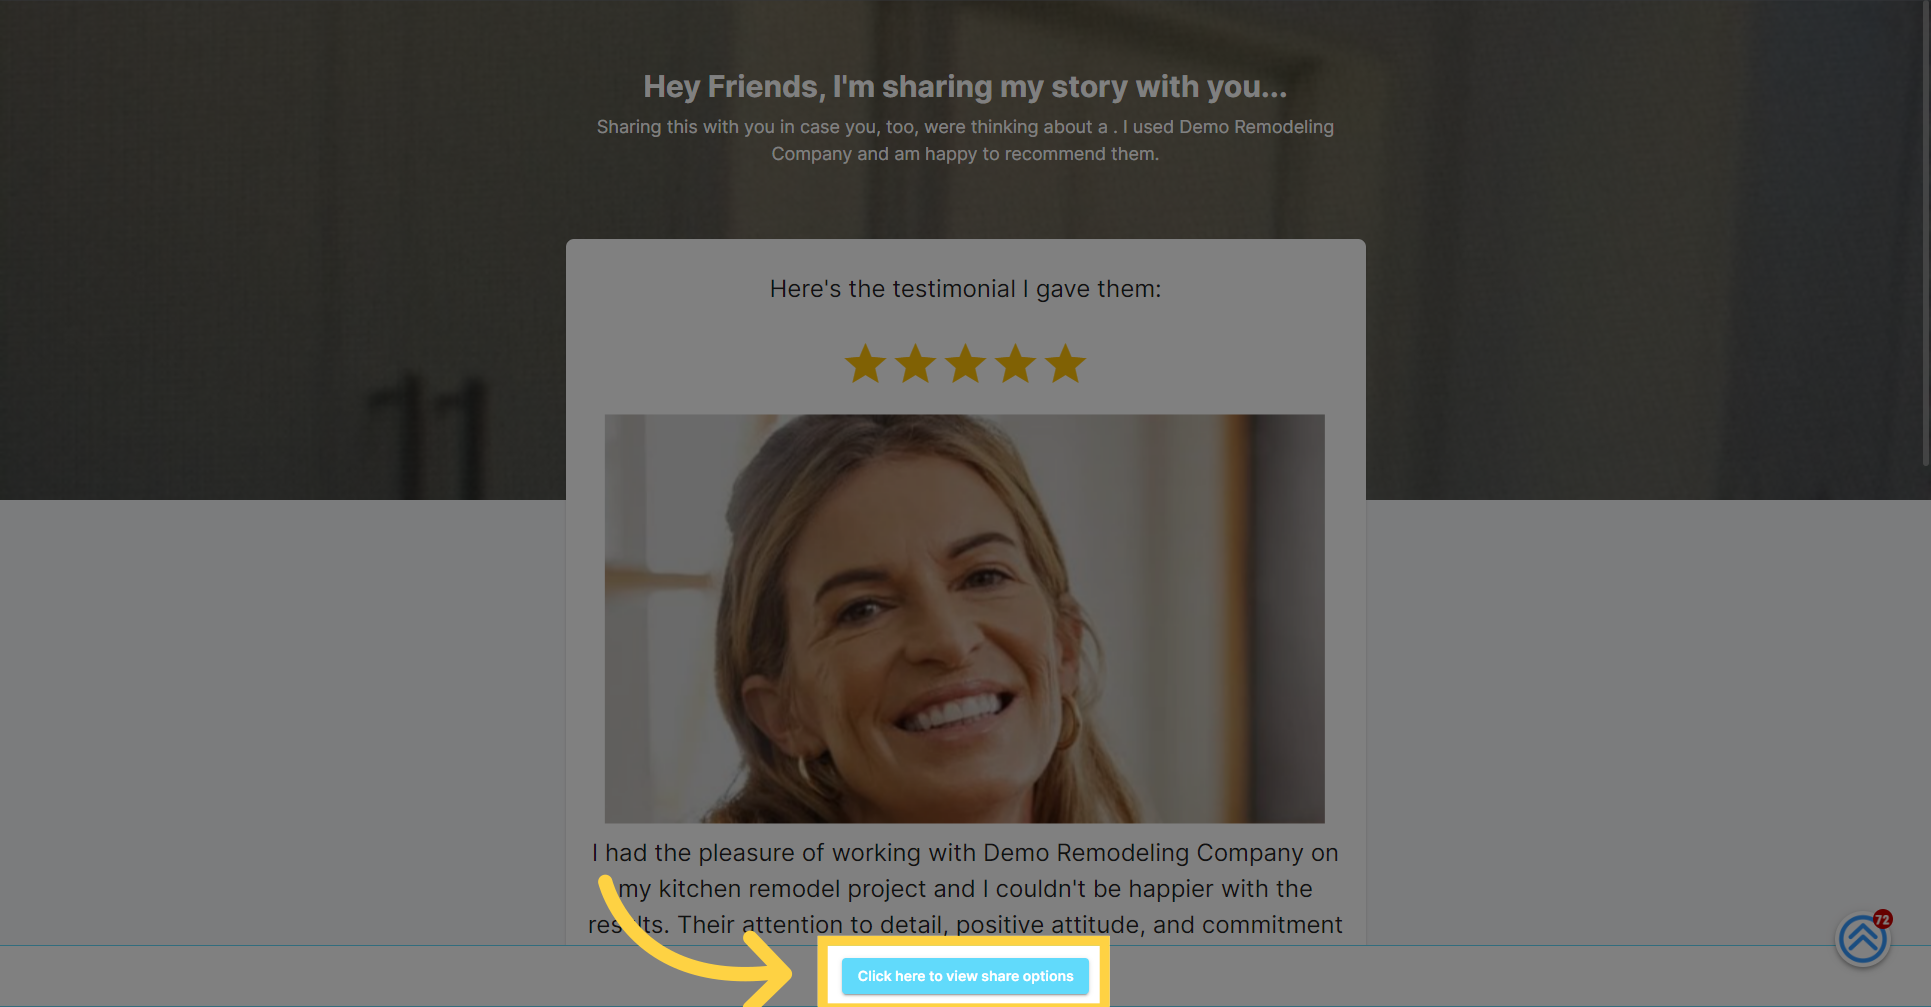
Upon completing their testimonial, clients are invited to share it with their network. The screen may also display an optional reward, determined by each business, for clients who help generate new business through referrals.
Clients can now click the "Share Testimonial" button to post their testimonial on their preferred social networks, extending its reach to friends and potential new clients.
The client will see their own testimonial featured prominently. To proceed with sharing, they should click the "Share Options" button to explore the various ways to share their testimonial with their network.
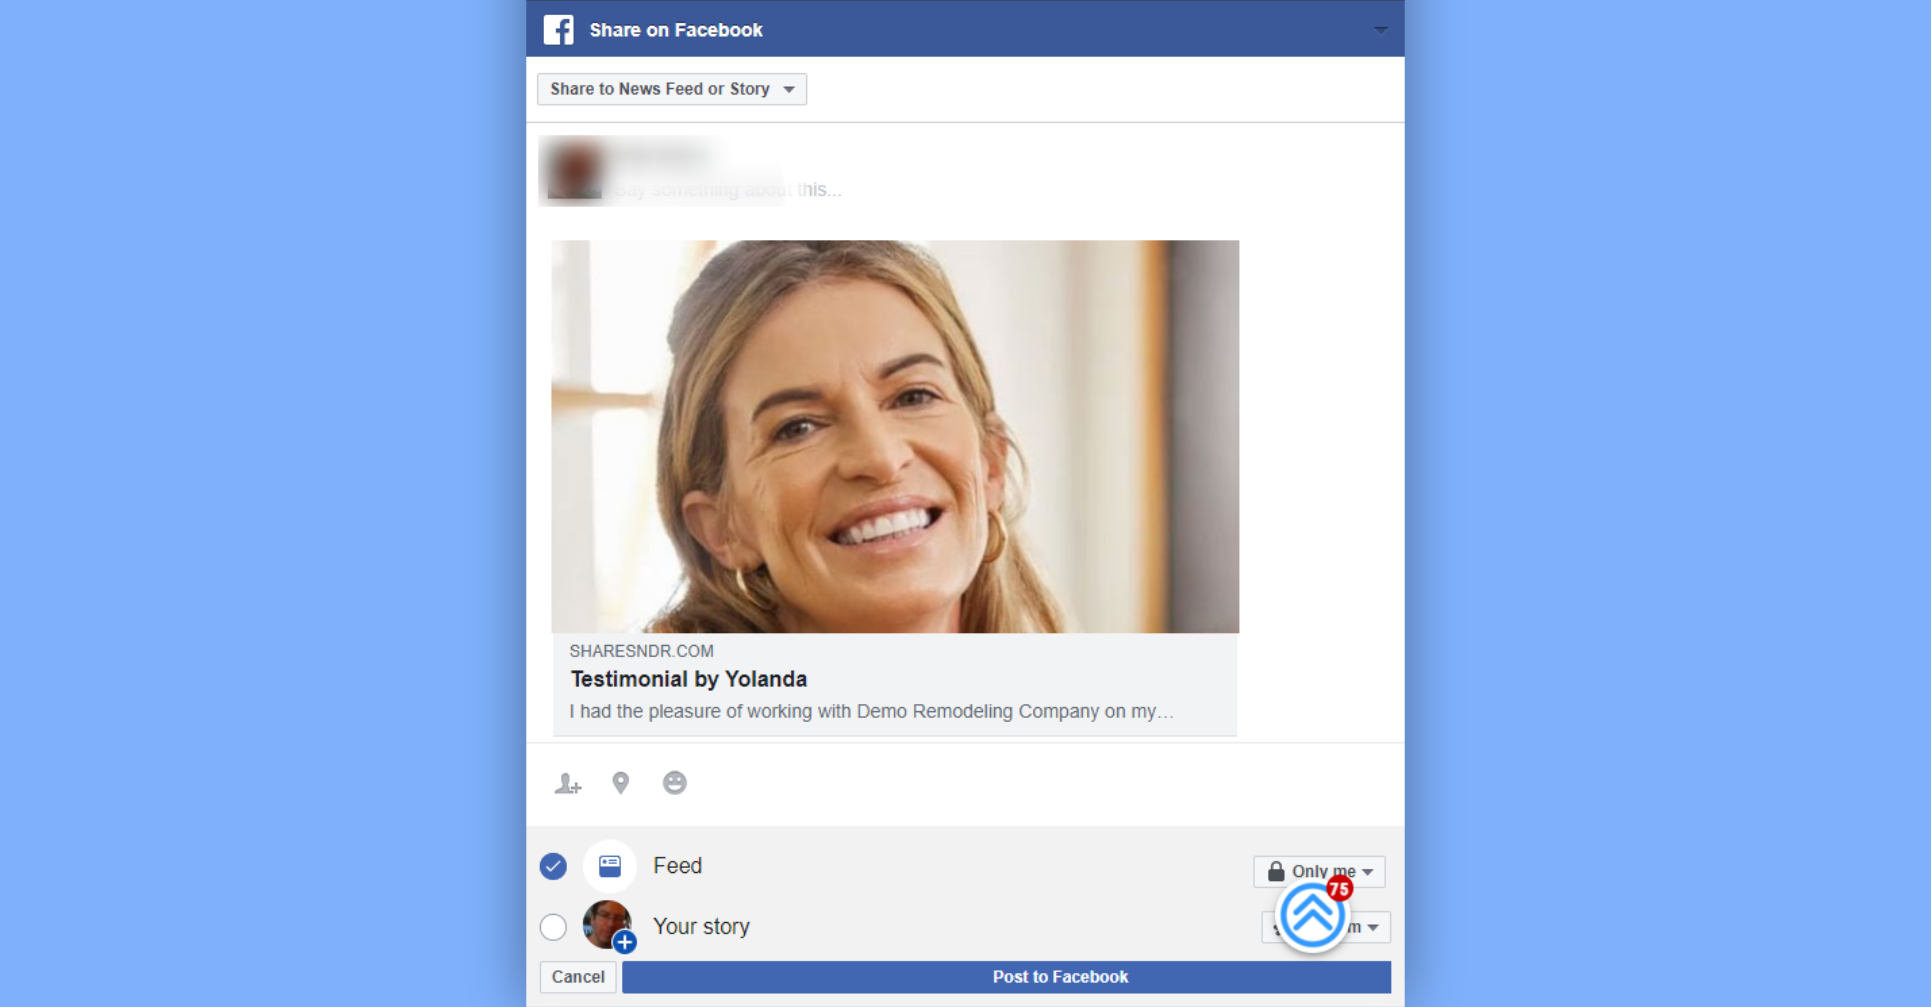
The client selects a social media platform, like Facebook, from the available icons to initiate the sharing process.
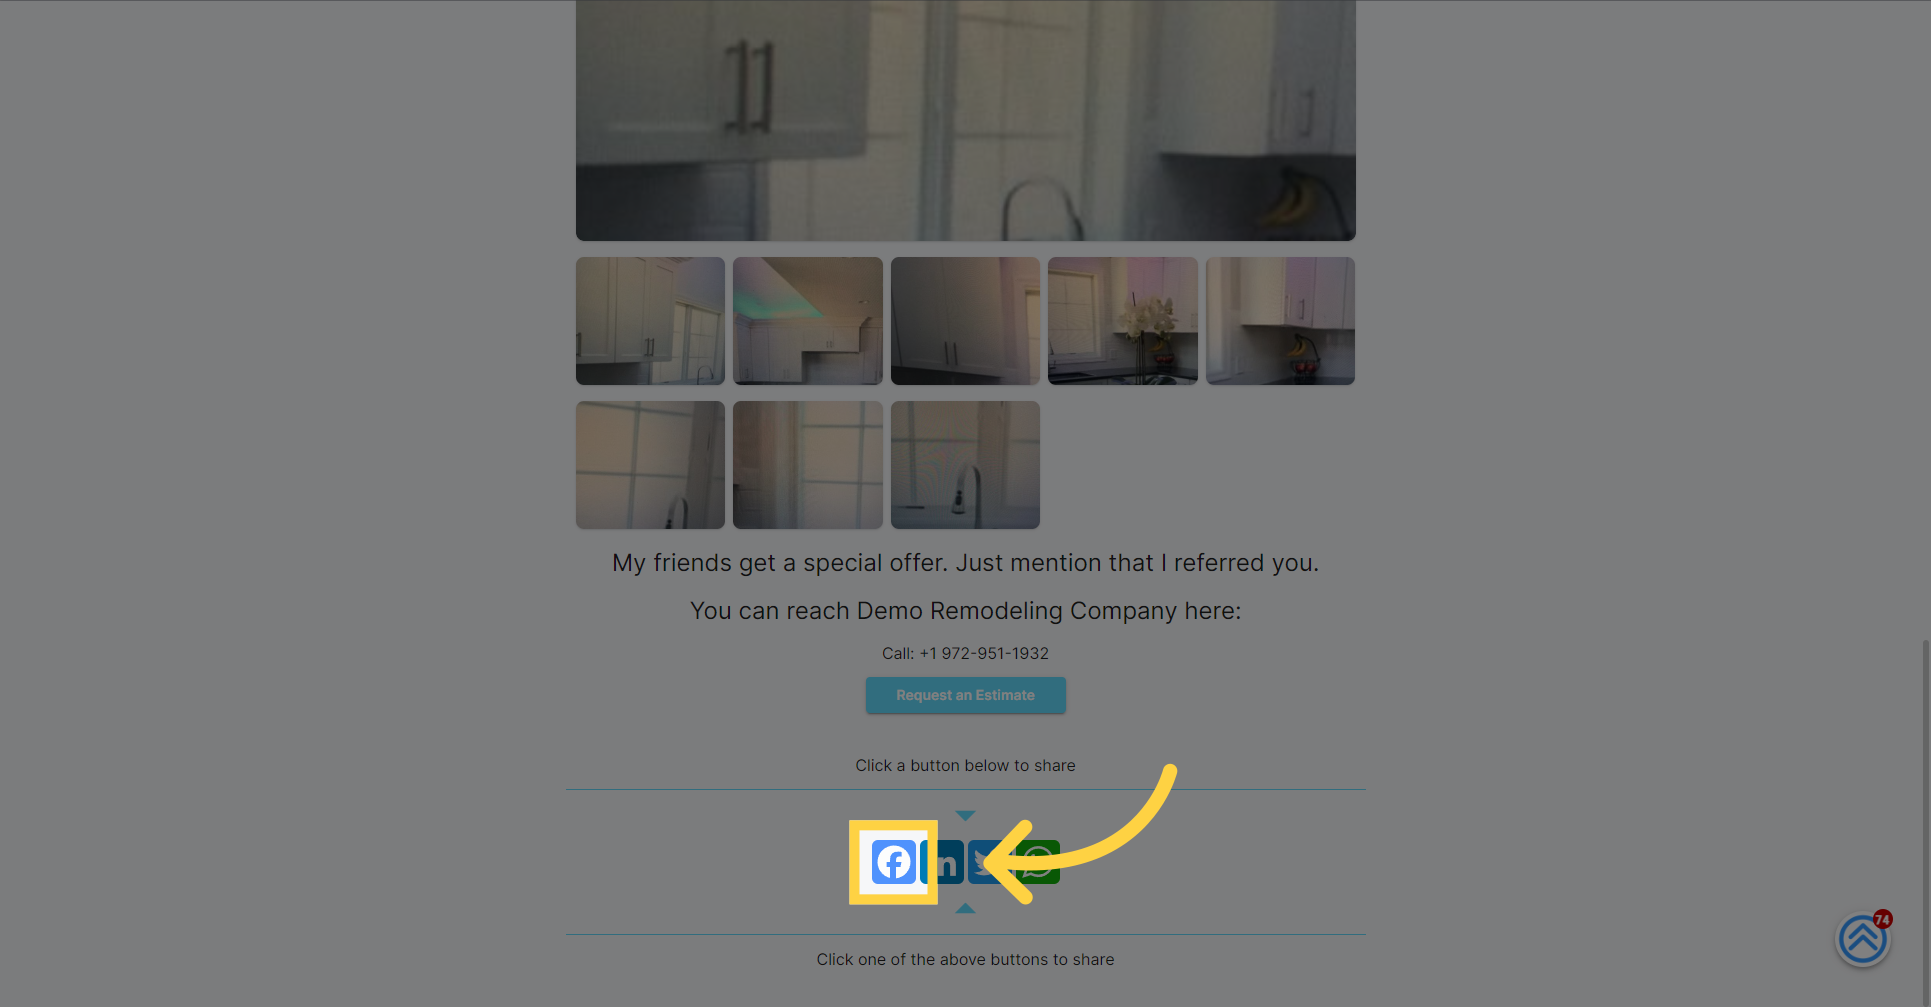
They are redirected to the chosen platform with a pre-populated post containing their testimonial, which they can then share with their network with a single click.
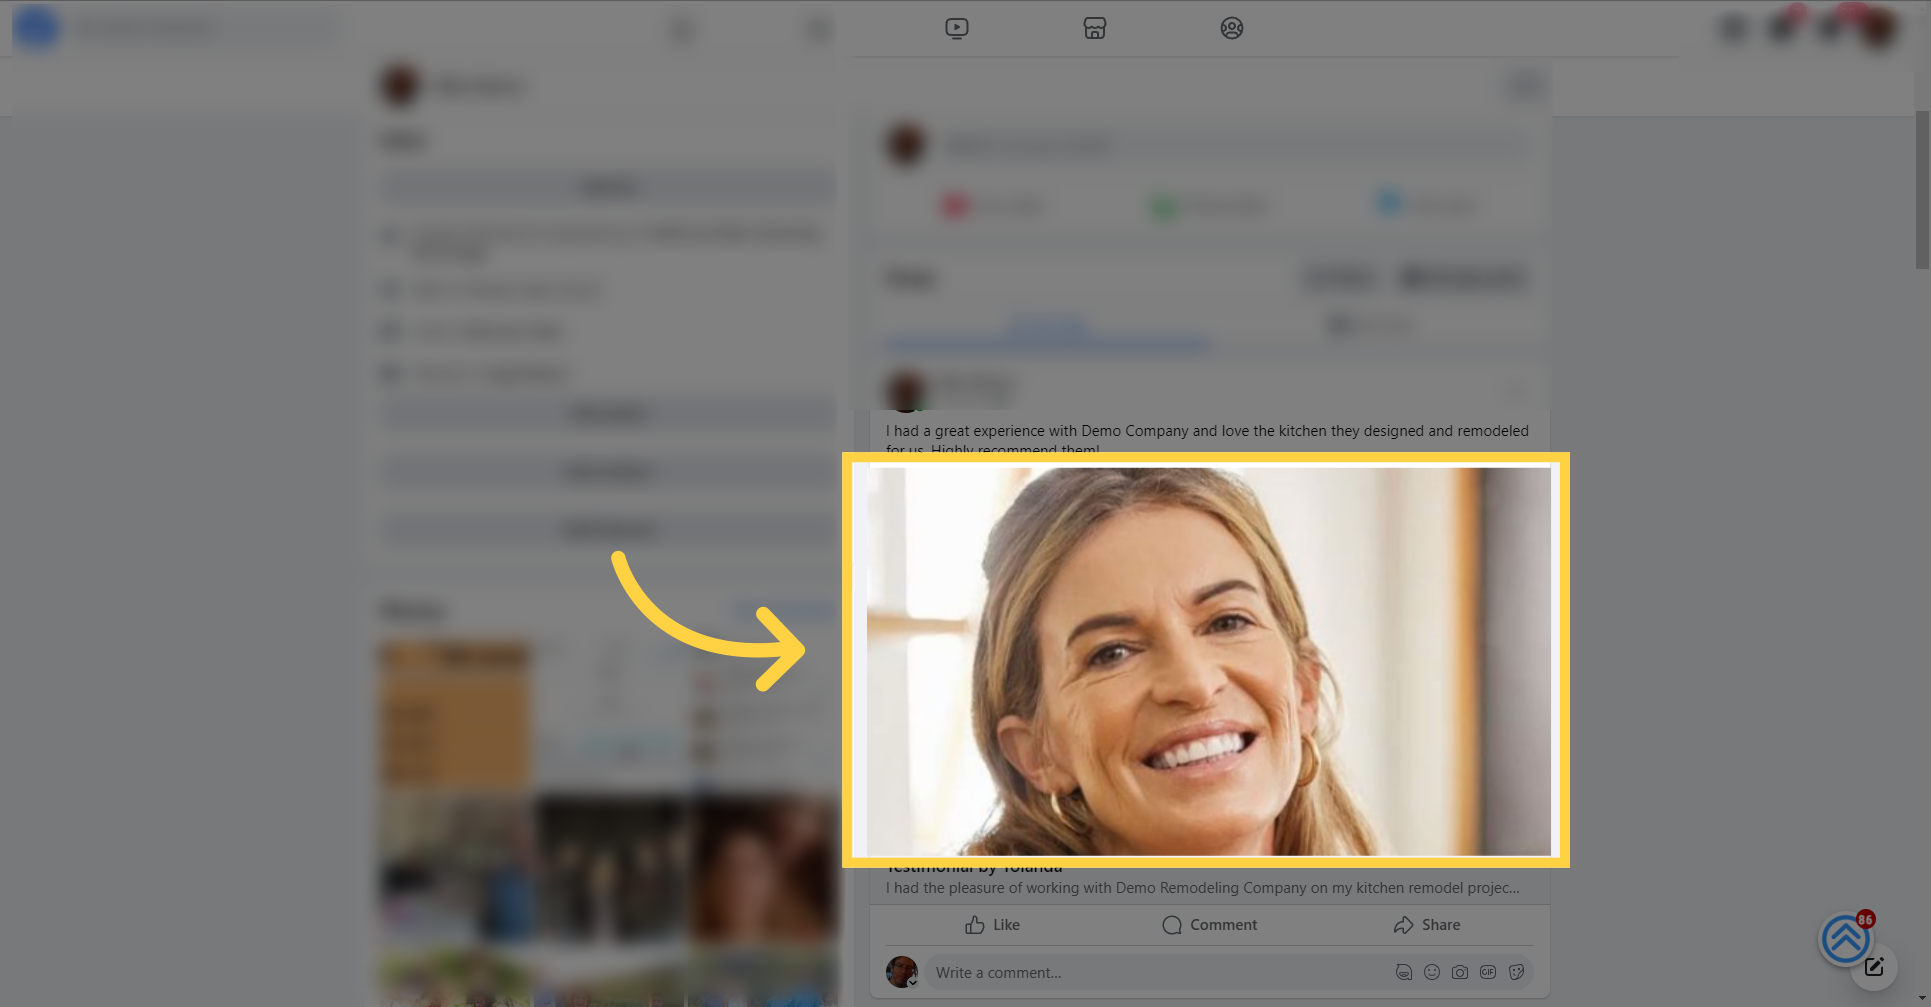
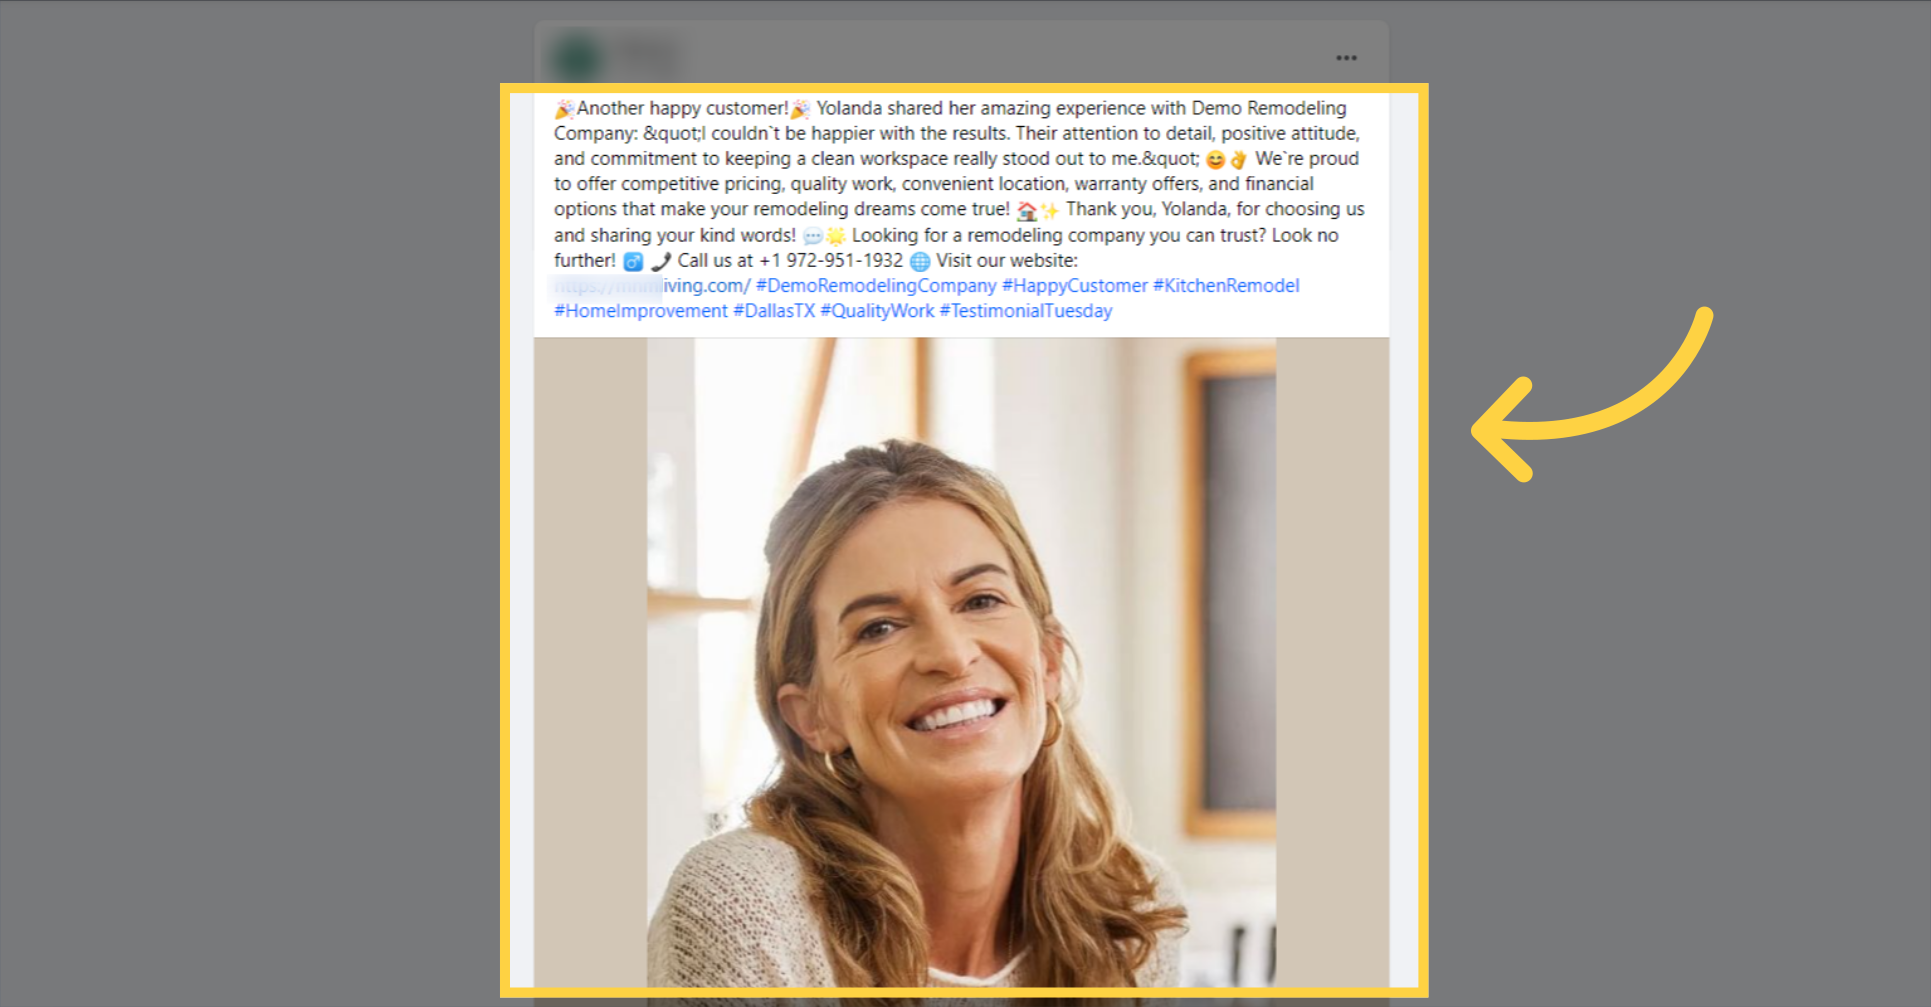
Once the client shares their testimonial, it appears prominently in their social feeds, giving your business immediate exposure to a broad audience and driving potential leads from their personal and professional networks.
Transitioning from individual client shares, set up automation to turn these testimonials into social media stories. This strategy ensures a consistent and engaging presence on your business's social channels, keeping your content fresh and your audience engaged.
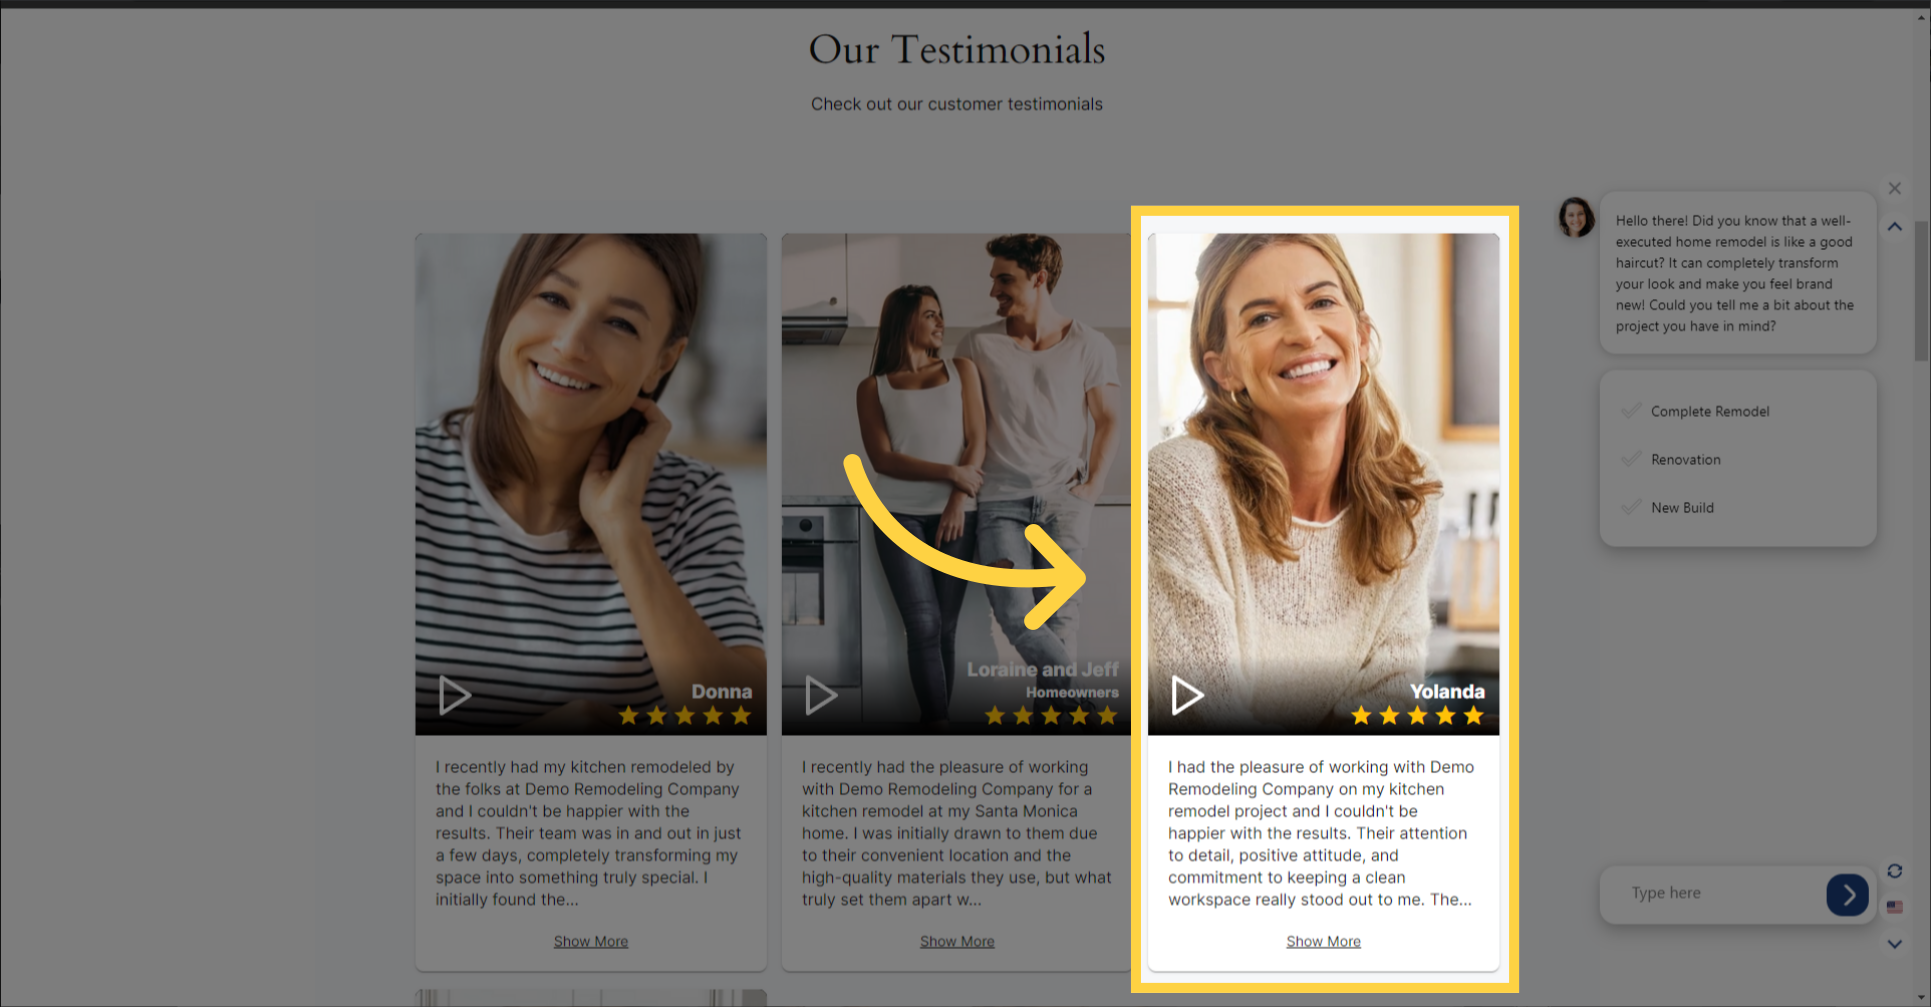
Following the pre-configured rules set in the testimonial configuration screen, the client's testimonial will also be featured on your business website's homepage, wherever the testimonial widget is integrated, providing visitors with immediate social proof and enhancing your online credibility.
Congratulations on completing the guide! You've now mastered the art of collecting and sharing client video testimonials. By integrating these authentic endorsements into your social media strategy and displaying them on your website, you're set to build a stronger brand reputation, foster trust with potential customers, and drive business growth. Remember, each testimonial is a story of satisfaction that resonates with your audience and showcases the value of your services. Thank you for following along, and we look forward to seeing the positive impact on your business.
