Note: You can click on any of the images in this document to view them fullscreen
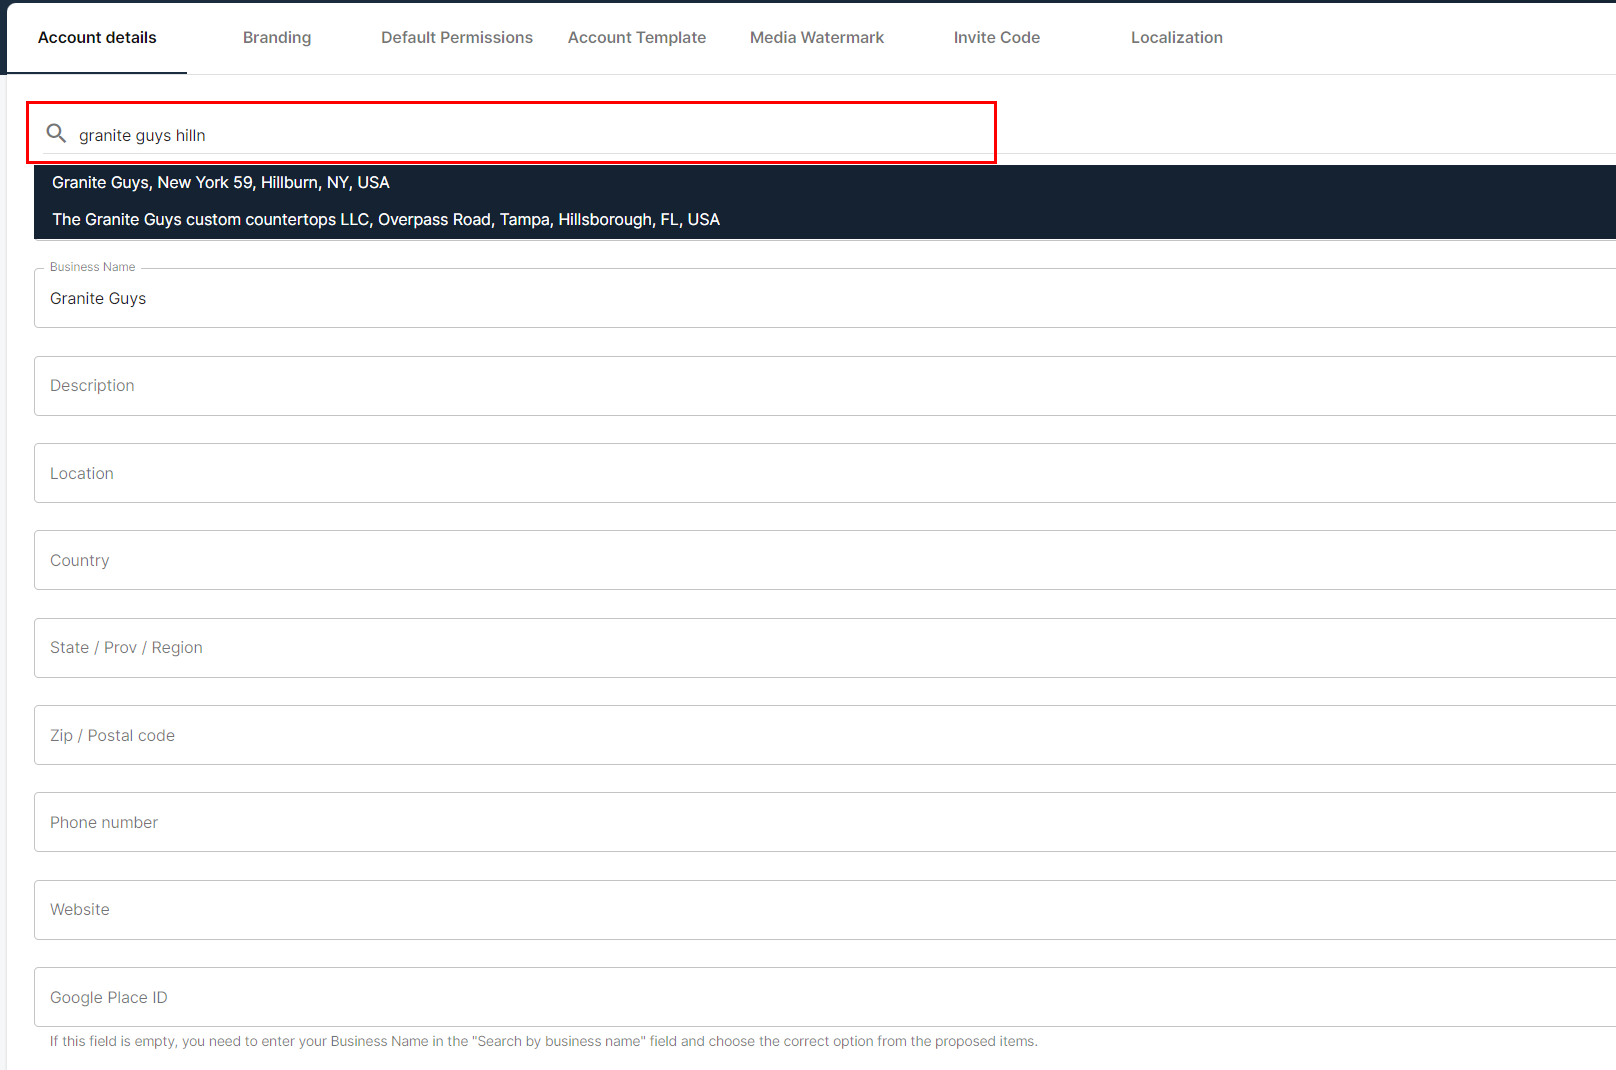
For businesses without a Google Business profile, enter your business details manually.
If your business has a Google Profile but isn’t showing up in the search, use this guide.
In the left side menu, open the Config Menu -> Team -> “Add New User”
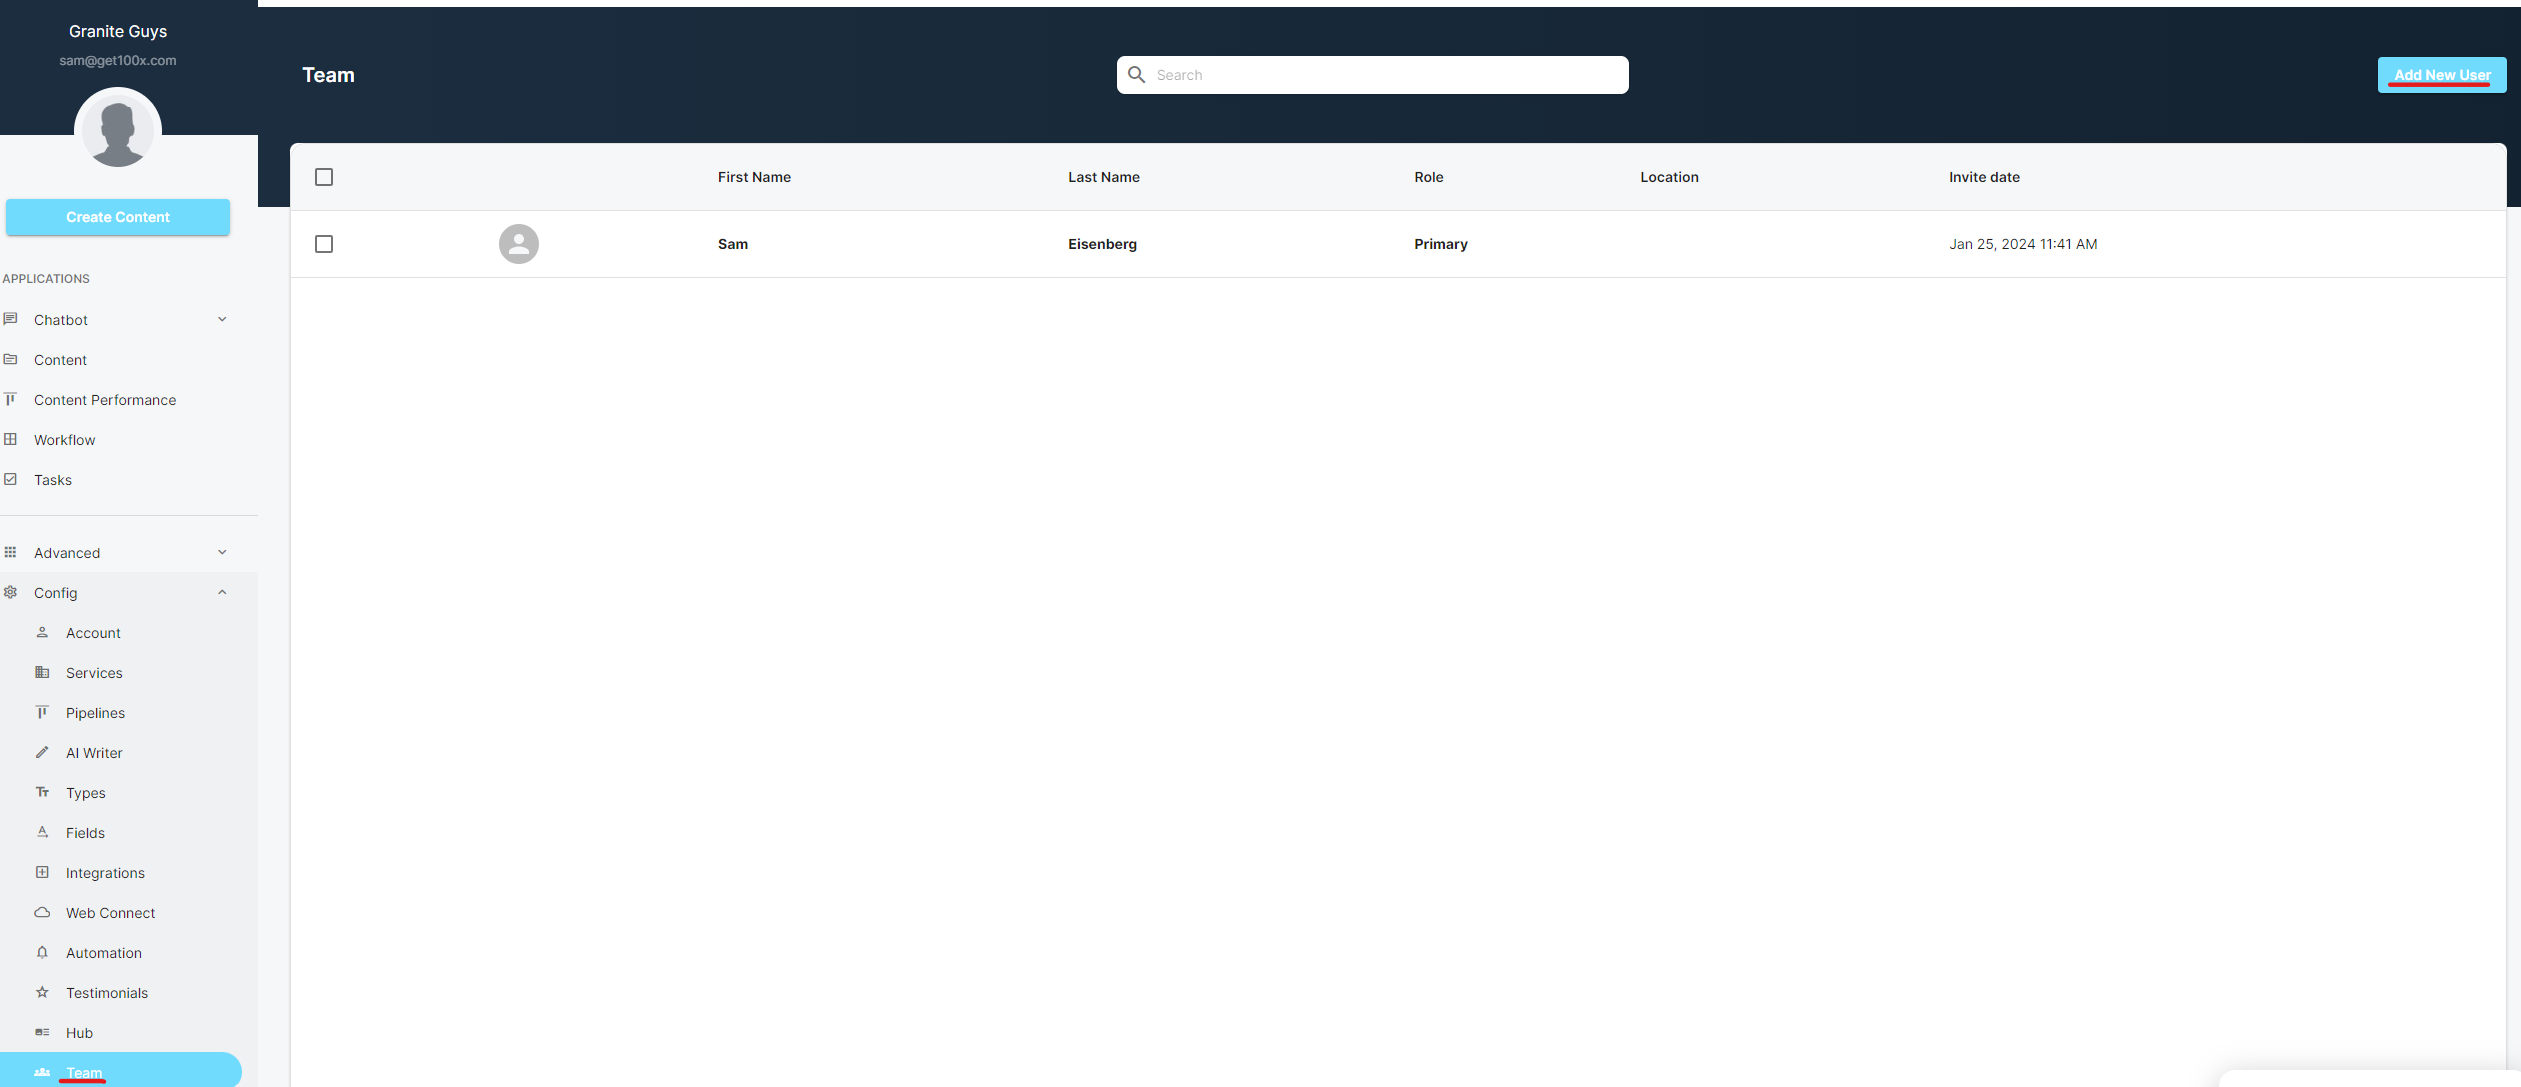
After adding your Team members’ details, click “Send Invite”
Users have all basic permissions needed to set-up the account, integrate socials, create content and beyond. Admins have access to more advanced features.
Your Sales Rep engages site visitors in conversation and collects their contact information or directs them to a link of your choosing. It will contextually use reviews, testimonials, case studies, completed projects, and more, to better direct and convert them.

Note: The chatbot will only work on the website currently listed in approved domain.
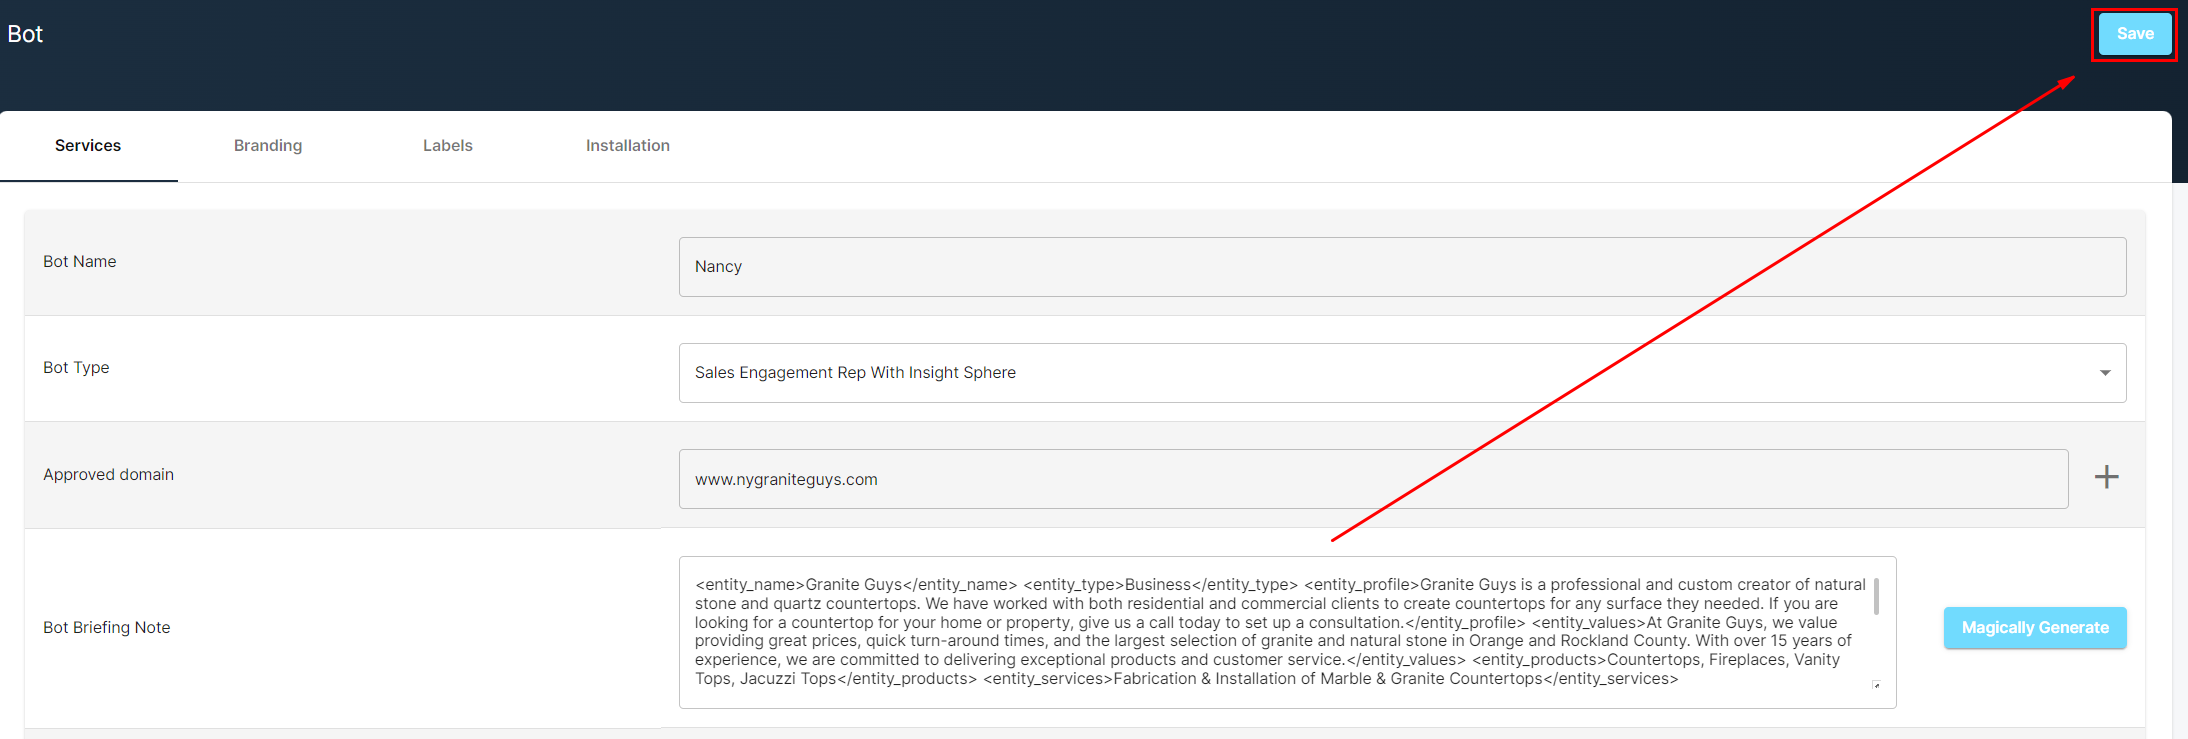
Note: The bot briefing note is the core instructions your sales rep uses when interacting with visitors and therefore is very important. Use this guide to optimize your Bot Briefing Note.

You can find instructions on installing the code on major website platforms, here.
Note: Your chatbot is always learning- even after your installed it on your website
Document Import: Add training manuals, guides, FAQs, marketing materials and beyond. The AI will then read through all of these and create internal summaries so it knows more about your business and offerings.
Website Import: While your website has already been scanned, you can provide non-indexed pages or pages from other websites (“Add custom Urls” - after clicking “Get Popular Pages”) to provide key web pages you want the bot to learn from.

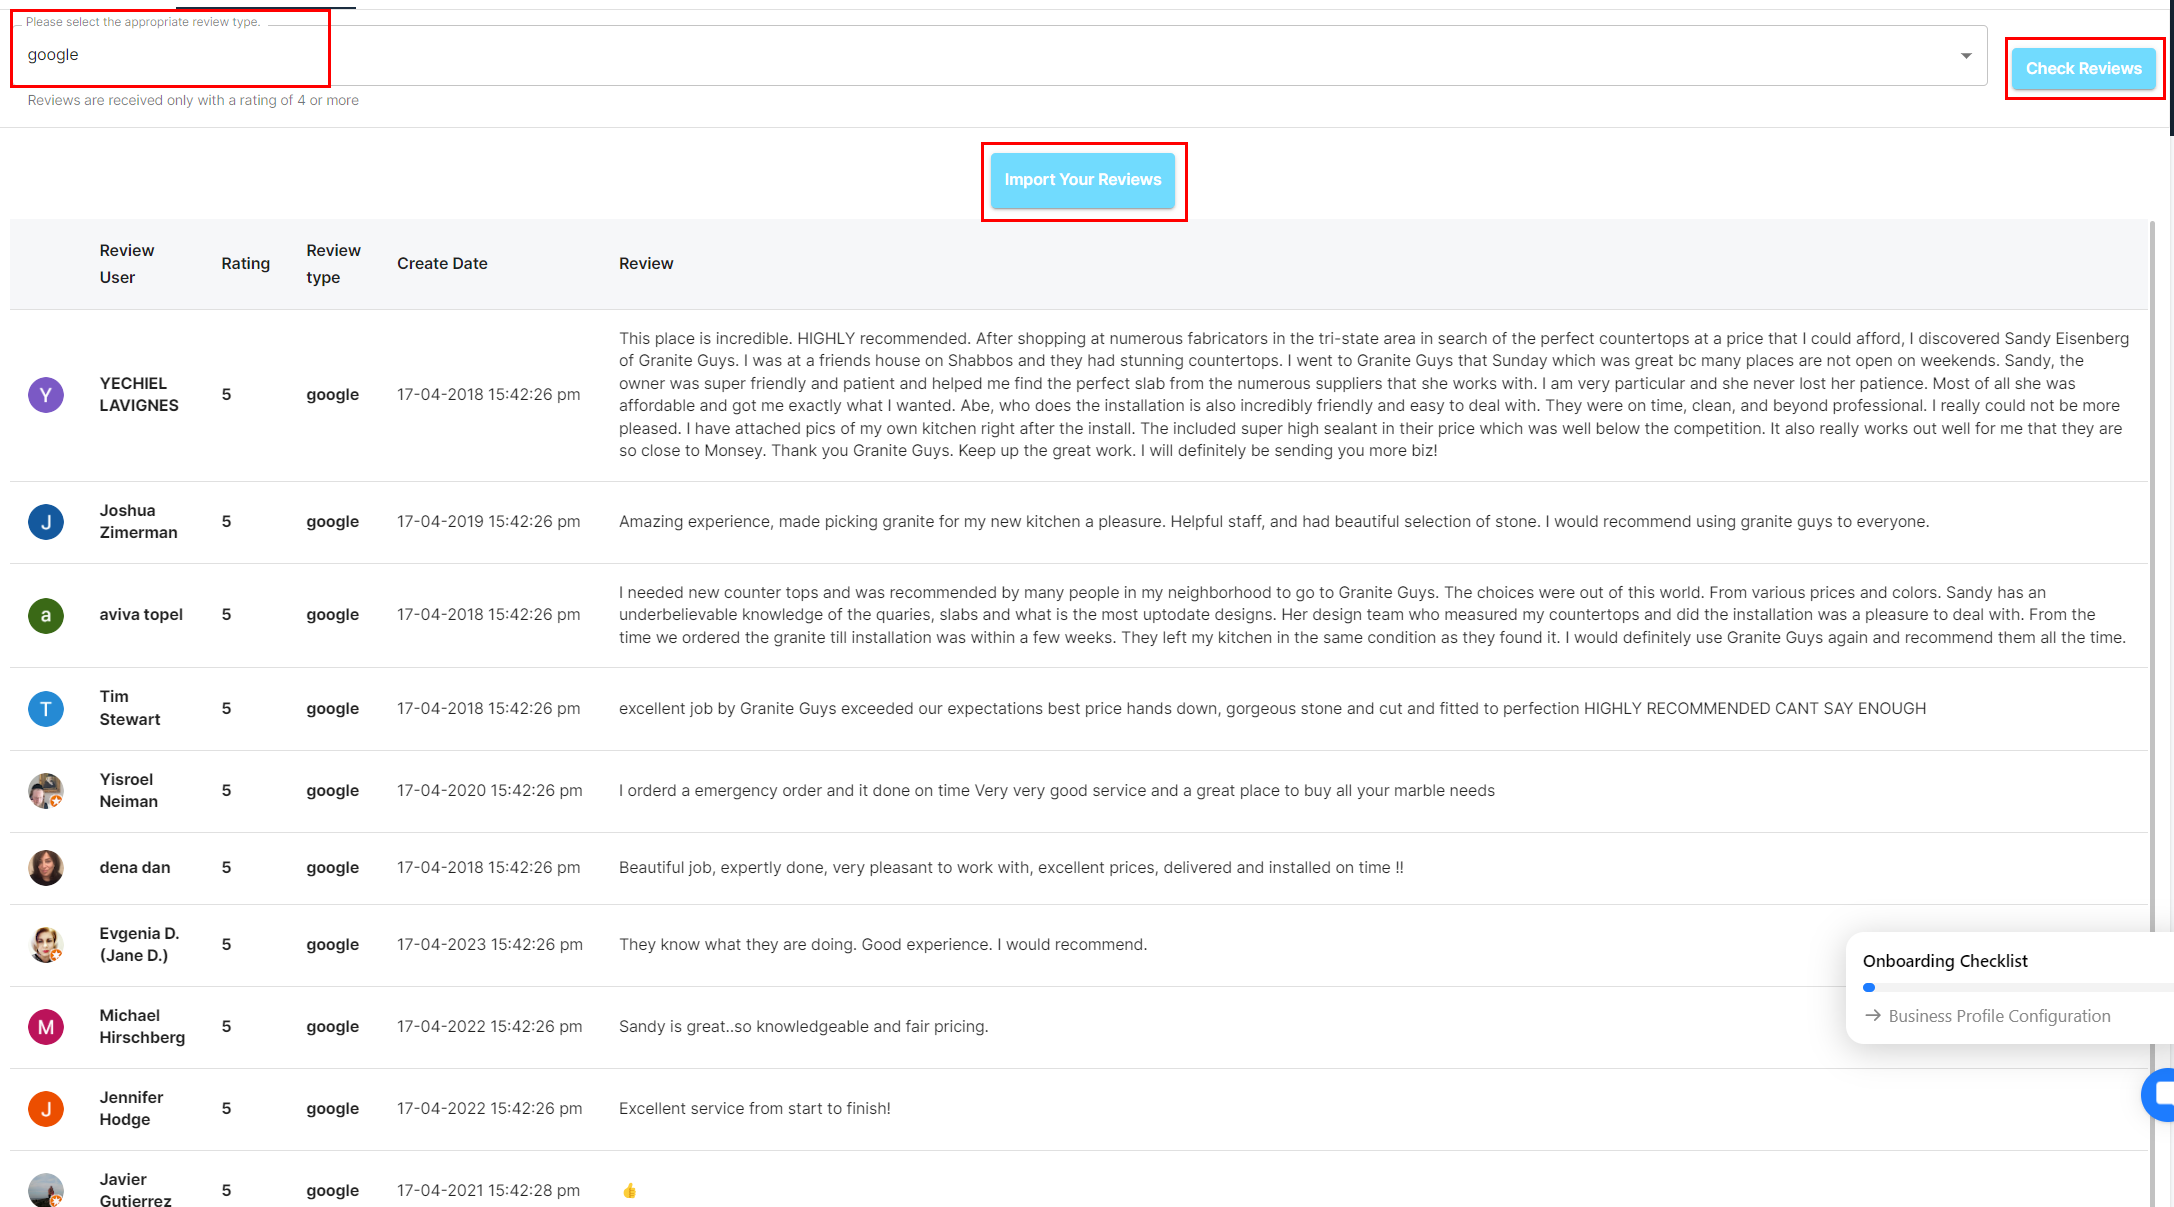
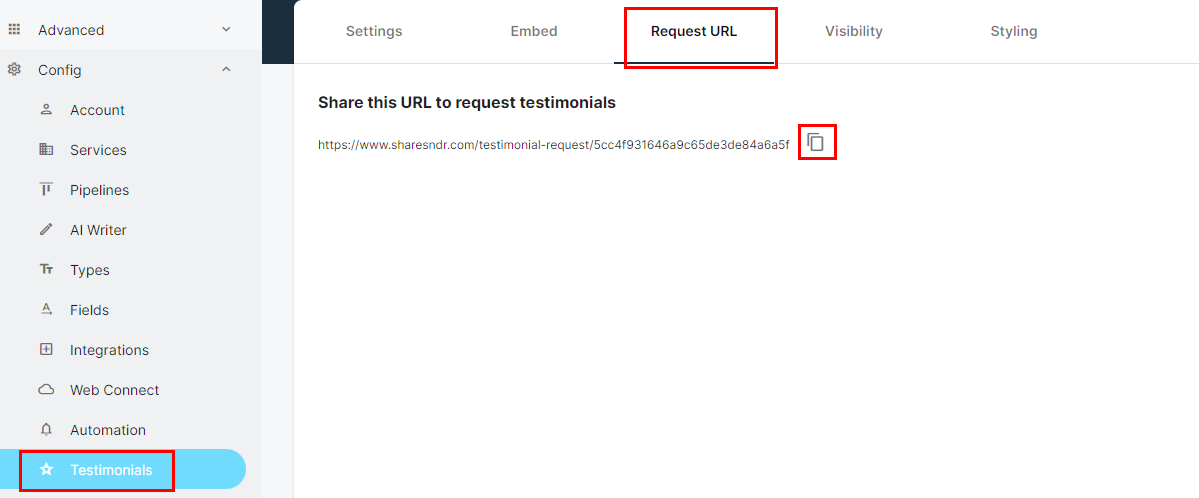
Import Reviews from Yelp and/or Google Business. These will be used contextually in conversations to help convert site visitors to leads.
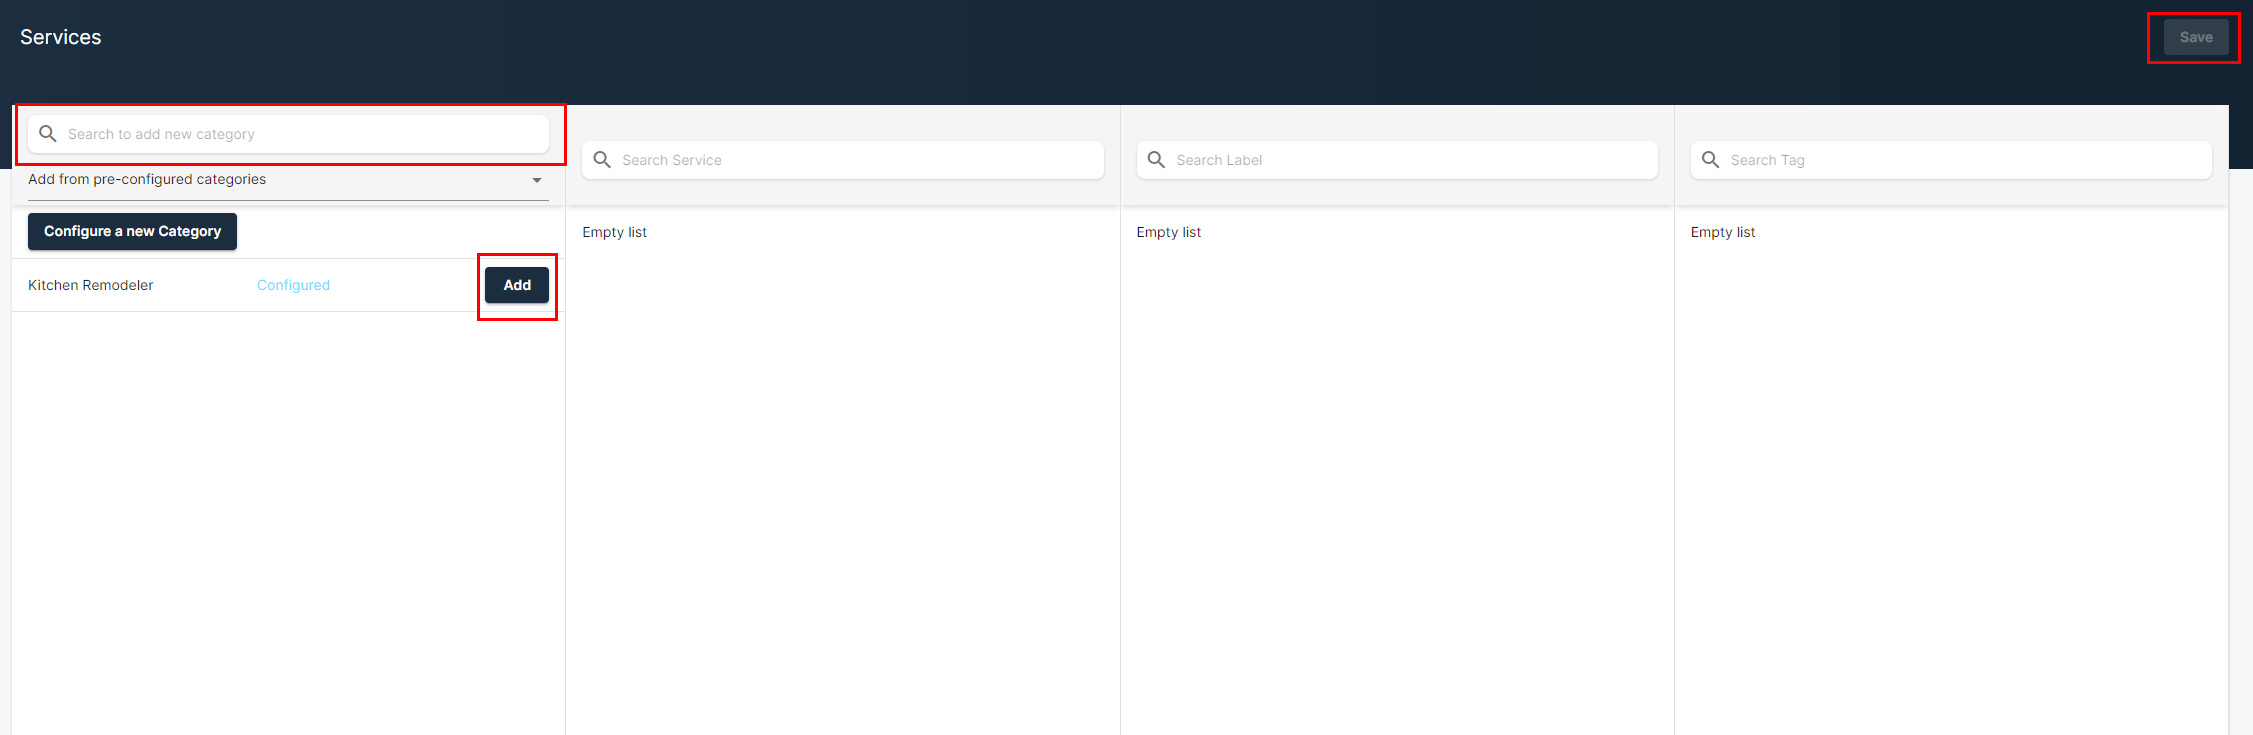
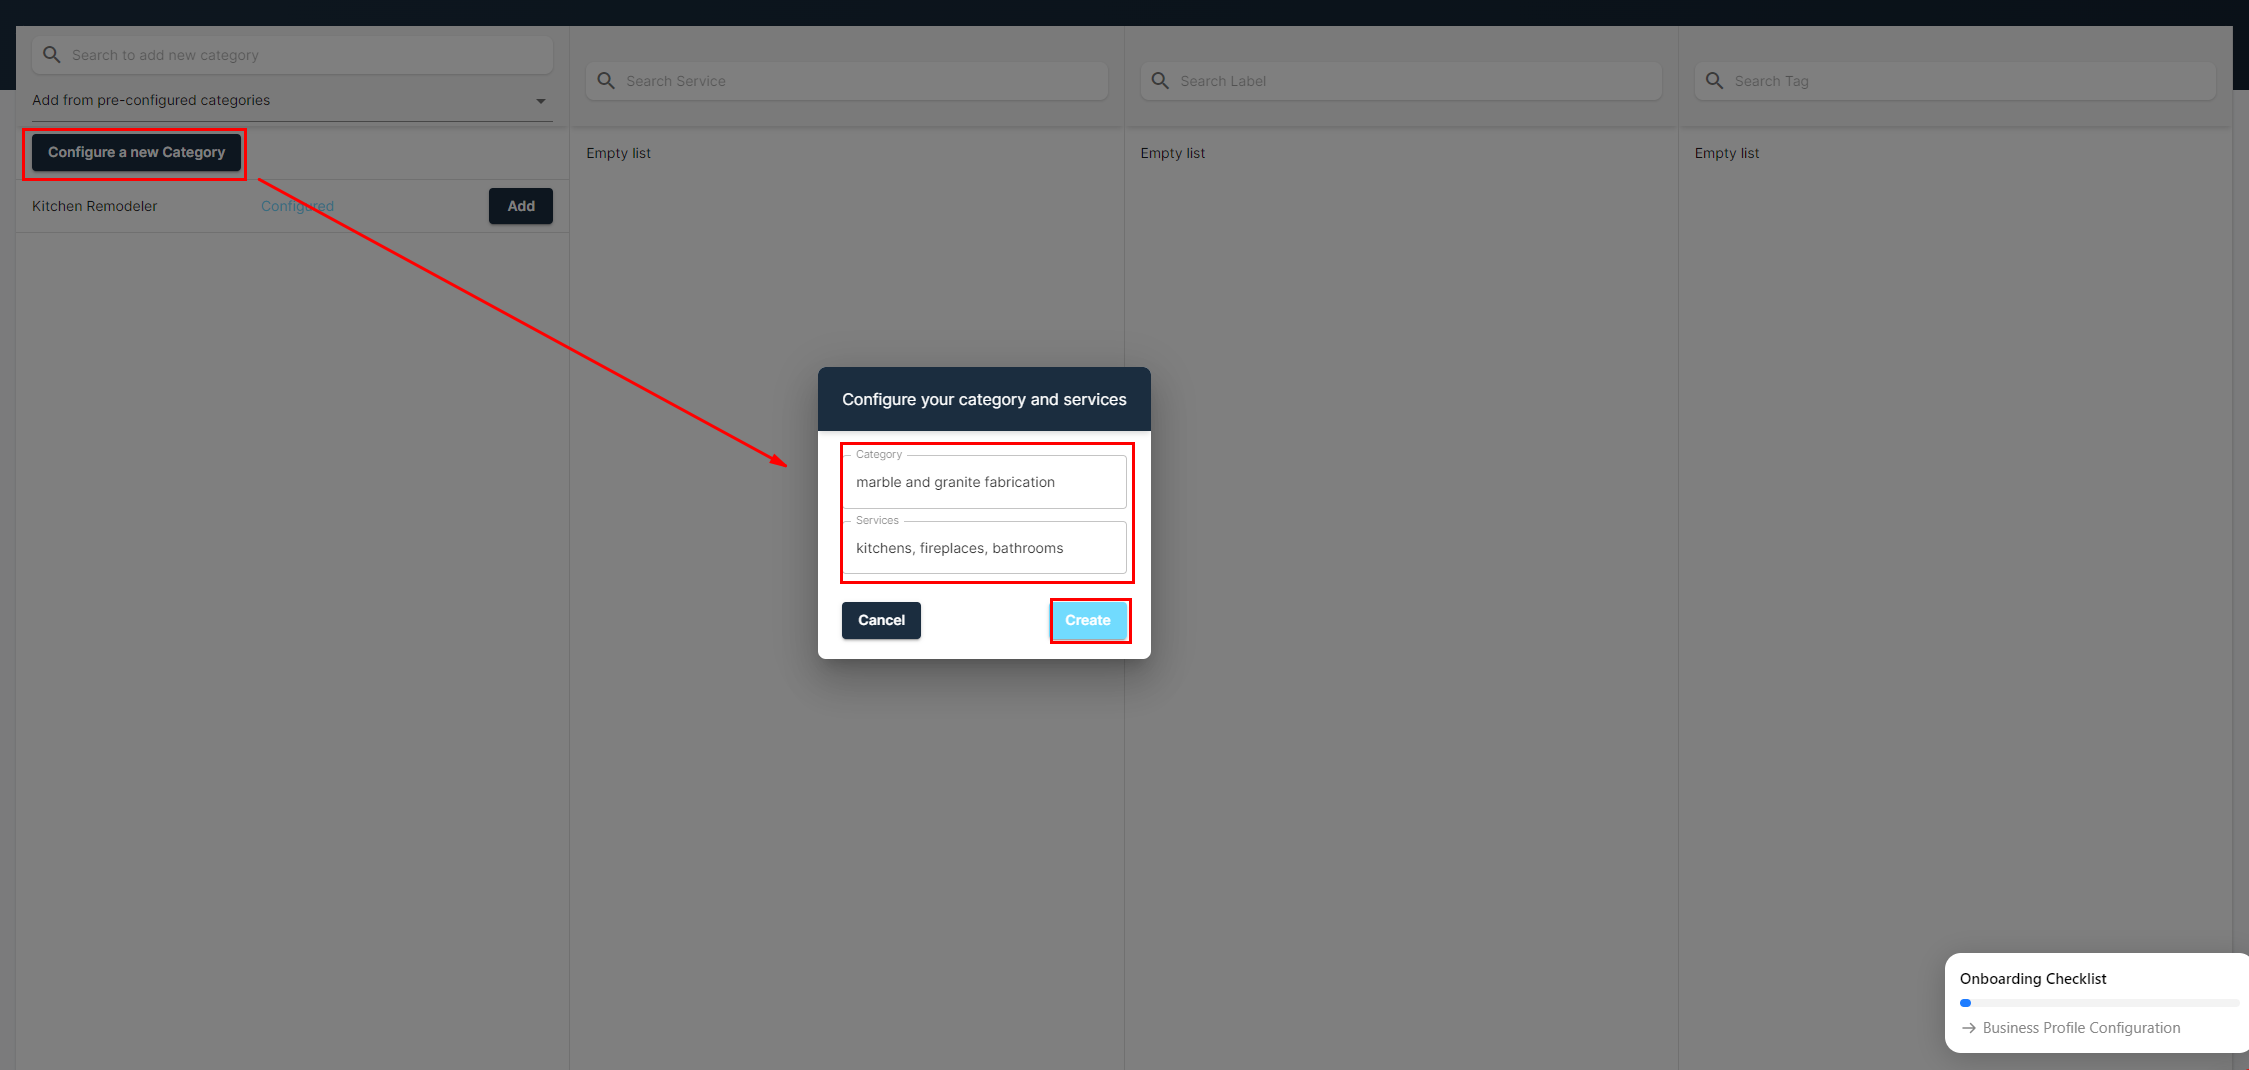
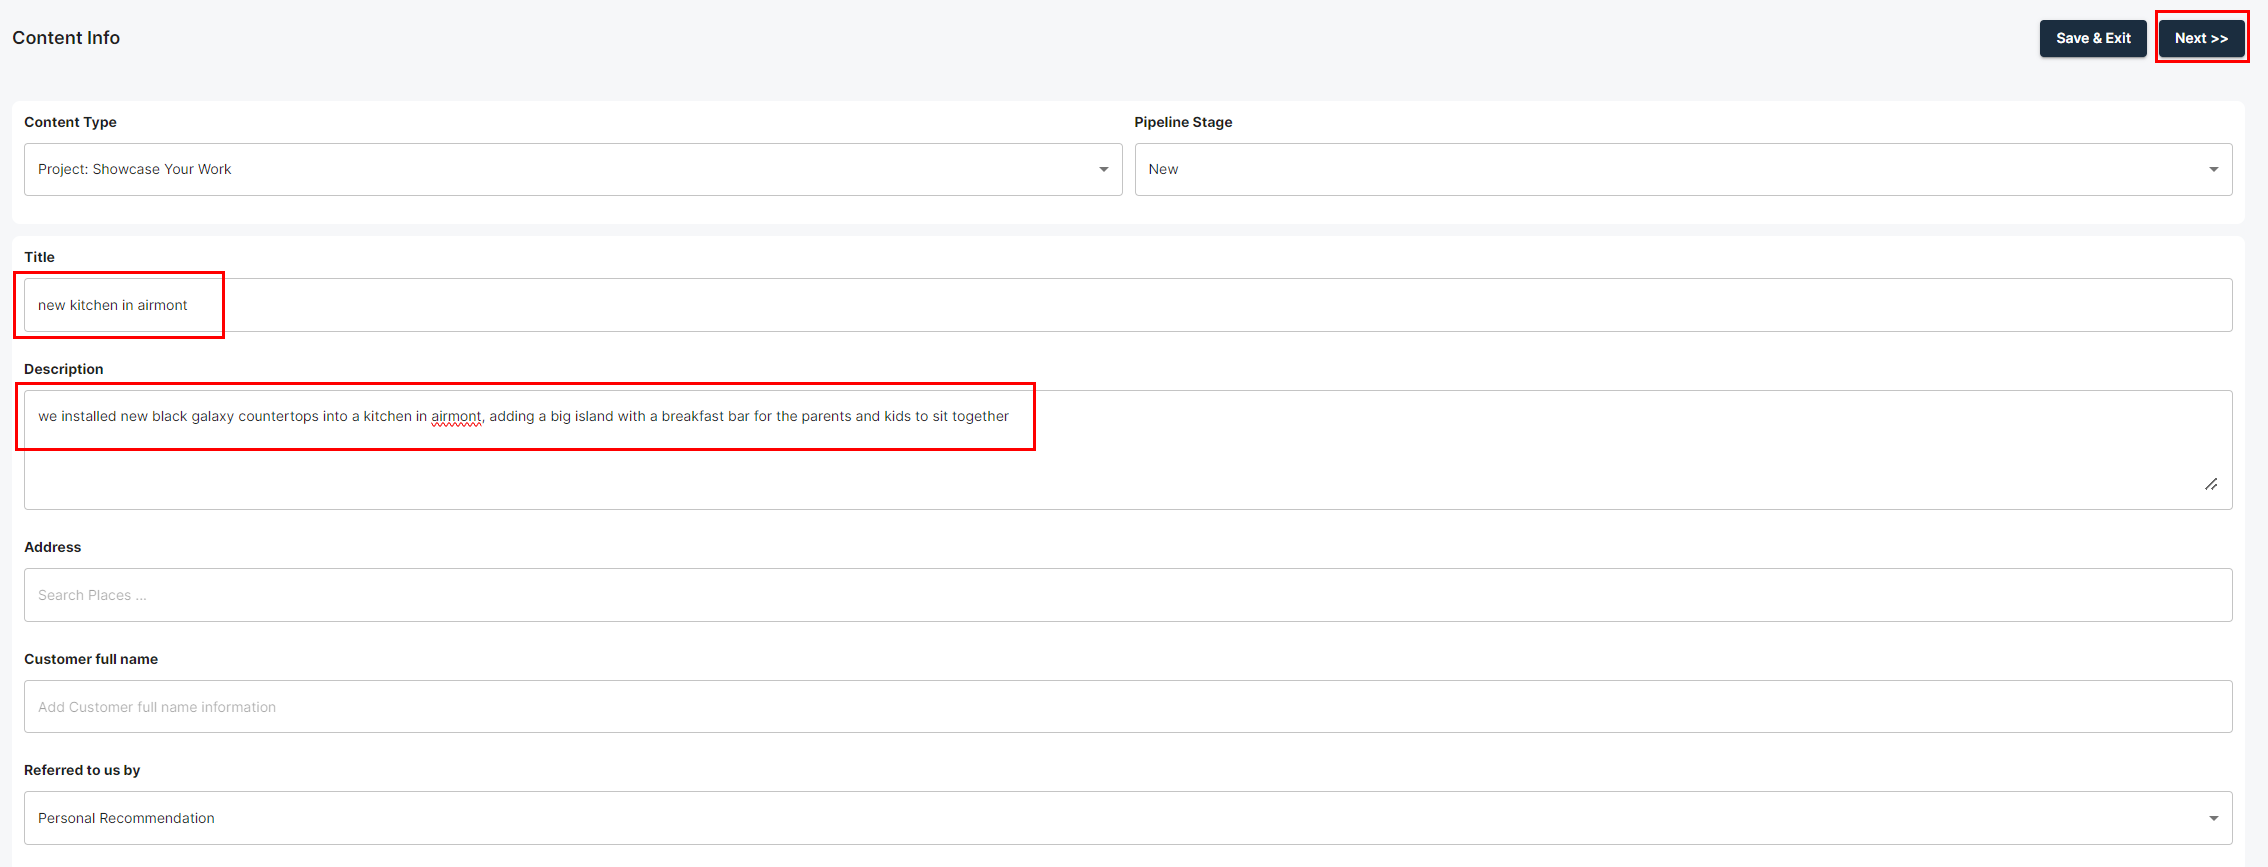
Add at least one case study/project completed using the manual content option.
Note: You just need a basic title, basic description (unstructured is fine), and image. It’s best to include some real details about the project then our AI can improve and augment it as it does with all content pieces.
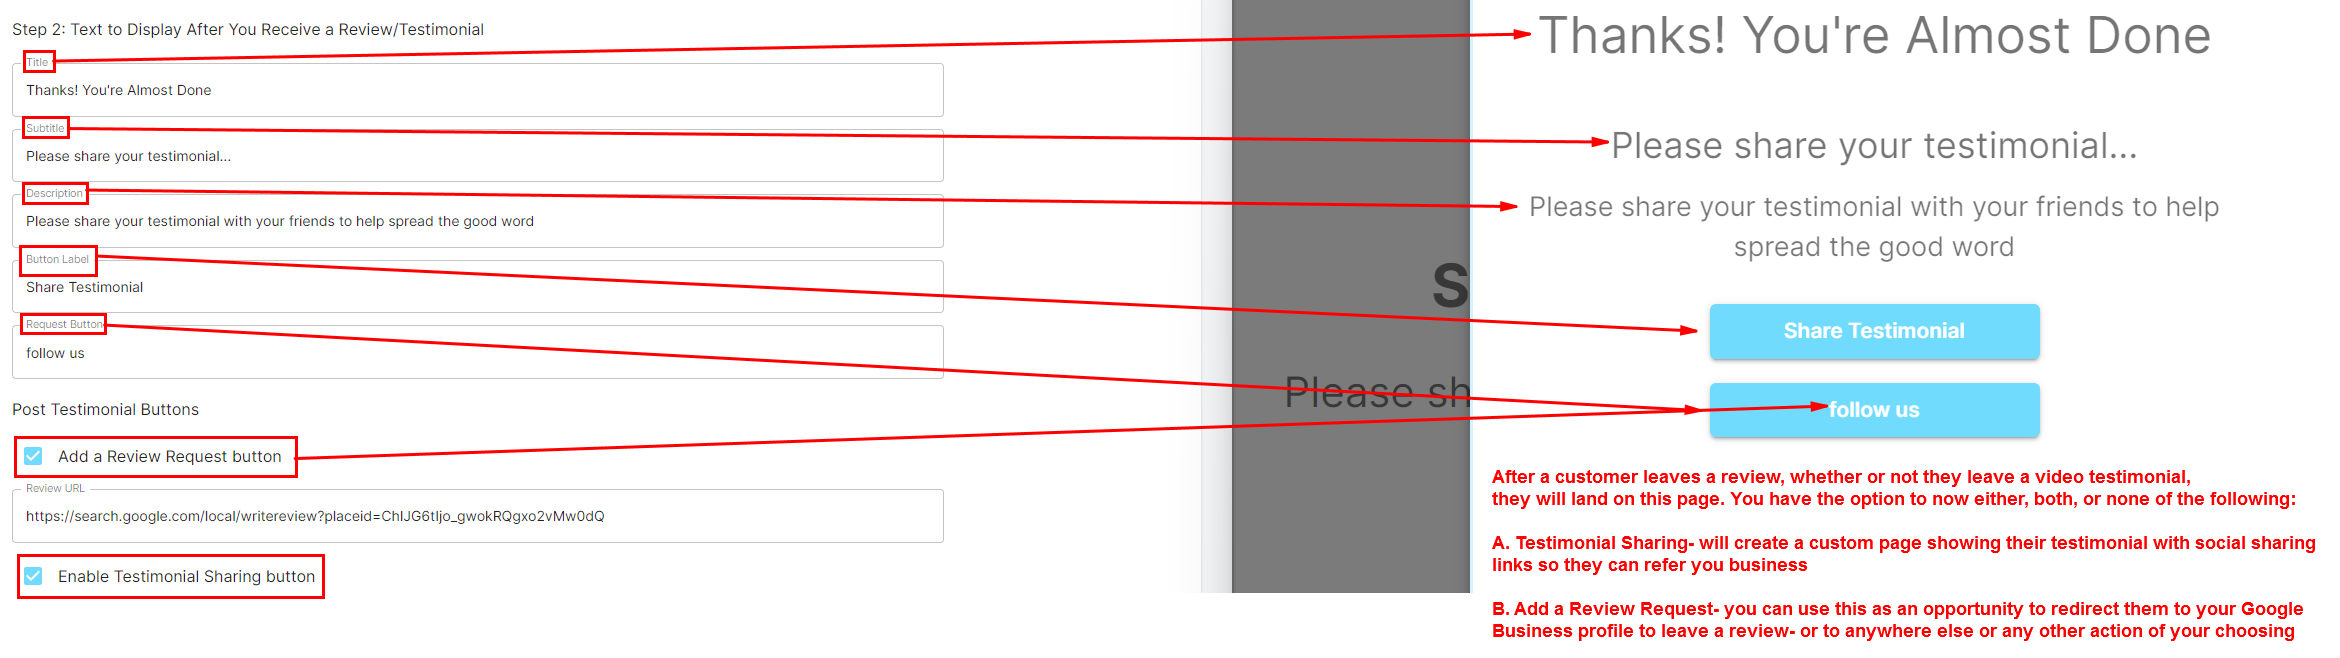

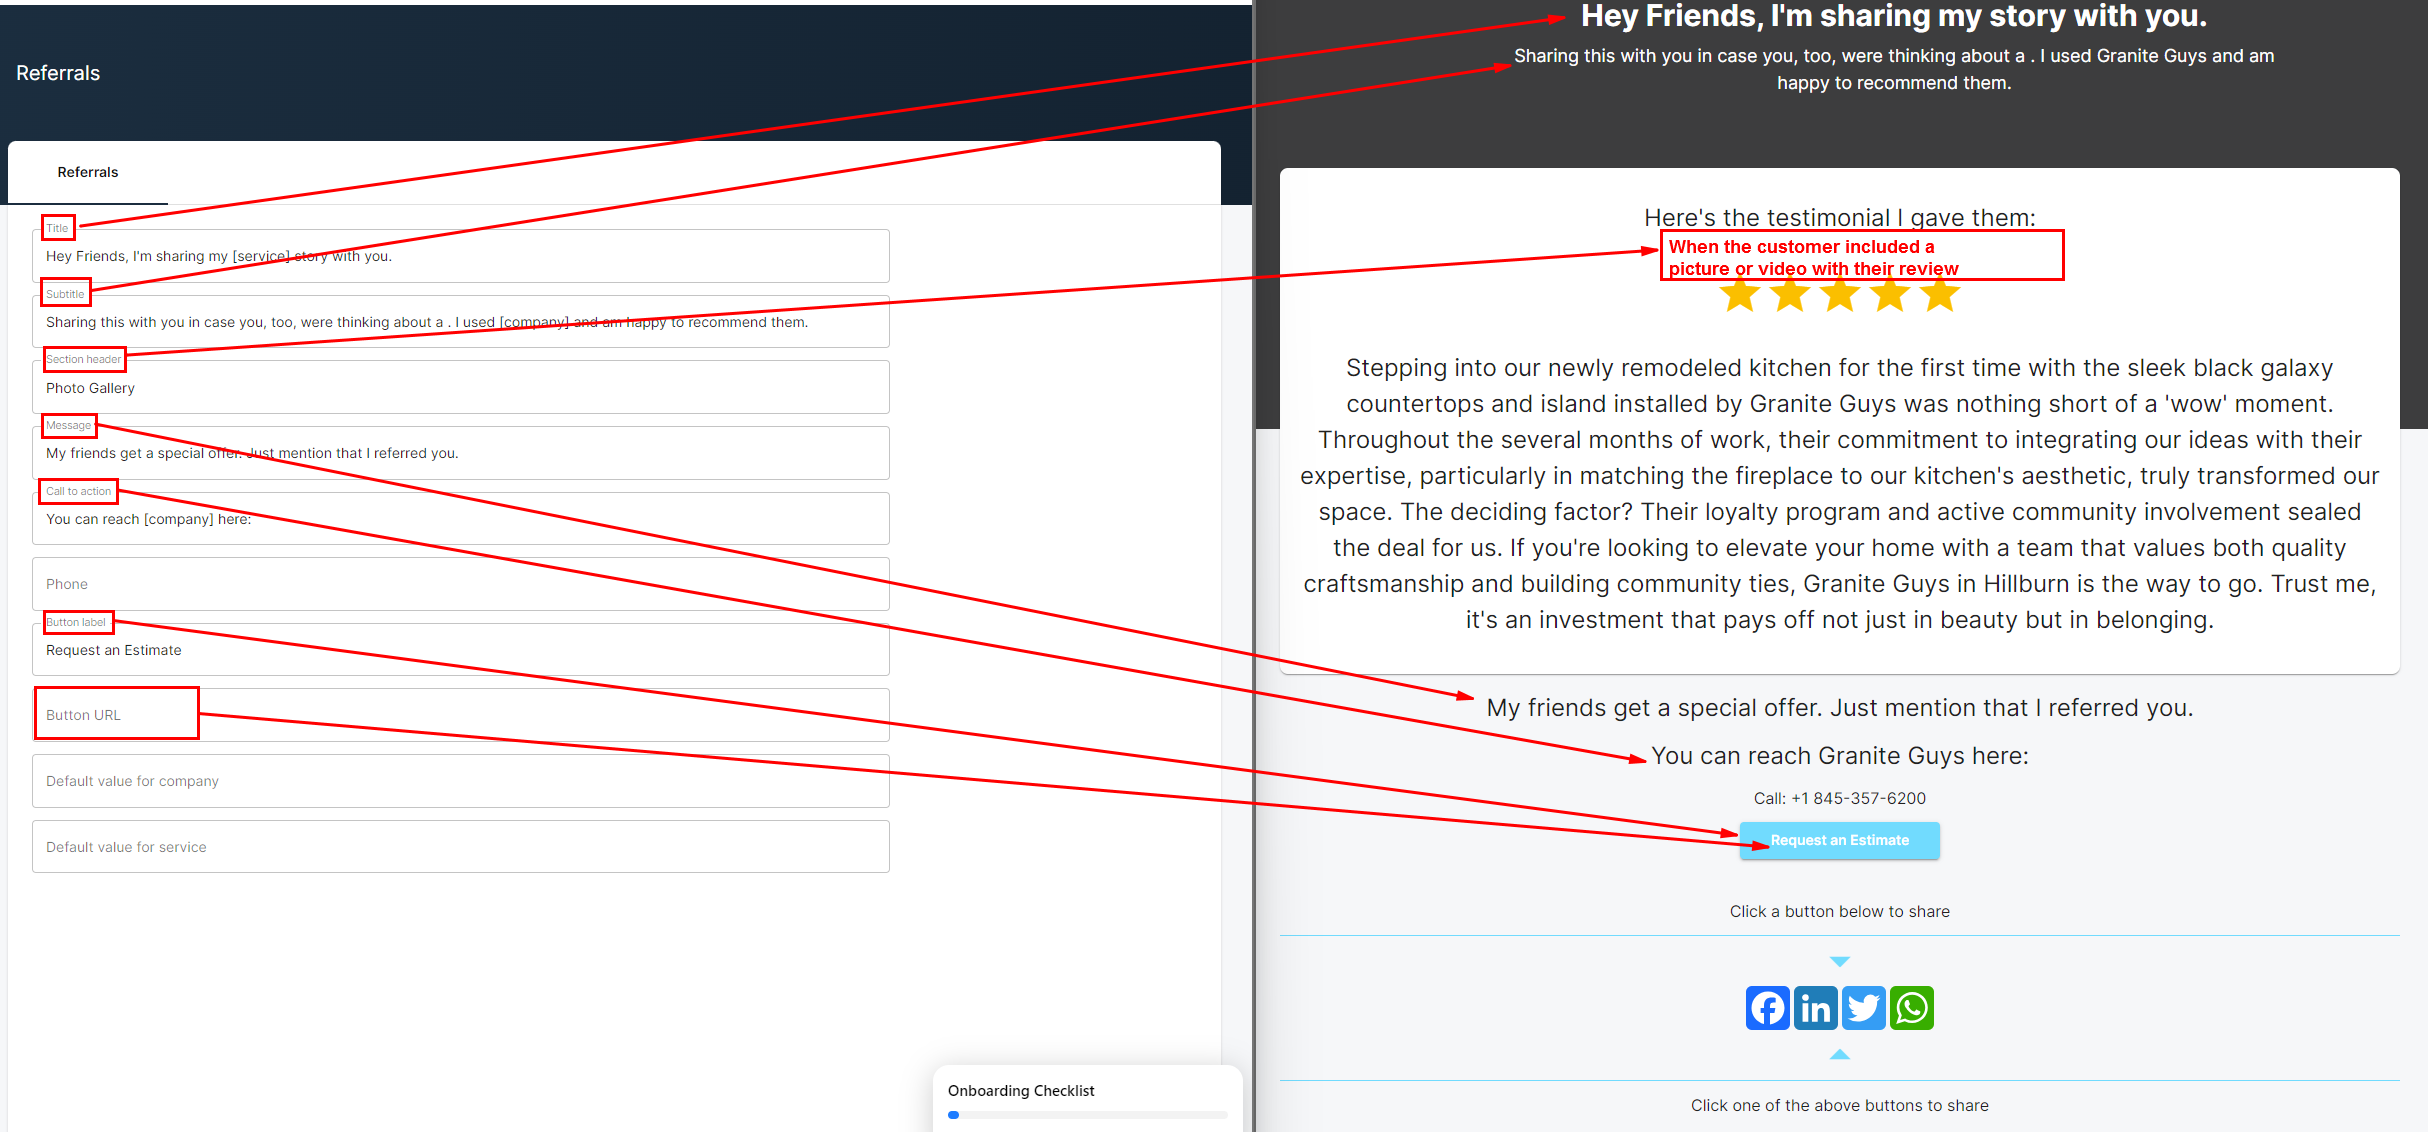
Our Automated content features enables you to turn client reviews, work completed showcases, and other (even unstructured) content, into engaging, platform optimized content across all social media channels, Google Business profile, and WordPress blogs. Our AI augments the content using real information it knows about your business and meaningful details you provided when creating the content- the more actual details you provide, the better the finished content will be. Content is set to automatically generate platform-specific content each time you add content, email the account owner for approval for each AI write-up, and publish approved content to your platforms. For those using our WordPress plugin, the AI can also write up and publish blogs and location specific posts twice a week on schedule and email you a confirmation once done.
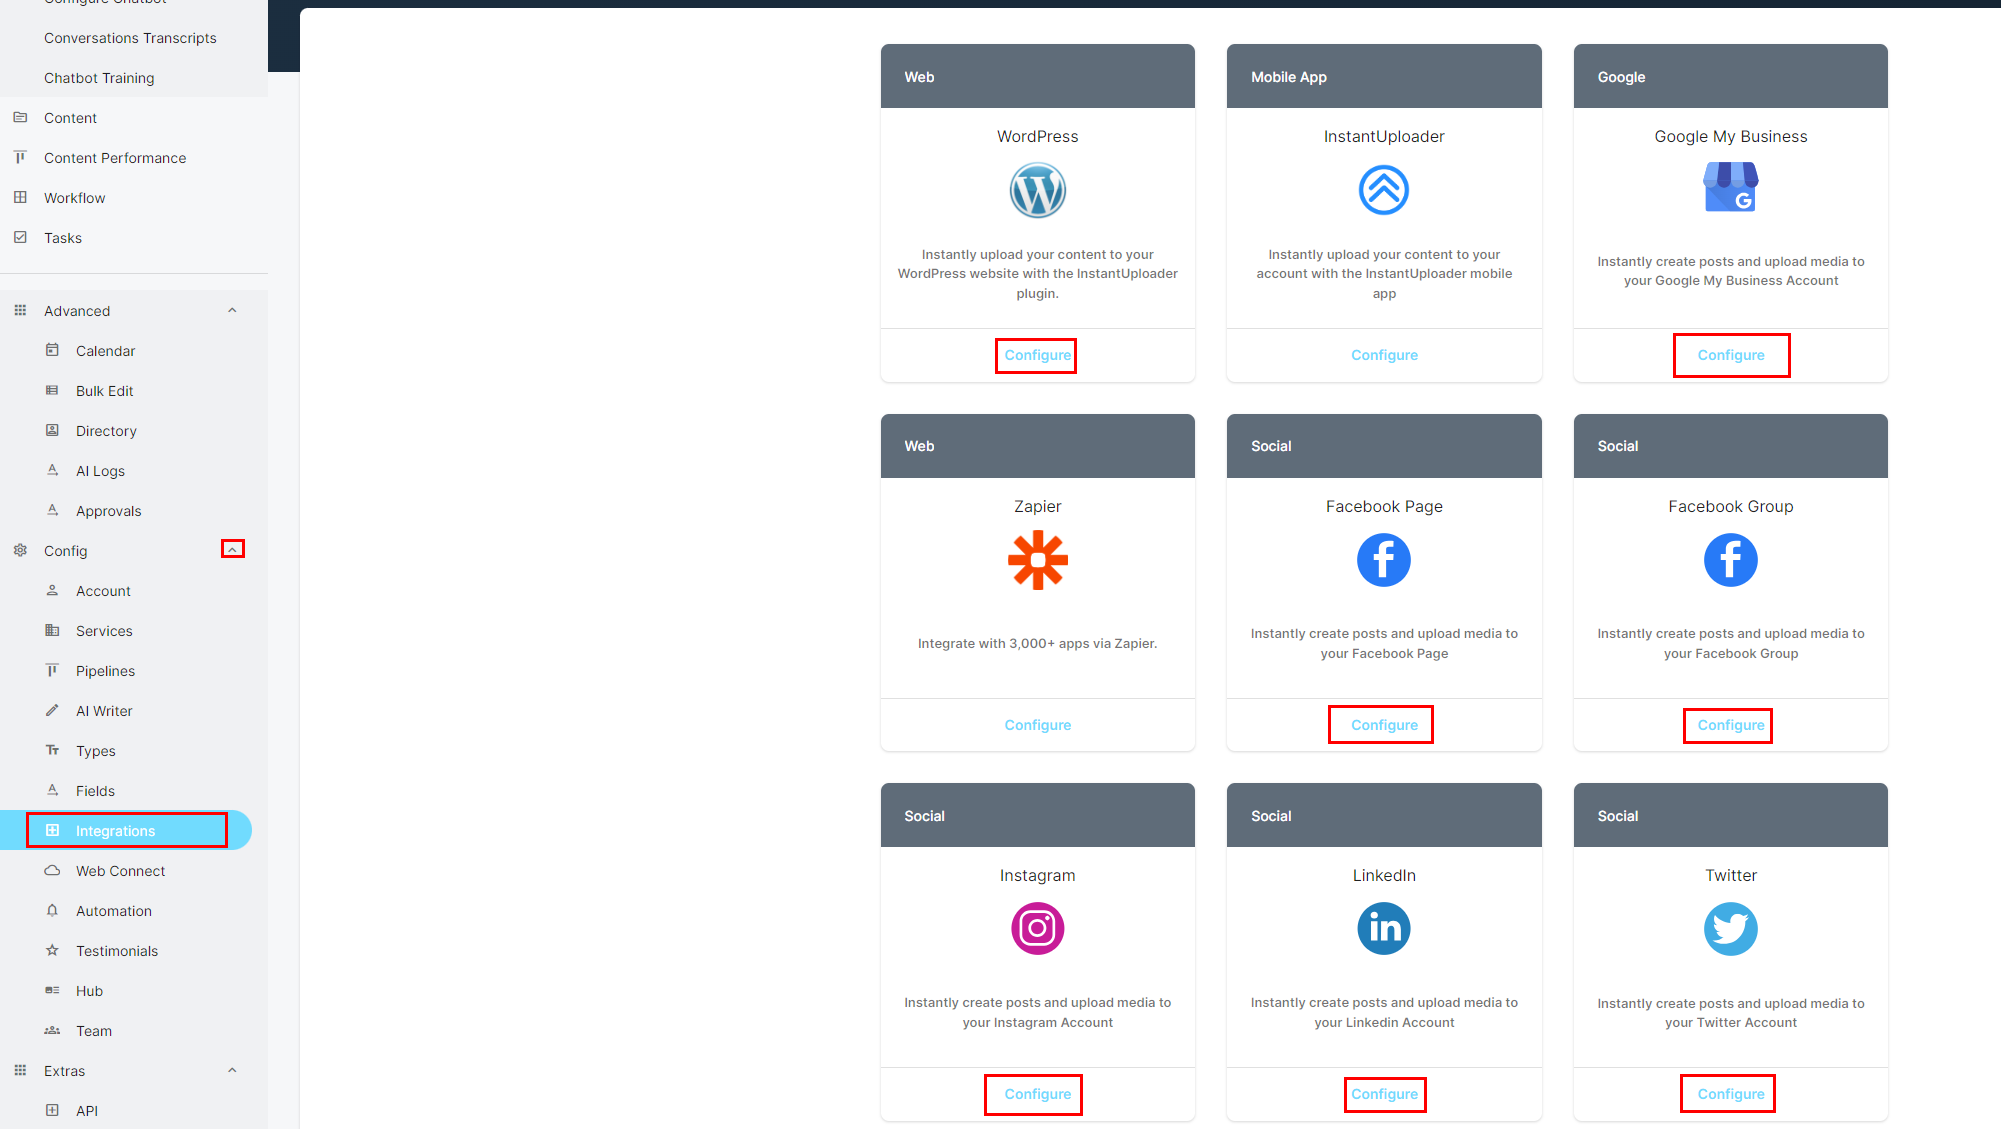
Upon successful integration, the configure button will turn green
Optional: if the image or video is related to the content (not a stock photo), you can add lots of valuable info to the AI instructions by clicking the image and then clicking “Analyze with AI”