Streamline your chatbot's functionality by learning to capture custom fields and incorporate them into email templates. This guide provides a step-by-step walkthrough to enhance your bot's interactions with personalized data collection.
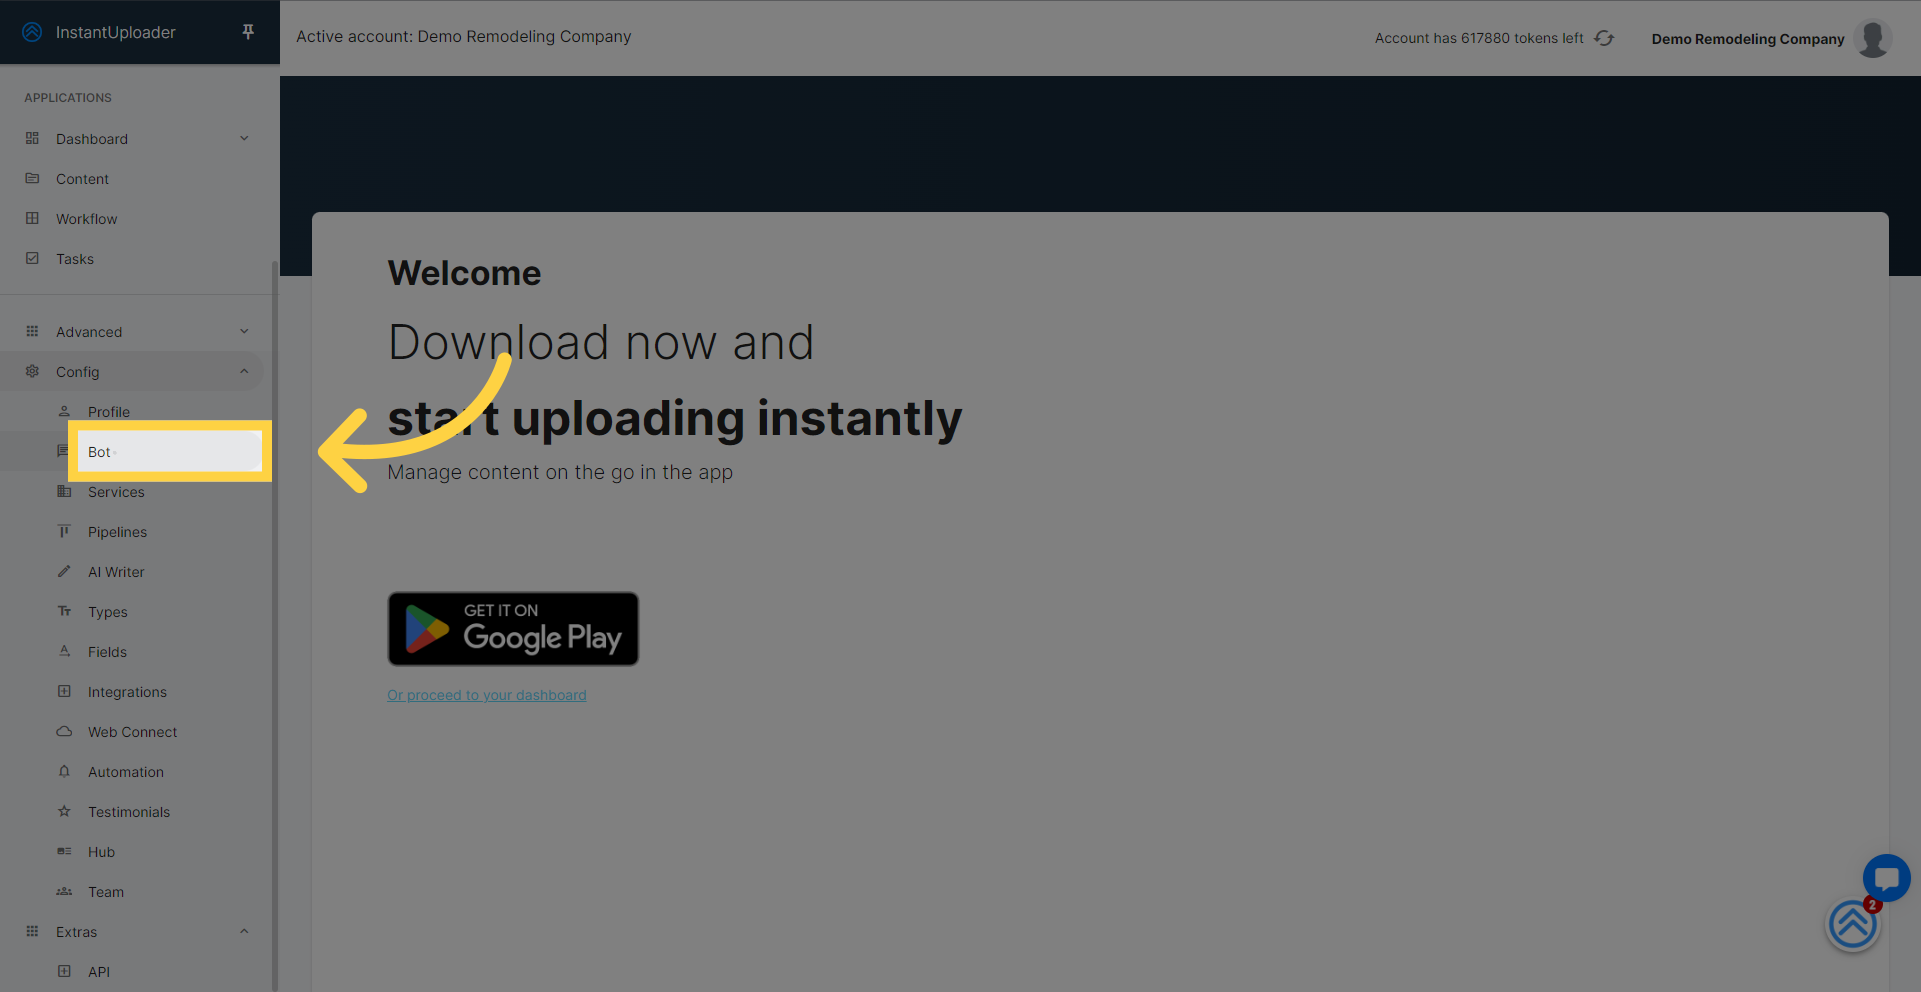
To kick things off, navigate to the 'bot' section within the 'config' menu of your dashboard. This is where you'll be able to customize your chatbot's settings to better suit your business needs.
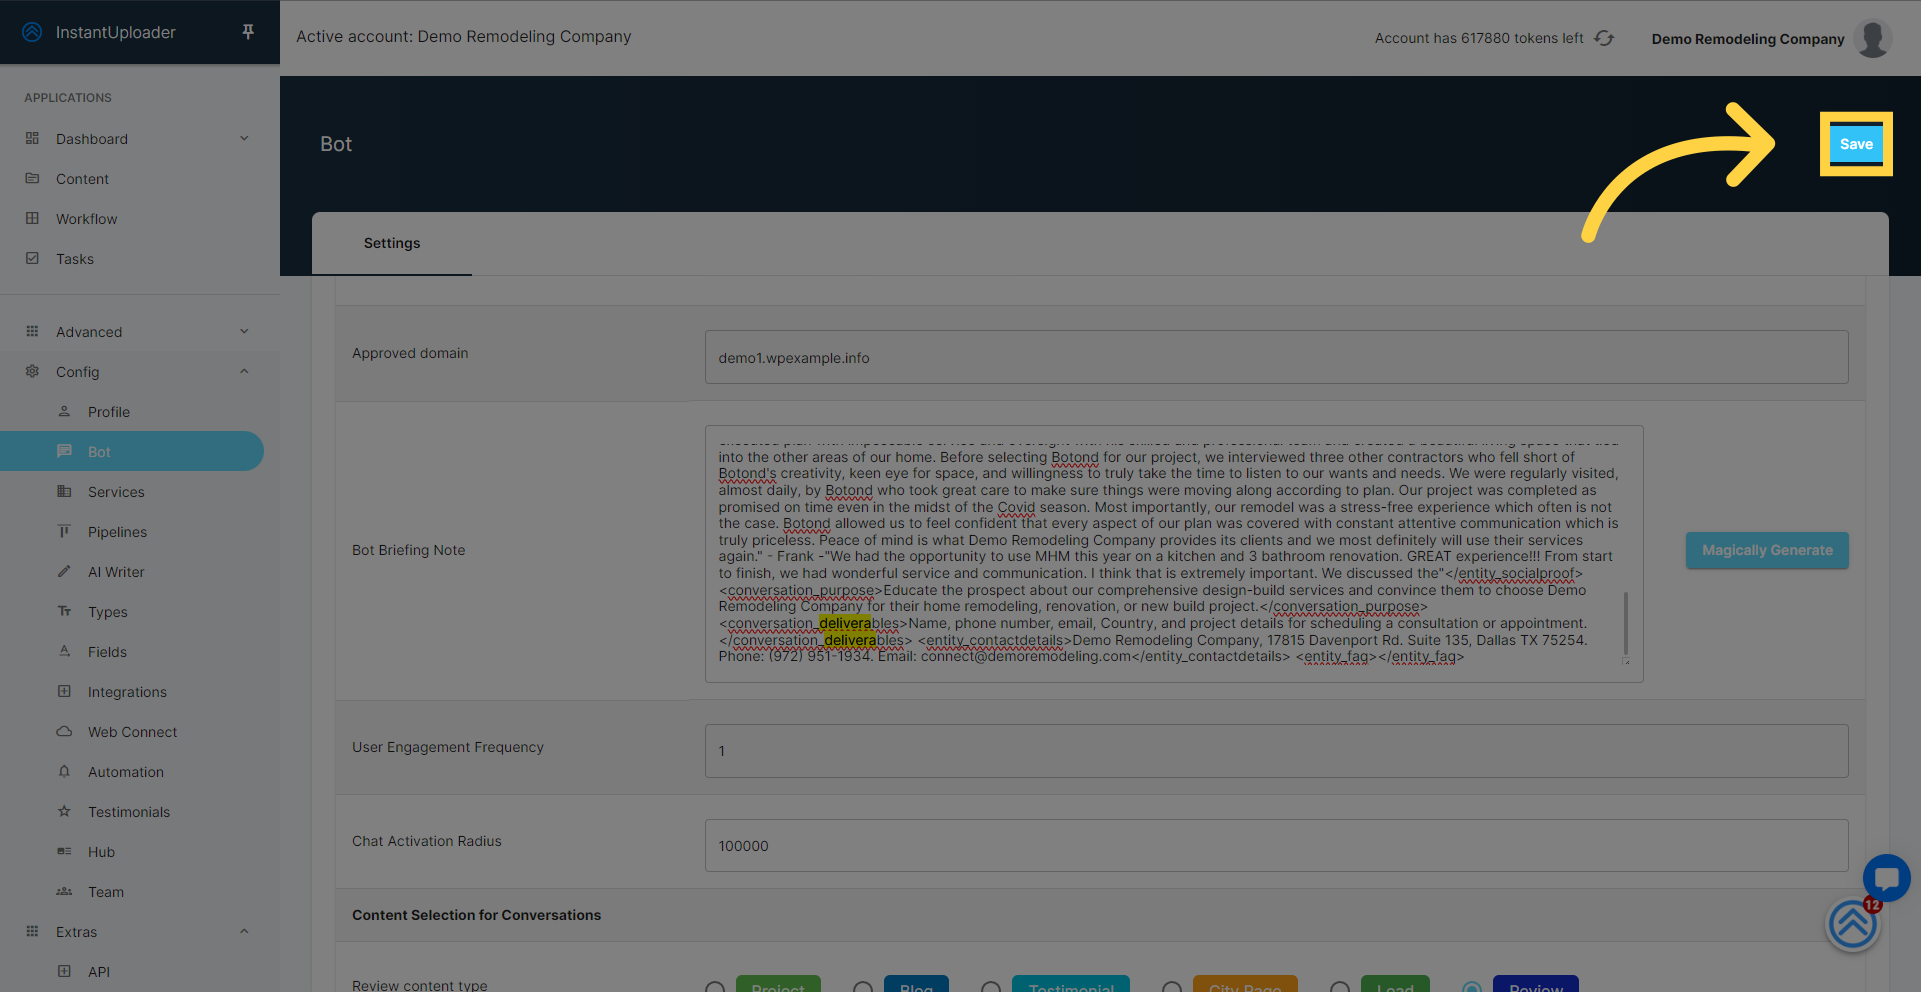
Once inside the bot settings, locate the 'conversation deliverables' in the Bot Briefing Note section. You'll see common fields like name, phone number, and email pre-listed. It's time to customize this lineup. Add any new field—'country' in our case—alongside the existing ones. This will instruct your chatbot to gather this additional detail from your users.

After you've added 'country' to the conversation deliverables, don't forget to save your changes.
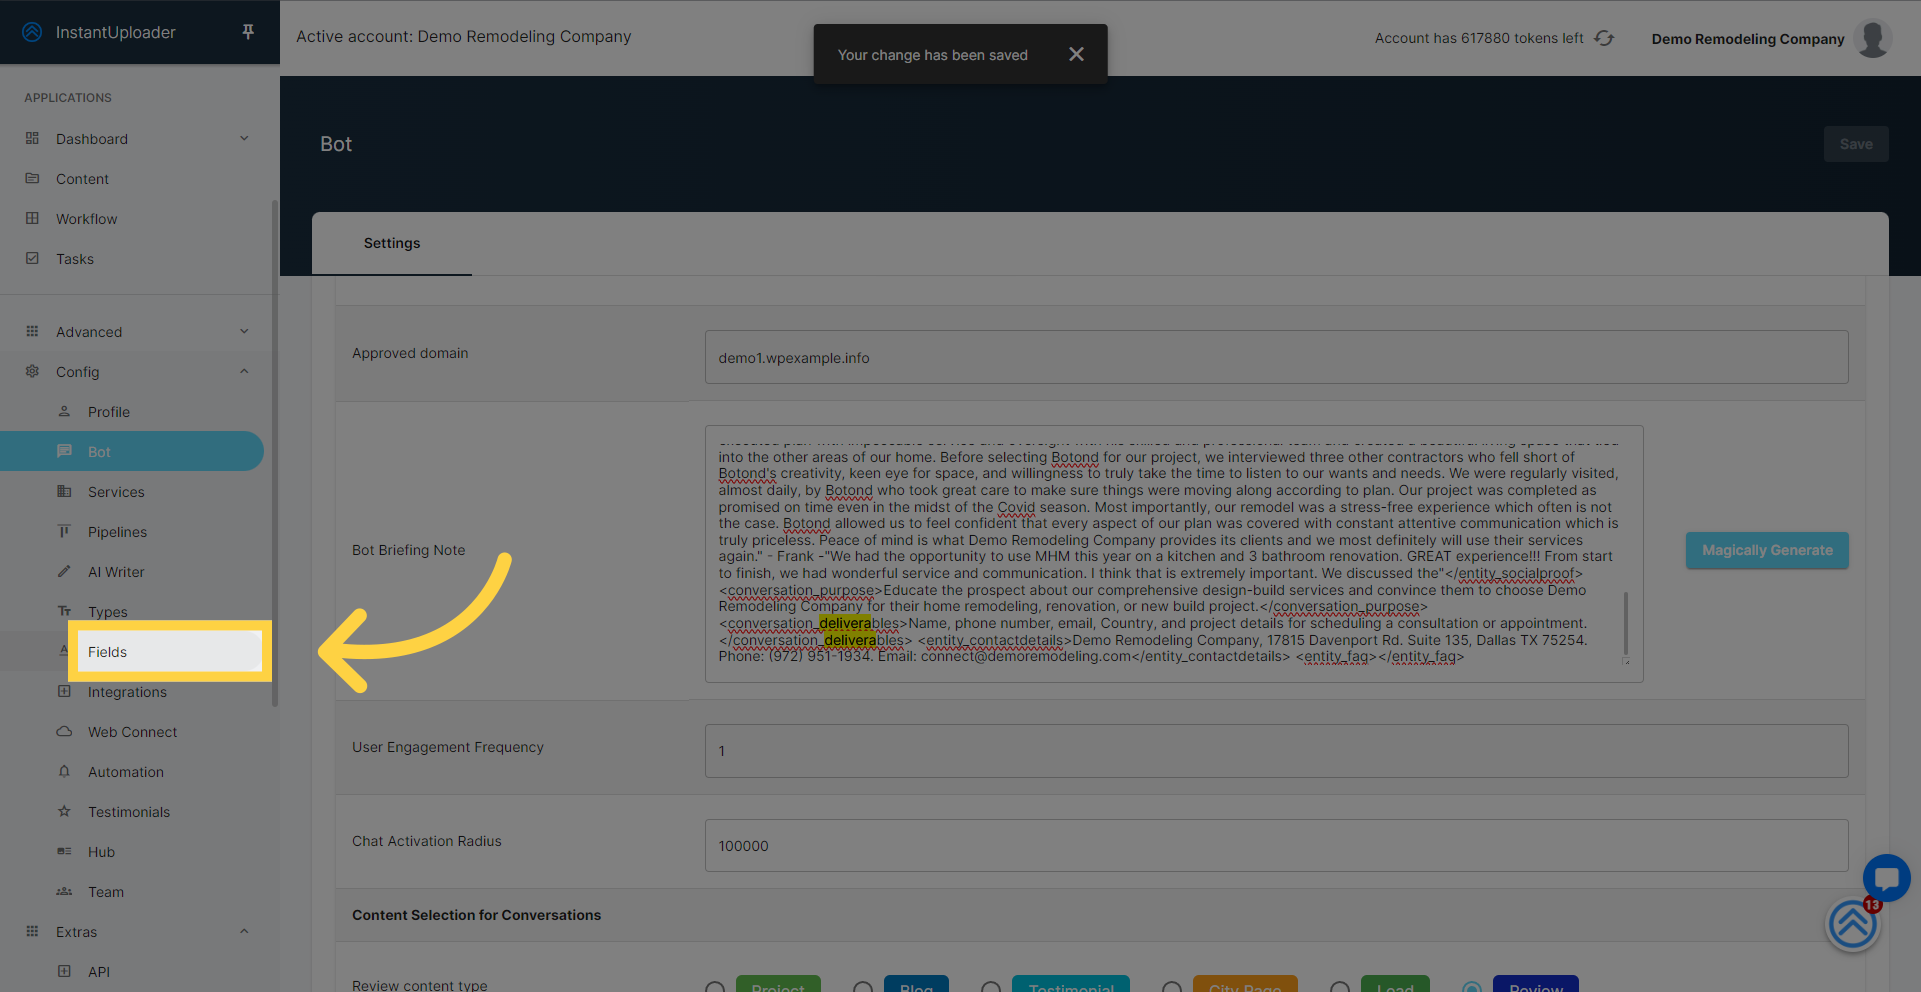
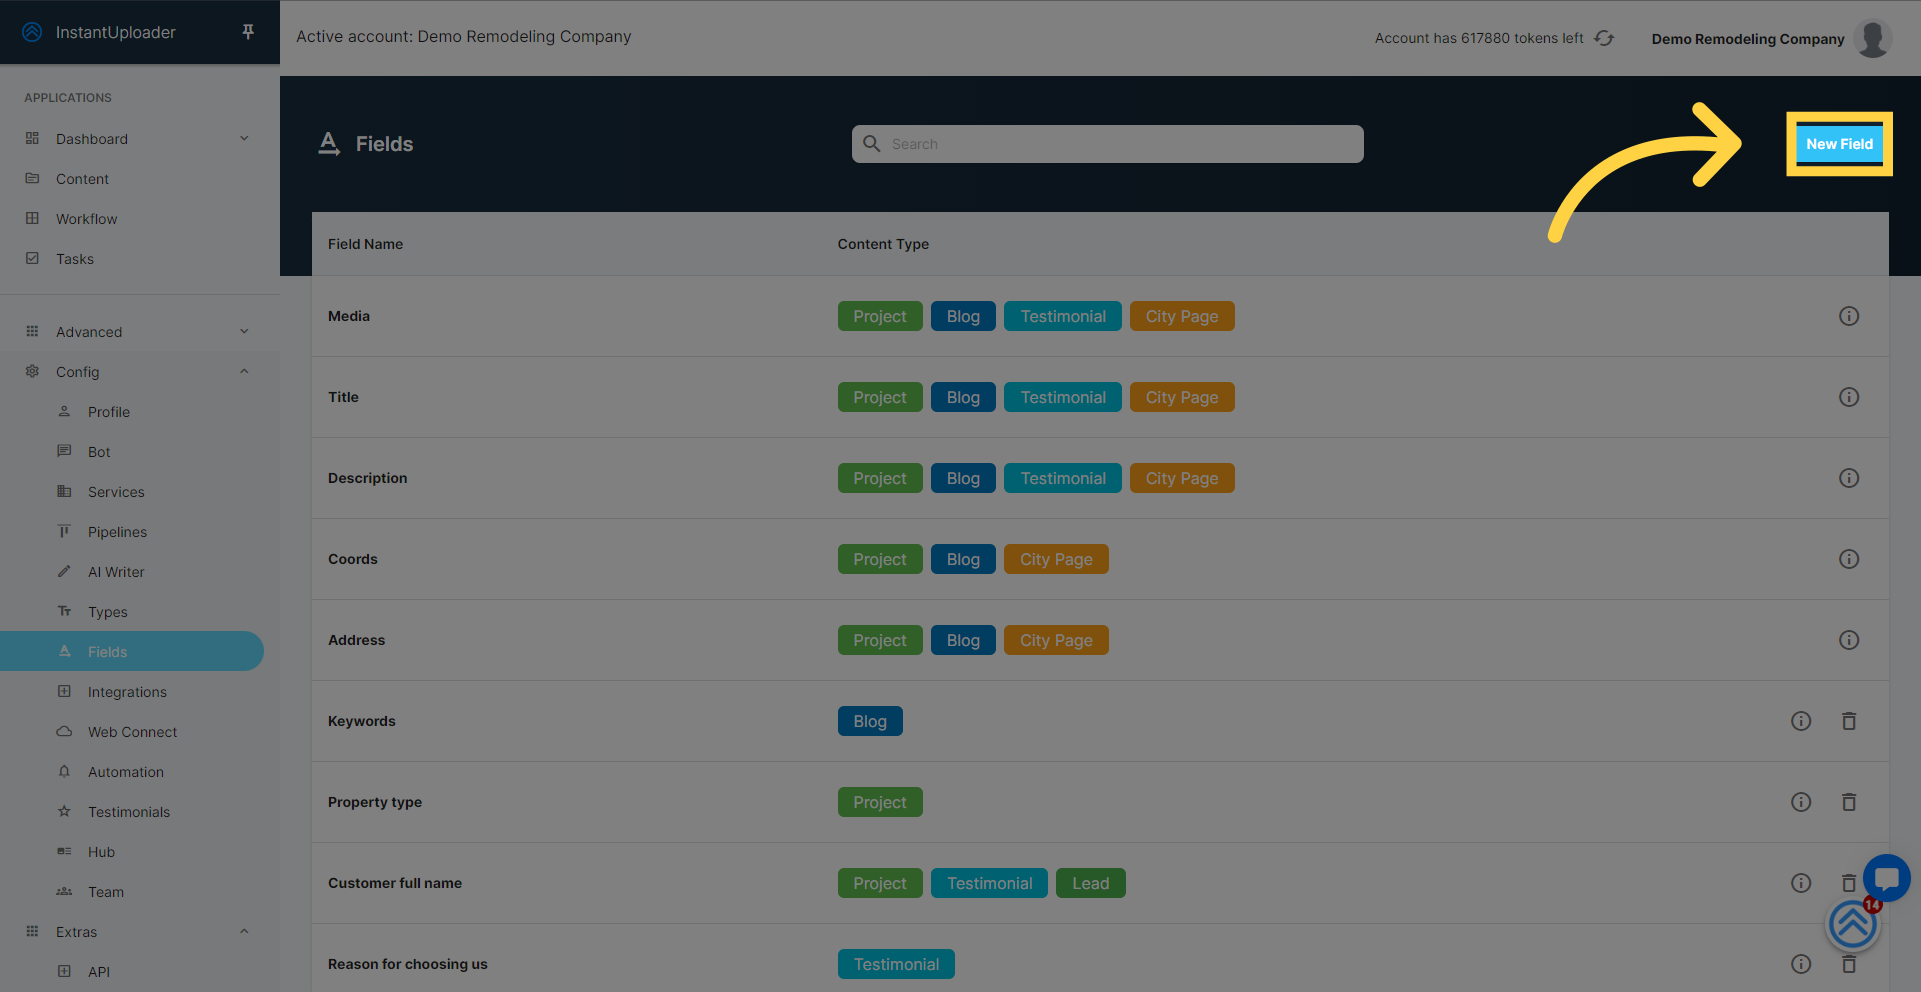
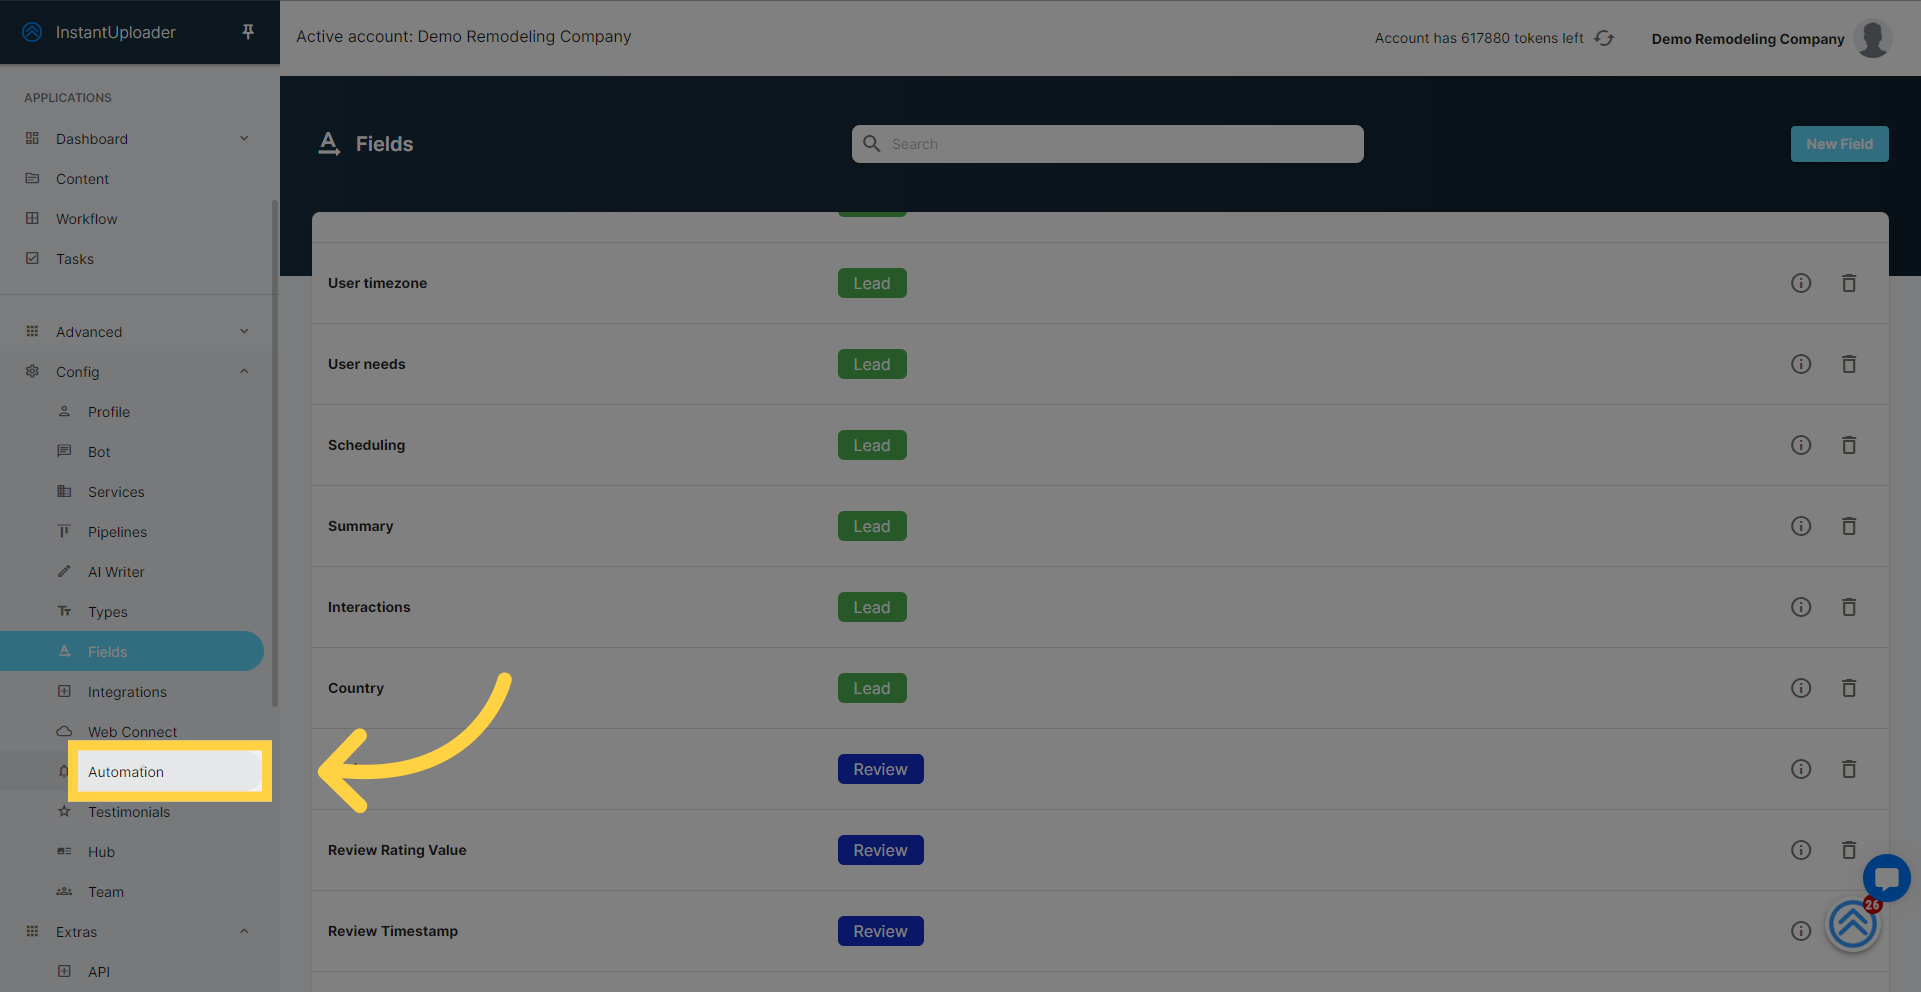
Navigate to the 'fields' section within your dashboard. This is where you'll define the new pieces of information you want to collect from leads.
Click on the 'New Field' button or link to start setting up your custom field.
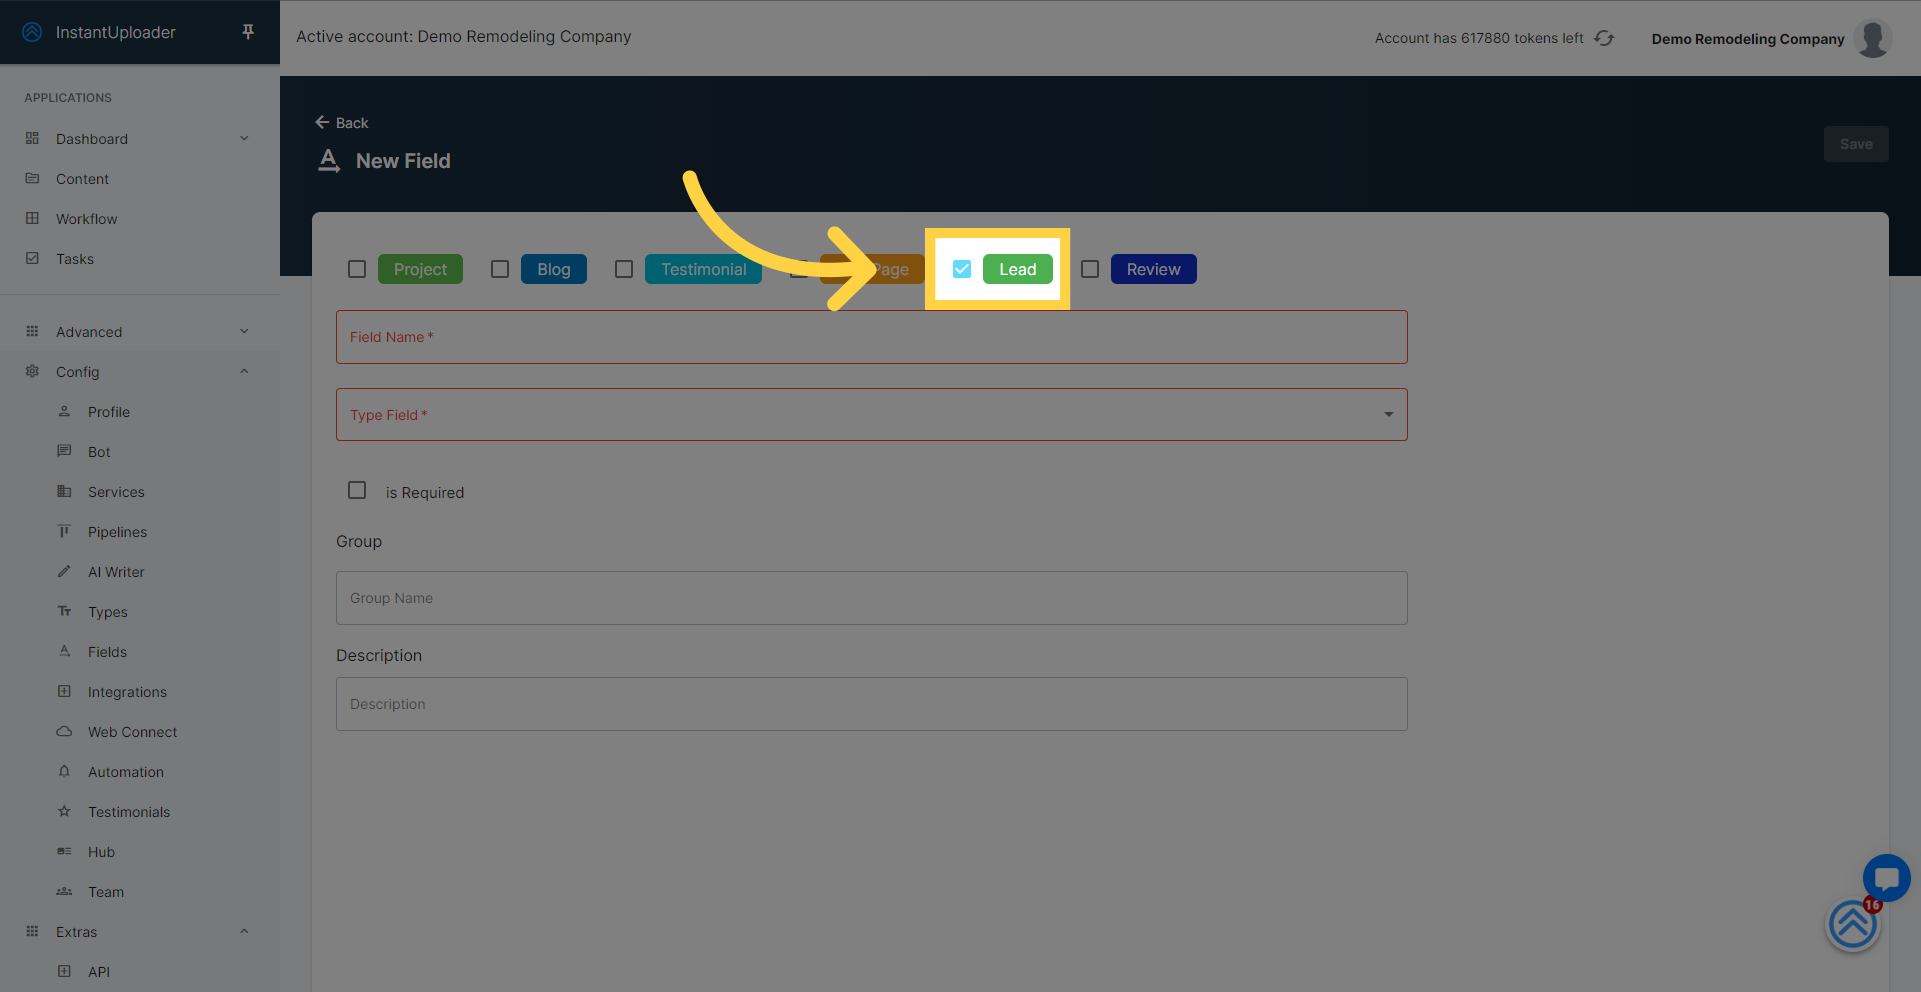
Ensure the 'country' field is properly linked to your leads by choosing the "Lead" option under content type associations. This step is crucial as it guarantees that the country data collected by your chatbot will be accurately tied to your lead management system.
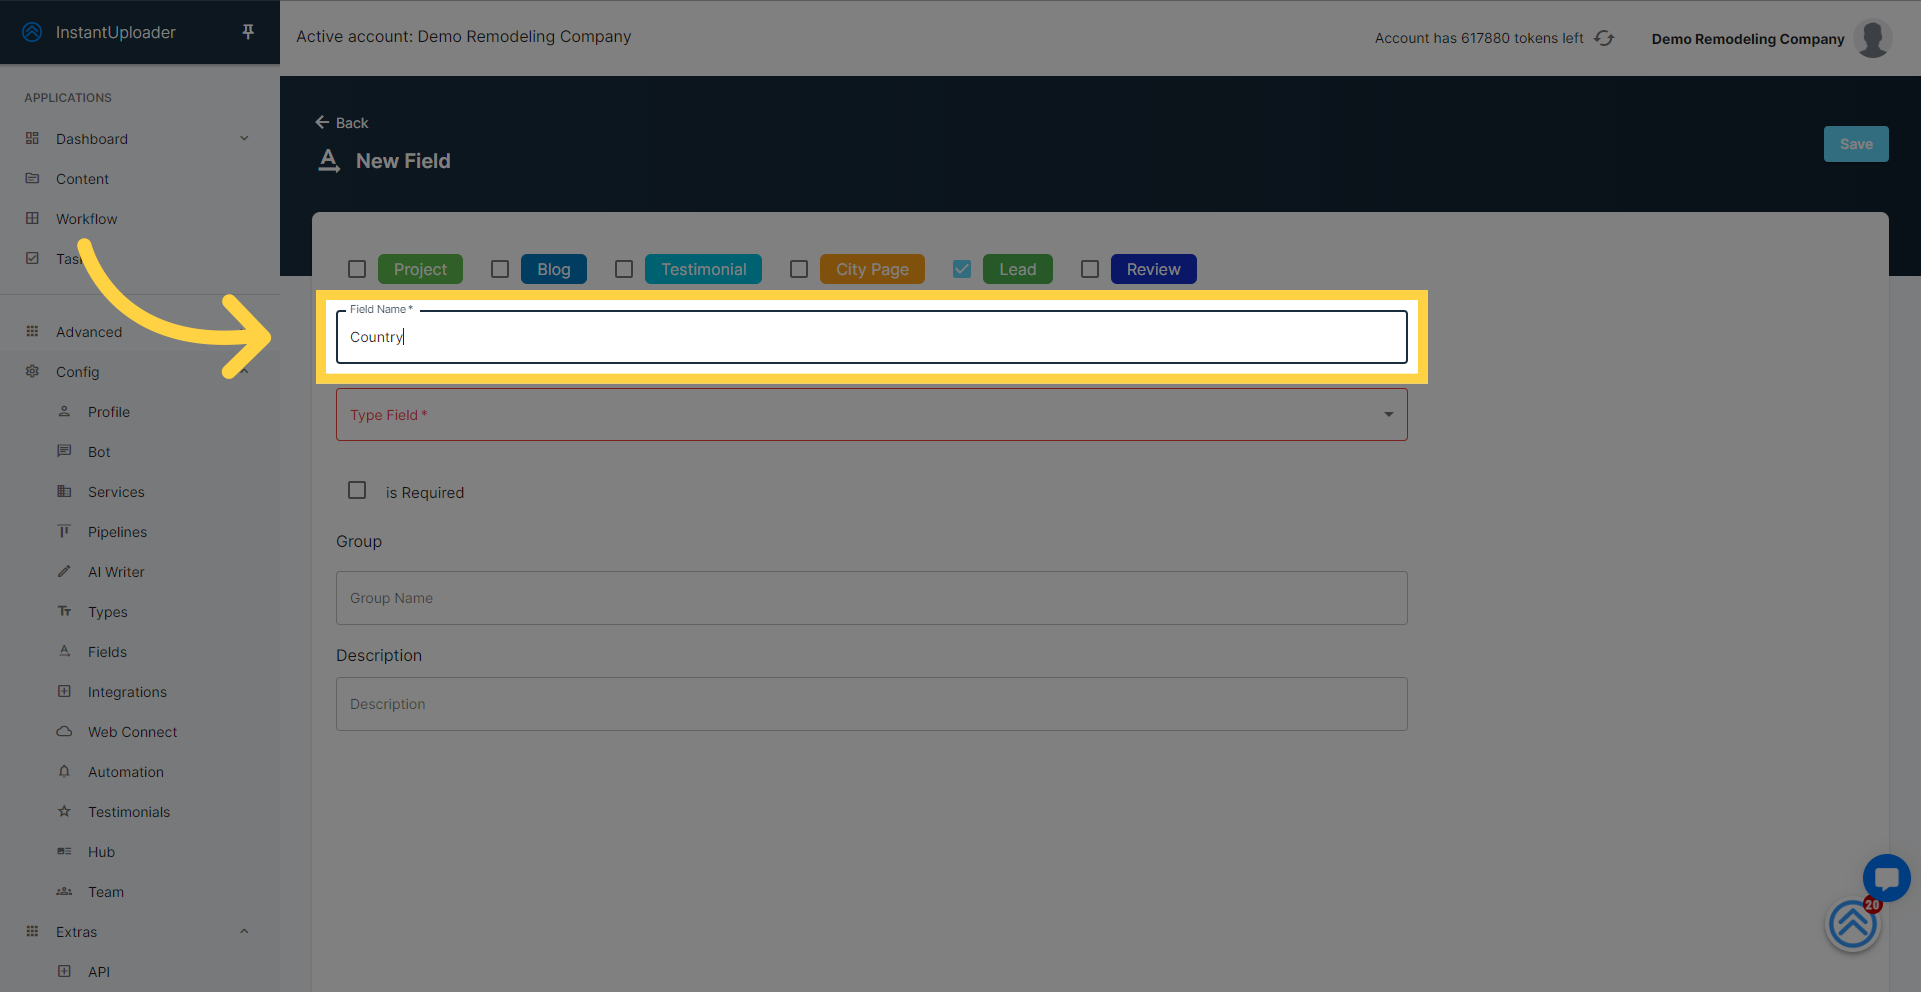
In the field creation area, enter 'country' as the name of your new field. This label will help you identify the data you're collecting.
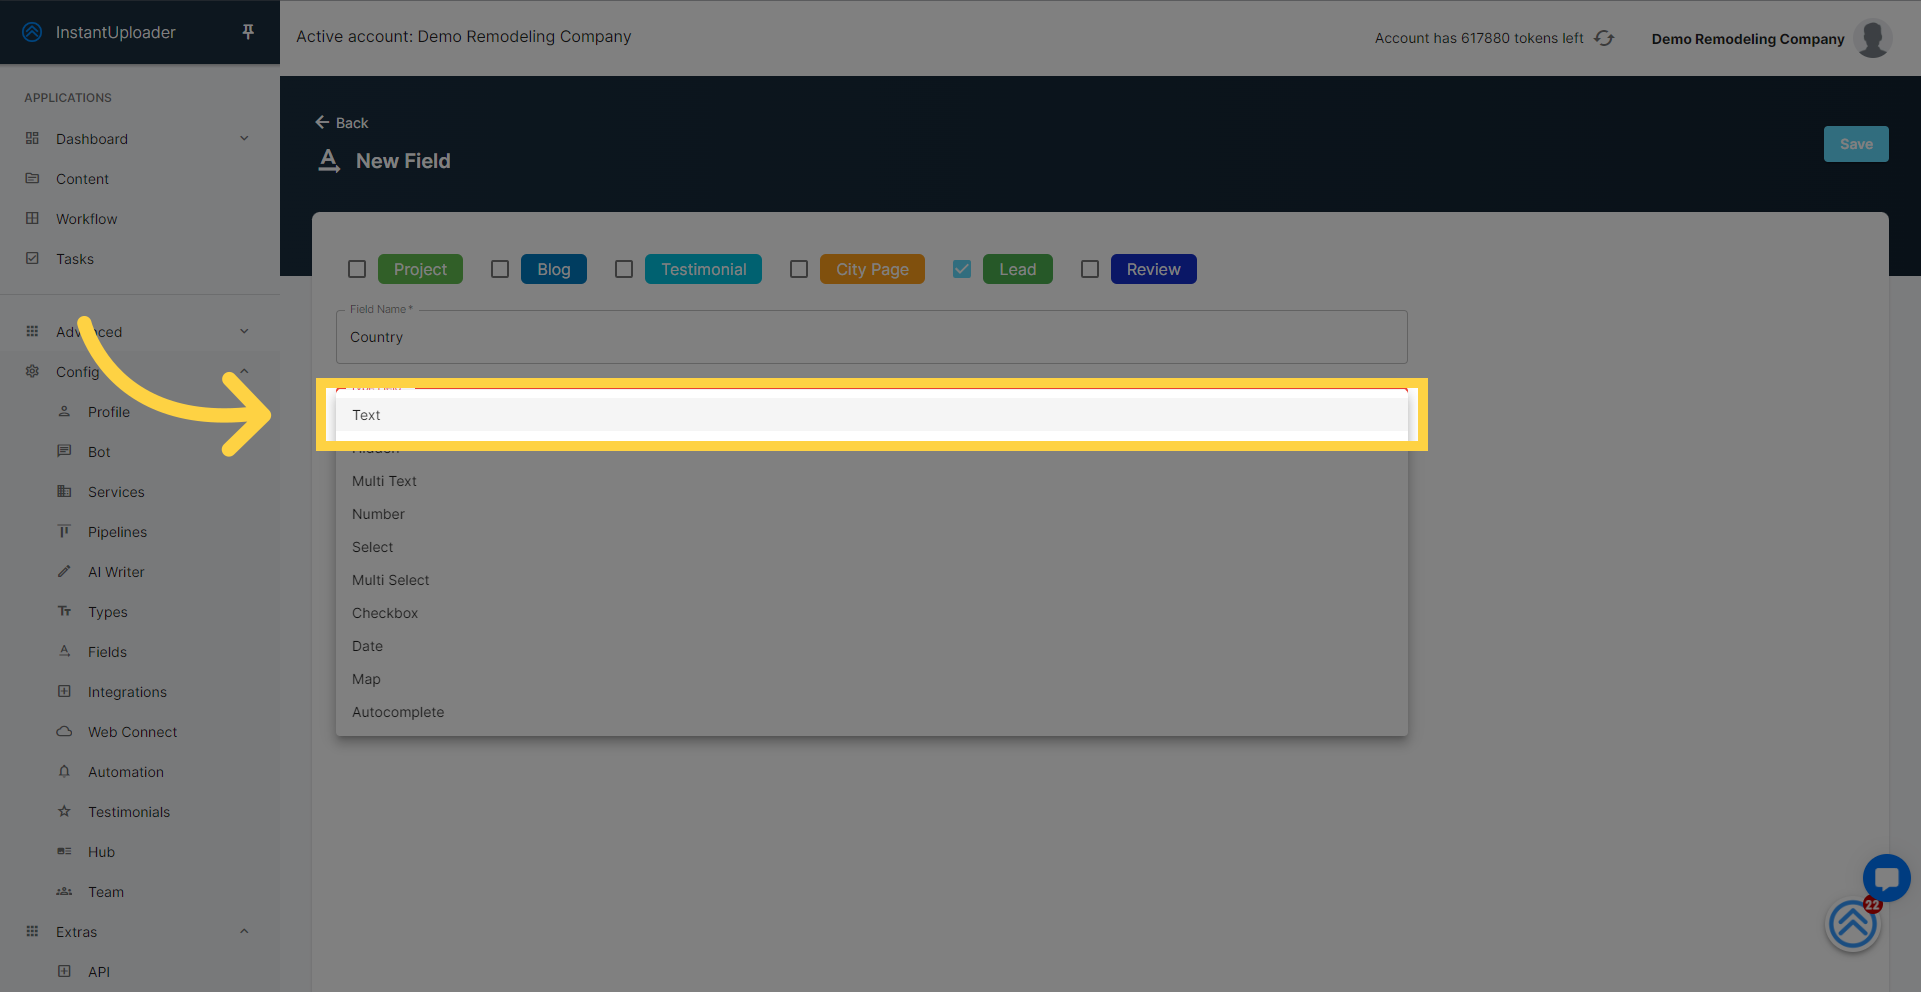
Choose 'text' as the field type from the dropdown menu or options provided. This selection specifies the kind of data you expect to be entered—textual information in this case.
Click the 'Save' button to confirm and store your settings.

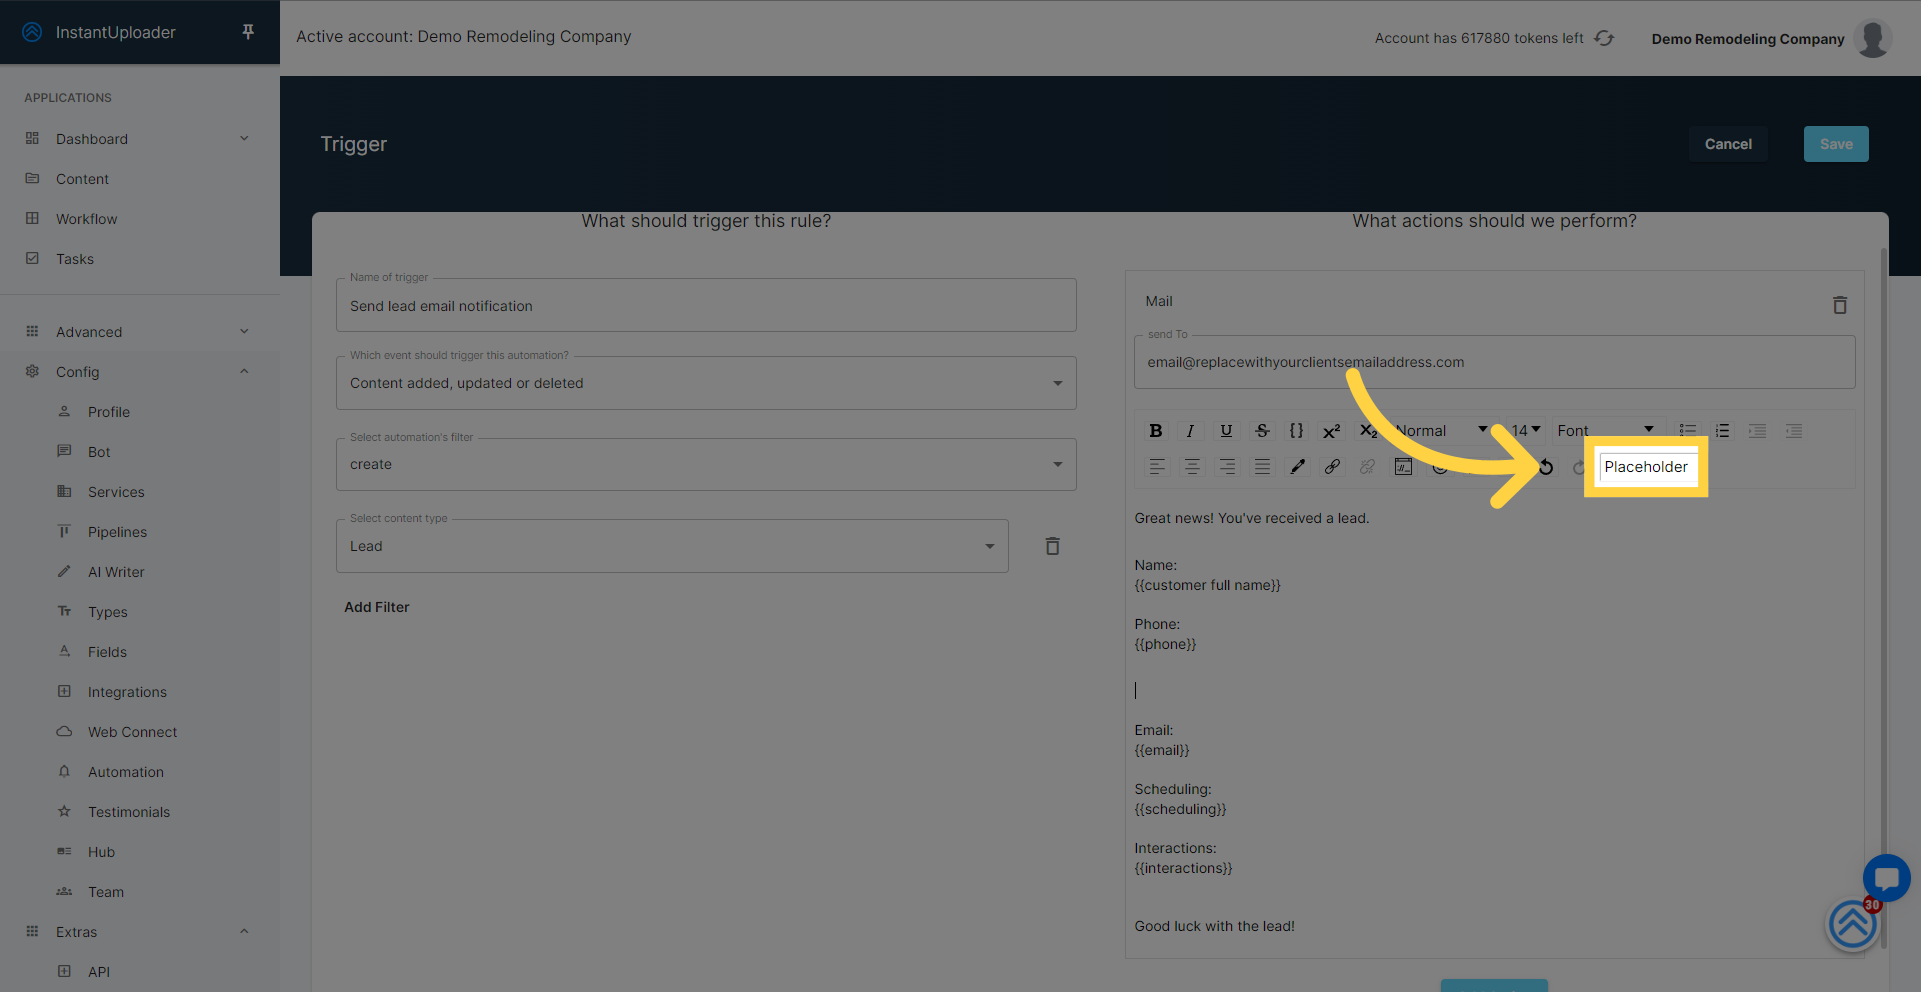
Now, let's put this new data to work. Move to the 'automations' section of your dashboard, where you can manage various automated processes.
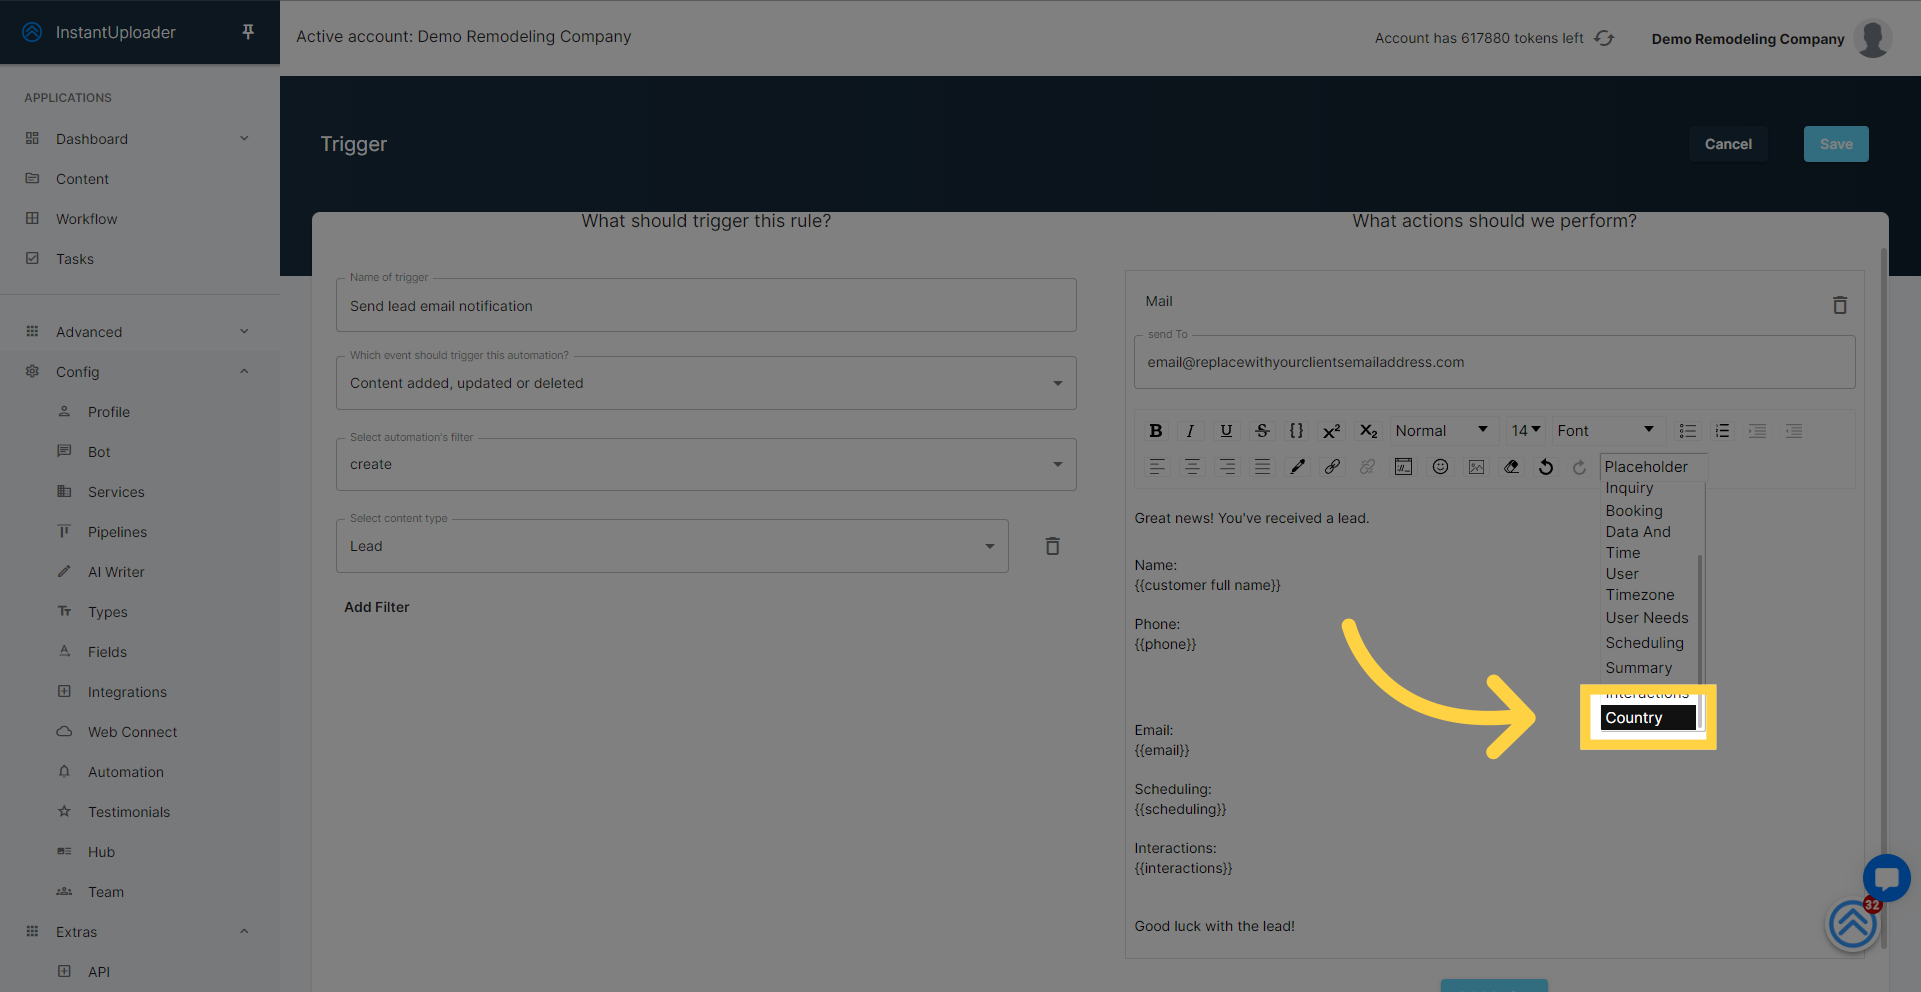
In the 'automations' section, locate the 'send lead email notification' trigger, and click to edit. In the email body editor, directly click on the placeholder field to expand the dropdown menu, where you will find a list of data fields available for insertion into your email template.
From the dropdown, select the 'country' placeholder. This will allow you to seamlessly integrate the country information into the desired location within your email template, ensuring that each communication sent to new leads includes this personalized detail.
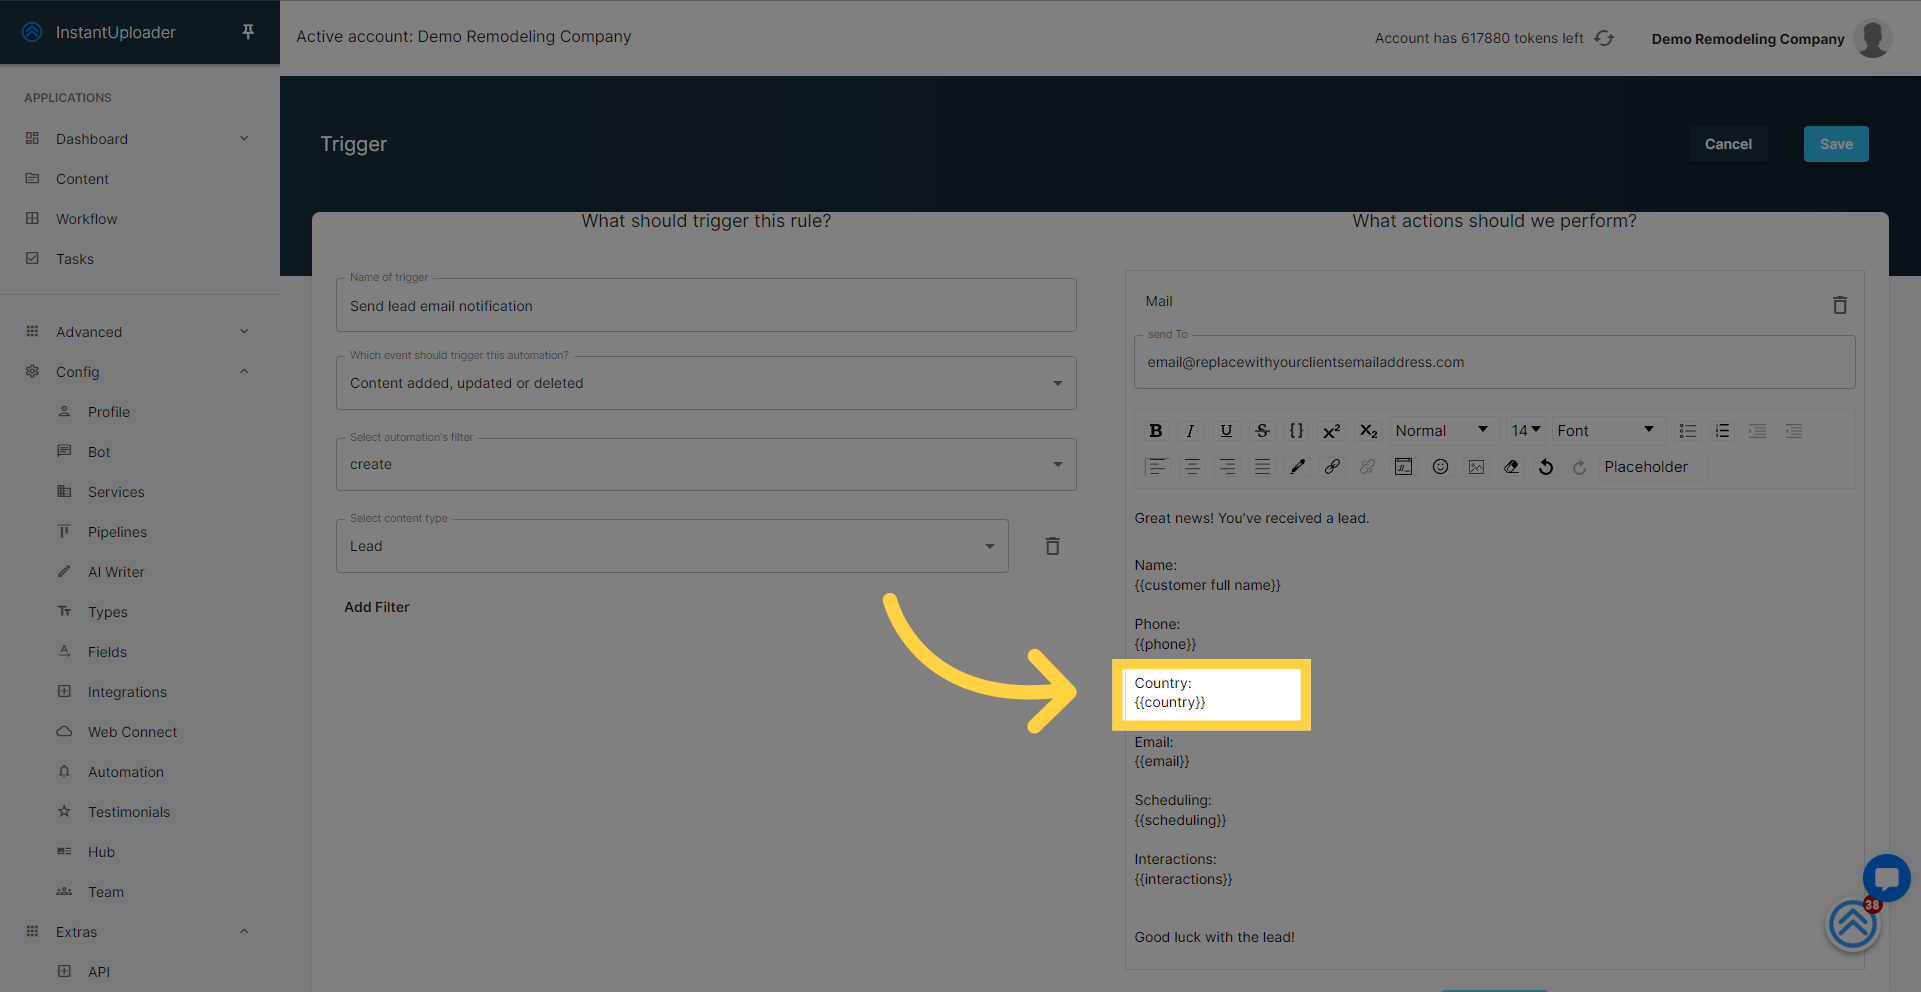
Position the 'country' placeholder in the appropriate section of your email template where you want the user's country information to be displayed. By doing so, you're customizing your outreach to reflect the data gathered by your chatbot, providing a more tailored and engaging experience for each lead.
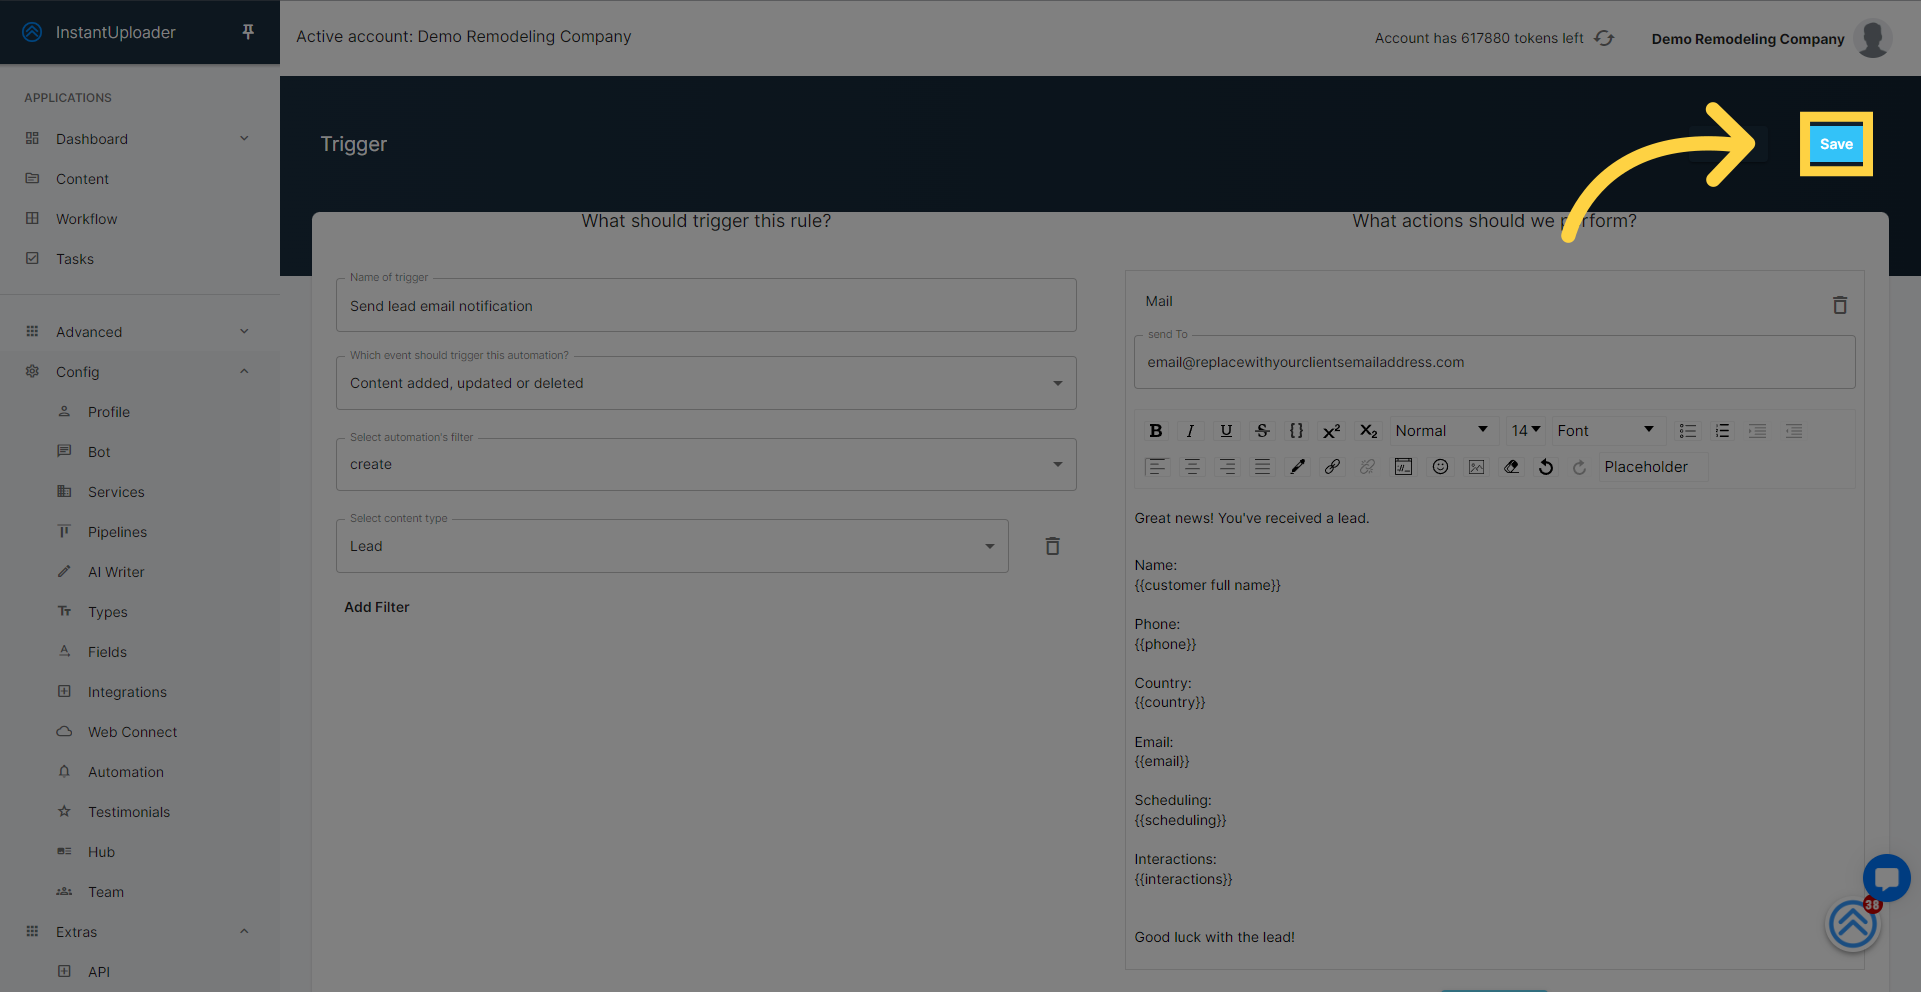
After placing the 'country' placeholder in the desired spot within your email template, make sure to save your changes. Click the "Save" button to ensure that all future lead notification emails will include the new custom field, enhancing the personalization of your automated communications.
Great job! You've enhanced your chatbot and emails for personalized lead engagement. Use these steps to continue refining your approach and strengthen customer connections. Thanks for watching, and here's to your success!
